
Login

Shoutbox
You must login to post a message.
allenb
04/19/2024 8:27 AM
eximwind 
renatoa
04/18/2024 12:36 AM
bijurexim, greyberry2, N C, 
renatoa
04/17/2024 9:27 AM
 , branchu
renatoa
04/14/2024 5:56 AM
TheOtherJim and papajim,
 !
!
!allenb
04/11/2024 6:33 PM
Zemona
Forum Threads
Newest Threads
Rainfrog's Roastmast...War on Farmers by Su...
Kaleido Roaster PID ...
Green coffee sellers
Wet beans - Estimati...
Hottest Threads
| Skywalker roaster... | [292] |
| Skywalker, the AL... | [214] |
| Skywalker Roasts | [94] |
| Rainfrog's Roastm... | [54] |
| My first popcorn ... | [47] |
In Memory Of Ginny

Donations
Latest Donations
dmccallum - 10.00
JackH - 25.00
snwcmpr - 10.00
Anonymous - 2.00
Anonymous - 5.00
dmccallum - 10.00
JackH - 25.00
snwcmpr - 10.00
Anonymous - 2.00
Anonymous - 5.00
Users Online
Guests Online: 4
Members Online: 0
Total Members: 8,212
Newest Member: eximwind
Members Online: 0
Total Members: 8,212
Newest Member: eximwind
View Thread
Who is here? 1 guest(s)
 Thinking of building a fluidbed roaster for my senior design project
|
|
| robschwieb |
Posted on 12/11/2013 3:32 PM
|
|
Newbie  Posts: 19 Joined: December 10, 2013 |
Hello everyone! This is my first post so I suppose I should give a bit of background info. I'm currently an electrical engineering student here at the University of Toledo and next semester is my last! This of course means that I'll be required to do some sort of final project. With my recent decent down the rabbit hole of coffee, I've realized home roasting is the next step and I'm eager to get started. This project should be nearly perfect for my field of study since I plan to build around Arduino and implement PIDs into the process. I've been doing lots of digging around and research on what type of roaster I want to go with and I think I have finally decided to go with an electric fluidbed. It seems to me it has many advantages and probably the most cost effective for a broke college student. I'm looking to roast anywhere from half to a full pound of beans. Here is a rough outline of what I have in mind: -Pyrex bread tube roasting chamber -Heat gun elements (two) -Blower motor (most likely an old vacuum motor) -PID control of heating elements with SSR -Inlet temp sensor -Outlet temp sensor (as close to beans as possible) -Arduino serial LCD display (for temps and time) -Exit chute that doesn't require the removal of roasting chamber -Cooling bed that uses the inlet air of the blower  My main question is regarding the tubing and metal required for the roasting chamber and bed. I know most people go with SS but I'm worried that might get a bit expensive. Are there any cheaper alternatives that still look good and are food safe at high temps? Thanks for any feedback or suggestions in advance! This is an awesome forum you guys have here! Rob edit to move to proper forum...gp |
|
|
|
| ginny |
Posted on 12/11/2013 3:40 PM
|
 Founder Posts: 3476 Joined: October 24, 2005 |
maybe you should say hello and then begin your thread in the proper forum... gp  |
|
|
|
| robschwieb |
Posted on 12/11/2013 3:51 PM
|
|
Newbie Posts: 19 Joined: December 10, 2013 |
Quote Sorry about that, I wasn't sure which forum was right since I was just in the design stage! Thanks for moving it for me though, won't happen again. |
|
|
|
| JackH |
Posted on 12/11/2013 4:06 PM
|
 Administrator Posts: 1809 Joined: May 10, 2011 |
Welcome to Homeroasters! It looks great Rob! I don't know much about this type of roaster but there are many members here that can help. Jack |
|
|
|
| oldgearhead |
Posted on 12/11/2013 10:09 PM
|
 1 1/2 Pounder  Posts: 1128 Joined: February 10, 2011 |
You goal sounds like my roaster. I used steel sink drain tubing to house my one 1500 watt hest gun element. http://forum.home...ad_id=2207
oldgearhead attached the following image:

Edited by ginny on 01/30/2014 12:51 PM No oil on my beans...
|
|
|
|
| coffeeroastersclub |
Posted on 12/12/2013 8:23 AM
|
 Pounder  Posts: 535 Joined: May 26, 2009 |
Any metal or material that comes into contact with the beans does not have to be stainless. It could be regular steel or pyrex, even aluminum (however some people may bring up an unsubstantiated urban legend alzheimers connection with aluminum ... and at real high heat it weakens). You need to stay away from any type of galvanized metal, the coating is toxic at high temp. Note that many big drums used in commercial roasters are regular steel and possibly even cast iron. Len "If this is coffee, please bring me some tea but if this is tea, please bring me some coffee." ~Abraham Lincoln
|
|
|
|
| oldgearhead |
Posted on 12/12/2013 10:04 AM
|
|
1 1/2 Pounder Posts: 1128 Joined: February 10, 2011 |
..sorry about forgetting to 'bracket' the url for the build. Here its: http://forum.home...ad_id=2207 You have a great concept! __The cooler that captures heat from the beans, should work out nicely for back-to-back roasts. ____
oldgearhead attached the following image:
No oil on my beans...
|
|
|
|
| tamarian |
Posted on 12/12/2013 11:19 AM
|
|
1/2 Pounder  Posts: 320 Joined: January 21, 2012 |
Love the design, especially the exit chute. I have two build threads that might interest you, one for a PID'ed electrical element, with an exit chute into cooling, and the same one converted to gas, also PID'ed. My exit chute is on the opposite side of yours. I use the angled side, just because I wasn't sure I can eliminate leaks. If your design can be leak-free, then your locations is best. If there are some leaks, the opposite side is better, so it won't affect heating efficiency. I used a regular 4 inch galvanized iron pipes for heating chamber and roasting chamber on my electrical build. For gas, I switched heating chamber to black iron, due to combustion heat, which may release some toxic powder (as I was warned in my build thread). My PID'ed electric fluid bed thread: http://forum.home...post_36963 The PID'ed gas conversion thread: http://forum.home...rowstart=0 Wa'il. 1 Kg PID'ed gas-fired fluid bed roaster, GS/3MPS, K10F
|
|
|
|
| carelgrundlingh |
Posted on 01/01/2014 1:47 PM
|
|
Newbie Posts: 15 Joined: December 25, 2013 |
Hey Rob, so what metal did you decide on? Have you made any progress? |
|
|
|
| Viridian |
Posted on 01/01/2014 3:17 PM
|
|
1/4 Pounder  Posts: 57 Joined: October 12, 2006 |
Funny, I was sketching my build the other day(only collecting parts so far) and it almost exactly matches your drawing, including the exit chute. So, great design! ;-) |
|
|
|
| DANE J |
Posted on 01/29/2014 2:59 PM
|
 Newbie Posts: 39 Joined: December 15, 2013 |
I am also thinking of something similar. I had initially thought dragging hot air though my leaf blower motor might be bad, but figured the air coming off the beans really isn't that hot. Regarding the chimney/chaff collector.. is that an trap-door to release the chaff? what impact does that have vs just an open chimney - other than your chaff flying everywhere (outside job) would it be more efficient to have a chimney like drawn above? Also, I can't quite get my head around the exit shoot for the beans.. I think my version 1.0 will have a removal RC for dumping into cooling bin I am hoping to buy the stainless steel for my RC today, 100mm stainless pipe. A days I did a proof of concept with 6 cups of green beans in a 100mm PVC pipe (with no heat) with my leaf blower motor, seemed to keep them lofted nicely. (famous last words). And hoping 2x 2KW heatgun elements will suffice for heat. Not sure about varying airflow or heat yet, looking at different options! Thanks |
|
|
|
| boris |
Posted on 01/29/2014 4:09 PM
|
|
Newbie Posts: 10 Joined: December 05, 2013 |
Hi Dane, Is it an electric blower? If so there's a good chance you can get good blower control with a light switch dimmer. Make sure you get one rated from some 600W at least - it's gonna start cooking! 2* 2kW elements should be plenty, assuming you aren't wanting several pounds at once. I have about 3kW of electric stovetop elements in my heat chamber and it's plenty of heat - plus you'll be in better shape with an actual heat gun element! -Boris |
|
|
|
| DANE J |
Posted on 01/29/2014 7:45 PM
|
|
Newbie Posts: 39 Joined: December 15, 2013 |
Hi Boris Yep, an electric blower, ok, will take a look at a suitably rated dimmer.. that is probably a lot easier than crafting/buying some sort of butterfly valve arrangement. thanks! Blower is very loud though.. sorry neighbours :( I will get heat gun elements such as these, quite cheap: http://www.aliexp...83954.html Cheers Dane |
|
|
|
| robschwieb |
Posted on 04/30/2014 11:36 PM
|
|
Newbie Posts: 19 Joined: December 10, 2013 |
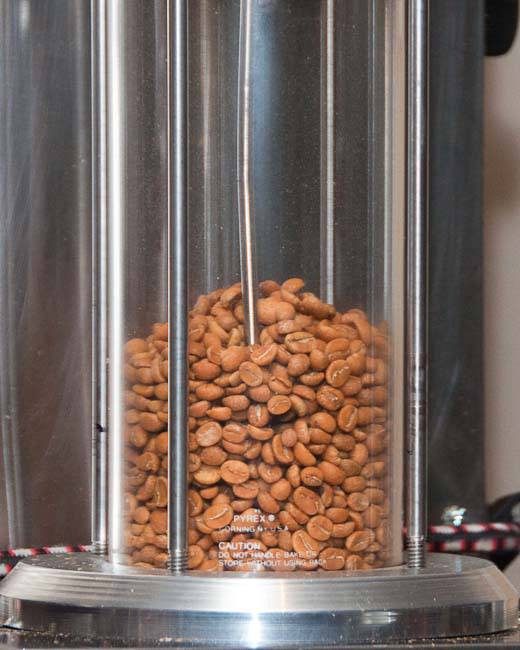
Hey guys, sorry for the lack of updates or responses to posts. It's been a very hectic last semester of college but I'm glad to say it is coming to an end. Last week was the Senior Design Expo and I'm excited to say we showed up with a functioning roaster! We ended up calling it the Roastduino. Now that it's finals week I have a bit of time to post some pictures and details about our build. I'm going to just post the link to the imgur album with all the pictures because I didn't feel like uploading them all on here. If people would like that, I can down the road. Eventually I'll post a video of it in action once I get moved over to West Lafayette and start my job but that probably won't be for a few weeks. Specs: -All Stainless Steel construction -120V two speed spa blower motor housed in a 1/2" MDF box with baffles -The infamous HAS-043K heat gun element -Arduino Uno (aArtisan-Q_PID code) -TC4 V5.31 with AC Zero Cross Detector -4x20 Sainsmart LCD using I2C -Arduino Bluetooth Dongle for TC4 Android App -25 Amp Amico Zero Cross SSR (element) -10 Amp Random Fire SSR (blower) -Two Type-K thermocouples (one before roast chamber, one inside) -Four 88CFM 120mm PC fans for cooling beans -Removable fan tray -Removable bean collection and cooling tray -Titanium header wrap on plumbing leading to roast chamber -Optional heat recirculation Problems: -Chaff collection We wanted a relatively clean roaster and that meant figuring out what to do with the chaff. As most of you know, filters clog and reduce airflow. There are many ways around this, as seen on here by other members but none of them seemed "professional" enough. We decided to go with a cyclonic chaff collector and hoped that it actually worked! As you can see in the pictures, there is a chamber at the bottom with a small door that latches with magnets. Once done roasting, simply open the door and vacuum out the chaff. Surprisingly, this works like a charm. I'd wager to say it's 99% effective and I honestly can't believe it. -Heat Our first roast (1lb) took over an hour and a half to reach first crack. We really overestimated our heating element when combined with such a powerful blower. Our biggest issue now that I think about it was probably blower speed. We were a bit too concerned with even agitation at first and that cost us big time. Stepping the blower down a few %'s greatly increases the ET, it's amazing how much of an impact it really has. Unfortunately, after our first roast we didn't think much about that though and instead set out to fix the problem of not enough heat. We made sure to seal up all of our connections with copper RTV and even wrapped the plumbing with titanium header wrap. Before, you could barely put your hand close to the pipe with the heating element, now you can place your hand on the wrap without getting burnt. We also sealed up the intake on the blower and made sure more recirculated heat was being used to its full potential. I had the bright idea of digging around on here and seeing what others with similar designs had done to get their temps up. Luckily, I found a few posts by oldgearhead discussing exhaust and the roast chamber. We realized we were wasting too much heat heating the cyclone and SS exhaust. To remedy this we cut a thin SS donut with a 1" ID and placed it at the exit of our roasting chamber. I strongly believe this was responsible for the biggest improvement in BT. The element has to run at 100% so the PID function really isn't of use at the moment but at least we can hit our temperatures in a respectable time. I think some further improvement on recirculation will get it the rest of the way there. -Noise We desired that our roaster be pleasant to be around and not sound like an F-18. A 1/2" MDF housing with 3 baffles on the intake was constructed. This, along with being inside the SS box did the trick. It's amazing how quiet it is! During roasting the blower is never higher than 20% and without measuring the DBs I'd have to say it is quieter than your average hair dryer on low. The beans banging on the glass chamber are actually the loudest part. Even at 100% blower it is quieter than your average upright vacuum. With me being so busy I haven't had much spare time to tinker with it and get it all fine tuned but I don't think it'll take much to get it to where I want it. Overall, it was a great project and I had a lot of fun with the three other students on my team. I wish I had a bit more knowledge and experience with roasting and building roasters beforehand but that just made it more....interesting! Oh, I forgot to mention fabrication. One of our teammates worked at a local SS manufacturing shop. They agreed to sponsor us and build the roaster based on our designs. They did a really great job, especially for the cost! A few things aren't how we requested them but I'm not about to complain! This thing has an 1/8" base and the sides are 14 gauge. It is total overkill but hey, it can survive an IED and still roast coffee! If you have any questions, feel free to ask and I'll try to respond when I get time! Hope you all enjoy! Also, thanks for all of the initial help and advice! I'd also like to thank greencardigan for all of this guidance through the aArtisan_Q PID code and letting us use it along with his Android App for our project. He was such a help and great guy to deal with. Oh, and thank you oldgearhead for posting some very valuable information around here. We would have been lost without it! With all that said, here is what we referred to as 130 pounds of stainless steel sex appeal! Full Album http://imgur.com/... |
|
|
|
| JETROASTER |
Posted on 05/01/2014 11:16 AM
|
 Administrator Posts: 1780 Joined: March 06, 2010 |
Looks great!! Sounds like a few tweaks left, but the bones are awesome. Cheers, Scott |
|
|
|
| Lawnmowerman |
Posted on 05/01/2014 1:56 PM
|
 Pounder Posts: 546 Joined: March 14, 2012 |
Rob. The roaster you and your partners have come up with is simply freakin amazing! Thanks for showing the pics. Thanks for showing the pics.
Bad coffee prevails when good coffee roasters stand by and do nothing.
|
|
|
|
| robschwieb |
Posted on 05/02/2014 2:02 PM
|
|
Newbie Posts: 19 Joined: December 10, 2013 |
Thanks for the positive comments guys! I threw together a small video of it in action for those who are interested. |
|
|
|
| allenb |
Posted on 05/03/2014 9:38 PM
|
 Administrator Posts: 3859 Joined: February 23, 2010 |
Hi Rob, as stated already, awesome design and execution! This is a roaster that could attract customers in a high end store-front coffee establishment. I'm sure you've already noticed what appears to be a small hang up in bean travel opposite the perf plate at the bottom of the glass. Maybe the silicone gasket or aluminum ledge not letting the beans slide down smoothly. Most likely won't have any negative affect in the cup but I always notice those little things. Be sure to keep us up to speed on further development! Allen 1/2 lb and 1 lb drum, Siemens Sirocco fluidbed, presspot, chemex, cajun biggin brewer from the backwoods of Louisiana
|
|
|
|
| robschwieb |
Posted on 05/04/2014 8:07 PM
|
|
Newbie Posts: 19 Joined: December 10, 2013 |
Thanks for the feedback Allen! Unfortunately, I too have a nagging eye for the smallest details. This is a definite downside to going with a stationary RC in a fuidbed. The angled RC bottom is always going to lose out to the martinti shaker style bottom. It didn't help that the angle was much less aggressive than I had requested but oh well. I think the best solution to this is adding more heat. With more heat I can bring the blower speed up and still hit my temps. More than 25% blower really gets all the beans agitating evenly. Although I still end up with a very even roast, it bugs me! When I get more time I'll get on to fixing and tweaking it. |
|
|
|
| Viridian |
Posted on 05/07/2014 7:32 PM
|
|
1/4 Pounder Posts: 57 Joined: October 12, 2006 |
Very nice looking build! Thanks for posting the video. I'd really like to see how you get the beans into the cooling tray. |
|
|
|
| Viridian |
Posted on 05/07/2014 7:49 PM
|
|
1/4 Pounder Posts: 57 Joined: October 12, 2006 |
Oops, just realized you provided an album link which shows your hinged door. Too bad you don't have much time to keep tinkering! |
|
|
|

| Jump to Forum: |
Similar Threads
| Thread | Forum | Replies | Last Post |
|---|---|---|---|
| Kaleido Roaster PID parameters | Roasting Coffee | 2 | 04/13/2024 3:07 PM |
| Skywalker roaster mods | Other Roasters | 293 | 04/07/2024 4:31 PM |
| Skywalker, the ALM chinese one pound roaster | Other Roasters | 215 | 04/02/2024 1:48 AM |
| My first popcorn mod roaster (vahegan) | Fluidbed Roaster | 48 | 03/24/2024 12:04 PM |
| Fatamorgana electric drum roaster | Other Roasters | 2 | 03/24/2024 10:03 AM |
Powered by PHP-Fusion Copyright © 2024 PHP-Fusion Inc
Released as free software without warranties under GNU Affero GPL v3
Designed with ♥ by NetriXHosted by skpacman