
Login

Shoutbox
You must login to post a message.
allenb
04/19/2024 8:27 AM
eximwind 
renatoa
04/18/2024 12:36 AM
bijurexim, greyberry2, N C, 
renatoa
04/17/2024 9:27 AM
 , branchu
renatoa
04/14/2024 5:56 AM
TheOtherJim and papajim,
 !
!
!allenb
04/11/2024 6:33 PM
Zemona
Forum Threads
Newest Threads
Rainfrog's Roastmast...War on Farmers by Su...
Kaleido Roaster PID ...
Green coffee sellers
Wet beans - Estimati...
Hottest Threads
| Skywalker roaster... | [292] |
| Skywalker, the AL... | [214] |
| Skywalker Roasts | [94] |
| Rainfrog's Roastm... | [54] |
| My first popcorn ... | [47] |
In Memory Of Ginny

Donations
Latest Donations
dmccallum - 10.00
JackH - 25.00
snwcmpr - 10.00
Anonymous - 2.00
Anonymous - 5.00
dmccallum - 10.00
JackH - 25.00
snwcmpr - 10.00
Anonymous - 2.00
Anonymous - 5.00
Users Online
Guests Online: 1
Members Online: 0
Total Members: 8,212
Newest Member: eximwind
Members Online: 0
Total Members: 8,212
Newest Member: eximwind
View Thread
Who is here? 1 guest(s)
 Replacing Burrs (Blades) on a Rossi RR45 Grinder - Photos
|
|
| seedlings |
Posted on 02/01/2008 9:39 PM
|
 1 1/2 Pounder  Posts: 4226 Joined: June 27, 2007 |
Here's a brief step-by-step guide to replace the blades on this Rossi RR45 and most other grinders. 1) Determine they need to be replaced. Just find some experts to harass about how your espresso isn't dialing in, and they'll lead you gently through the forest of variables. That's what I did. 2) Take off the hopper. Clear out the pile of beans left in the throat/neck. 3) Remove the throat/neck by unscrewing it (see the second to last picture below). In my case, there is a springloaded catch that must be held down while unscrewing. 4) Once removed, here's a look down into the grinder. The bottom burr spins with the motor while the top burr is fixed and attached to the throat/neck. Here there are 3 screws that need to be loosed. (Old blades can still remove flesh.) Use the large tines to steady the blade while you unscrew. Remember where you put the screws. 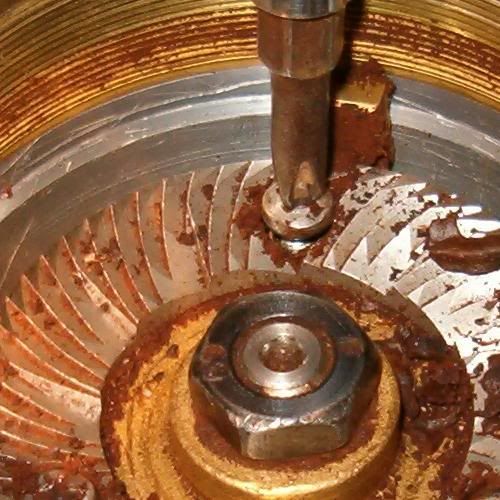 5) Remove the bottom blade. I used some bamboo chopsticks to pry it out. Coffee goo is a surprisingly strong adhesive. 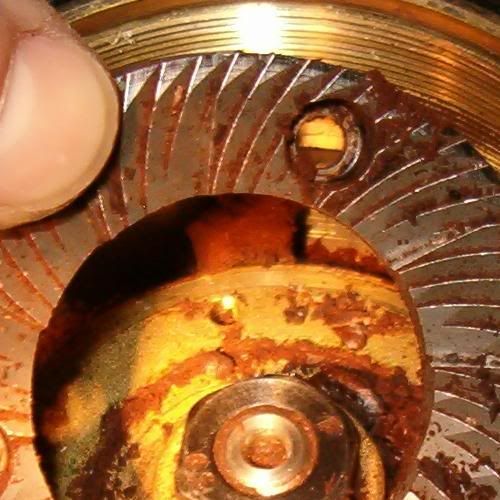 6) Find the matching trio of screws on the top blade and back them out. You probably won't need the chopsticks to free this one. Take it off. 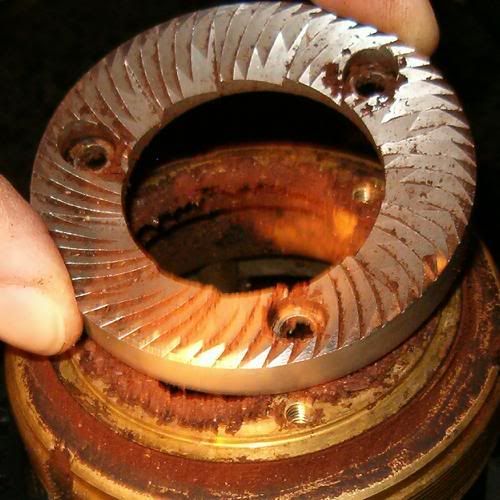 7) Now for the hard part. Cleaning. Take this opportunity to scrape all the goo off of everything. Vacuum out the neck of the hopper. I used a non-toxic cleaner/degreaser as an aid to toothpicks and a nylon scraper we use on the dishes. I didn't take pictures of the cleaning part, but you'll see a difference below. 8) Re-attach each new blades following the reverse method described above. Grab a new blade, find a trio of screws, attach to the throat. Grab the other new blade, find the last three screws and attach to the motor. Now you can screw the throat back in. DON"T forget to replace the spring-loaded catch! I added a couple of laps of teflon plumbers tape to the threads of the neck. It eliminates any play in the threads, so that when you flip the switch the top blade won't torque slightly looser than the grind you selected. Notice it's nice and clean again. 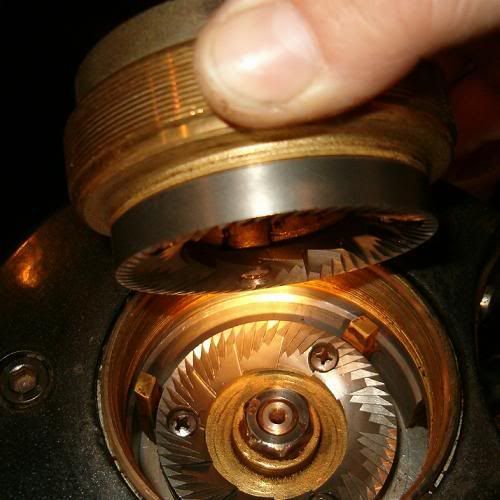 Check out this picture and see if you can tell a new blade from an old one. 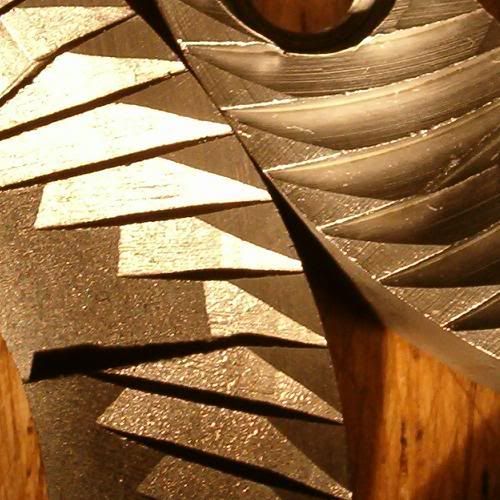 CHAD Roaster: CoffeeAir II 2# DIY air roaster
Grinder: Vintage Grindmaster 500 Brewers: Vintage Cory DCU DCL, Aeropress, Press, Osaka Titanium pourover |
|
|
|
| David |
Posted on 02/01/2008 10:09 PM
|
 1 1/2 Pounder Posts: 690 Joined: October 27, 2005 |
What a nice, practical, clear and succinct photo essay. A fine job, Chad. Keep up the good work. s:2 You da man! s:1 |
|
|
|
| Kaffee Bitte |
Posted on 02/01/2008 10:15 PM
|
 1 1/2 Pounder Posts: 613 Joined: May 11, 2007 |
Ditto, what David said! Have you tried the new burrs yet? I can definitely see the difference. Those new ones will last you a long time. Lynn
"Some days it's spice, other days it's bitter dirt." |
|
|
|
| seedlings |
Posted on 02/02/2008 10:18 AM
|
|
1 1/2 Pounder Posts: 4226 Joined: June 27, 2007 |
Tried the burrs this morning. Shot 1: Backed the grinder off 12 clicks to the zero mark that Rossi built in. Ground and... didn't brew. too coarse. Dumped them and brushed out the doser. Shot 2: Moved the grinder to the spot I used to use and.... choke. Shot 3: Moved the grinder 2 clicks coarser and... 1 oz in 25 seconds. Tasted pretty good, though. Shot 4: Moved the grinder 1 more click (a total of 3 clicks coarser than the old burrs) and . . . 2 oz in 22 seconds. Only problem was a little jetstream that came up about 12 seconds into the shot. Then it ended with a tornado bubble in the center. So, I can't say I'm blown away with the new blades... but, maybe this will reduce one of those pesky variables and soon... success. CHAD Roaster: CoffeeAir II 2# DIY air roaster
Grinder: Vintage Grindmaster 500 Brewers: Vintage Cory DCU DCL, Aeropress, Press, Osaka Titanium pourover |
|
|
|
| Kaffee Bitte |
Posted on 02/02/2008 1:07 PM
|
|
1 1/2 Pounder Posts: 613 Joined: May 11, 2007 |
That one ounce in 25 seconds would be considered a ristretto. Excellent! They are a very nice form of spro on occasion, with some serious kick in straight shot form. Have you done the stepless mod to your grinder yet? Doing so might help. That way you could adjust down or up by small increments. Say Chad, could you do something that might help me to visualize what's going on? Dose your pf as you normally do, take a pic. Then distribute, take a pic. Then tamp, and take a pic with the tamper still in the pf. This could help get you some diagnostic info. Then maybe take some shots while the spro is running. Show us the pour from the naked pf. Show us the shot. Another photo essay? Lynn
"Some days it's spice, other days it's bitter dirt." |
|
|
|
| seedlings |
Posted on 02/02/2008 10:03 PM
|
|
1 1/2 Pounder Posts: 4226 Joined: June 27, 2007 |
Lithium batteries are out of the camera. Maybe I'll work on that tomorrow afternoon. Yes I tried the stepless mod. The teflon tape makes turning quite difficult with bare hands... but throw some amperage to the motor and the torque starts to unscrew the hopper enough to change the grind setting. I left the tape on, but also replaced the pin, so it's still stepped. CHAD Edited by seedlings on 02/02/2008 10:36 PM Roaster: CoffeeAir II 2# DIY air roaster
Grinder: Vintage Grindmaster 500 Brewers: Vintage Cory DCU DCL, Aeropress, Press, Osaka Titanium pourover |
|
|
|
| mtbgirl |
Posted on 12/15/2010 4:49 PM
|
|
Newbie  Posts: 1 Joined: December 15, 2010 |
How did you remove the throat? I cannot seem to get mine to budge... any suggestions? |
|
|
|
| Koffee Kosmo |
Posted on 12/15/2010 6:30 PM
|
 Administrator Posts: 1620 Joined: December 31, 2008 |
Quote mtbgirl wrote: How did you remove the throat? I cannot seem to get mine to budge... any suggestions? What do you mean by "the throat" Everything screws on or off However one very important tip to take note of is Lots of things in a grinder have left hand threads So its the opposite to the normal operation one is used to Hope that helps KK I home roast and I like it. Designer of the KKTO
Roaster Build information https://homeroast...ad_id=1142 https://docs.goog...lide=id.i0 Blog - http://koffeekosm...gspot.com/ Bezzera Strega, Mazzer Robur Grinder, Pullman Tamper Convex, (KKTO) Turbo Oven Home Roaster. |
|
|
|
| seedlings |
Posted on 12/15/2010 7:04 PM
|
|
1 1/2 Pounder Posts: 4226 Joined: June 27, 2007 |
Quote mtbgirl wrote: How did you remove the throat? I cannot seem to get mine to budge... any suggestions? The upper section with the top burrs unscrews like opening a pickle jar. The only thing I had to do was hold down the spring-loaded 'button' that locks the grinder in place, you know the one you press down to adjust your grind? Hold that down until the entire top unscrews. Other than that there are just the screws that hold the blades in. Does this help at all? CHAD Roaster: CoffeeAir II 2# DIY air roaster
Grinder: Vintage Grindmaster 500 Brewers: Vintage Cory DCU DCL, Aeropress, Press, Osaka Titanium pourover |
|
|
|

| Jump to Forum: |
Similar Threads
| Thread | Forum | Replies | Last Post |
|---|---|---|---|
| Grinder black hole?? | GRINDERS | 33 | 03/13/2024 6:46 PM |
| Fellows Opus grinder | GRINDERS | 11 | 10/05/2023 9:55 AM |
| New Grinder toy | GRINDERS | 2 | 08/06/2023 6:01 PM |
| Repairing/replacing heating element | Popcorn Popper roasting | 8 | 05/08/2022 3:09 AM |
| Manual traditional grinder | GRINDERS | 3 | 12/05/2021 6:40 AM |
Powered by PHP-Fusion Copyright © 2024 PHP-Fusion Inc
Released as free software without warranties under GNU Affero GPL v3
Designed with ♥ by NetriXHosted by skpacman