
Login

Shoutbox
You must login to post a message.
allenb
04/19/2024 8:27 AM
eximwind 
renatoa
04/18/2024 12:36 AM
bijurexim, greyberry2, N C, 
renatoa
04/17/2024 9:27 AM
 , branchu
renatoa
04/14/2024 5:56 AM
TheOtherJim and papajim,
 !
!
!allenb
04/11/2024 6:33 PM
Zemona
Forum Threads
Newest Threads
Rainfrog's Roastmast...War on Farmers by Su...
Kaleido Roaster PID ...
Green coffee sellers
Wet beans - Estimati...
Hottest Threads
| Skywalker roaster... | [292] |
| Skywalker, the AL... | [214] |
| Skywalker Roasts | [94] |
| Rainfrog's Roastm... | [54] |
| My first popcorn ... | [47] |
In Memory Of Ginny

Donations
Latest Donations
dmccallum - 10.00
JackH - 25.00
snwcmpr - 10.00
Anonymous - 2.00
Anonymous - 5.00
dmccallum - 10.00
JackH - 25.00
snwcmpr - 10.00
Anonymous - 2.00
Anonymous - 5.00
Users Online
Guests Online: 2
Members Online: 0
Total Members: 8,212
Newest Member: eximwind
Members Online: 0
Total Members: 8,212
Newest Member: eximwind
View Thread
Who is here? 1 guest(s)
 Cory's new BM/HG roaster build 2013
|
|
| CoryZ |
Posted on 10/06/2013 1:13 PM
|
|
Newbie  Posts: 5 Joined: July 19, 2013 |
With parts to build a TC4 controller on order, it's time to upgrade my roaster from a popcorn popper and start doing bigger batches. This is a pretty typical base BMHG build, so hopefully it's not too boring! Went to the thrift store and harbor freight yesterday, and scored a Breadman TR555LC for $10. Then, I played the coupon game at Harbor Freight and picked up a $9 heat gun. I'm using a cheap $15 HF DMM with temp probe until I get the PID built. The dough cycle was a bit short (17min), so I modified it right away. It took longer to figure out how to open up the unit than to do the mods. It turned out that it was just 1 screw by the control unit and then pry off the cover. Two wire nuts later and life was good. Forgot to grab a pic of the final mods, but it's the two spade terminal connectors and the molex plug with the yellow and blue wires on the left. Just snip them off and connect the motor wires to the AC wires. 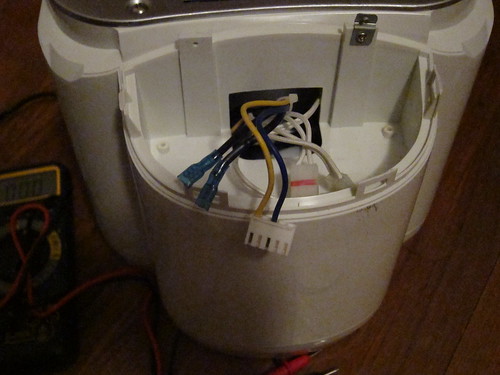 bread maker mods by mtntreks, on Flickr Here's my Rube Goldberg setup, as I haven't made a cover that will hold the heat gun yet. The thermocouple is stuck through a hole I drilled in the lower corner of the pan. 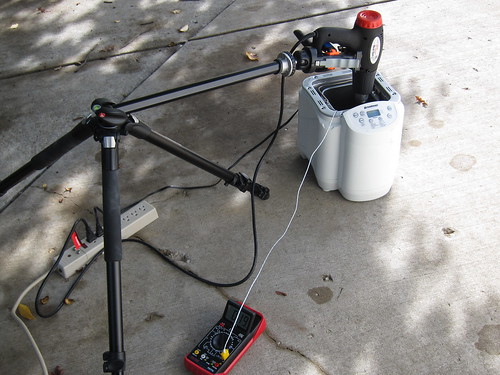 Rigged Roasting Setup by mtntreks, on Flickr 1st Roast just a hair over 1lb total green beans. 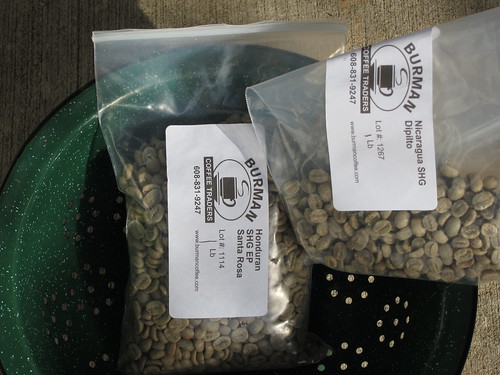 raw beans by mtntreks, on Flickr Here's the roast in progress. 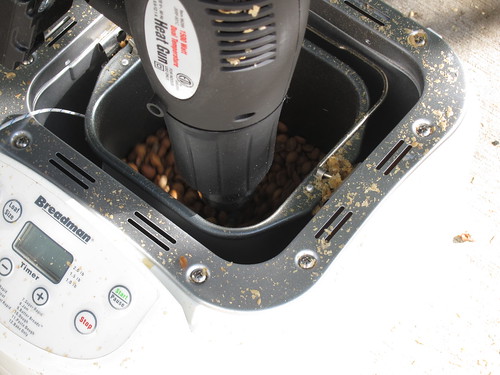 Roast underway by mtntreks, on Flickr 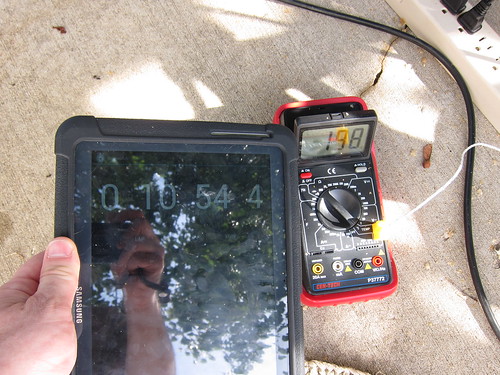 Time and temp. by mtntreks, on Flickr Todos: Cover. It took a little longer than expected to heat everything up. Need chaff containment / redirection. Plus, I don't want the big tripod setup and tear down. The breadmaker cover doesn't look like a good choice to mod, so I'll find something at the thrift store to put over the container portion. Need a bean cooler. I stopped short of 2nd crack but coasted right into a rolling 2nd crack. Whoops! The Final product: 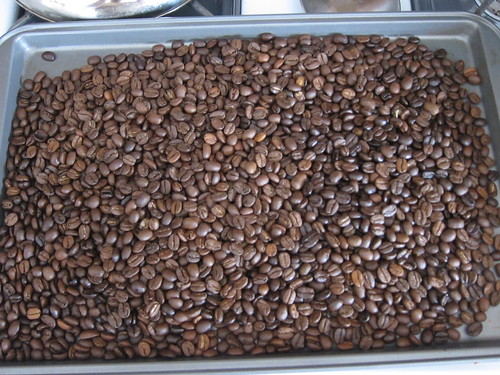 Finished product 1st roast bmhg roaster by mtntreks, on Flickr I cheated and brewed some right away. Success. Should be even better after a couple of days. Total invested in the basics $35. I figure up to 10 to deal with a cover and chaff containment. Should probably pick up a spare heat gun too. So call it $55 for the basic build and a spare heat gun? I may grab a HF router controller for a bit more heat control. Not sure if it's worth it, as I'm building a TC4. |
|
|
|
| Lawnmowerman |
Posted on 10/06/2013 4:14 PM
|
 Pounder  Posts: 546 Joined: March 14, 2012 |
If there is a metal plate in the original lid, i would suggest you get that out and use itwhen you build a new lid. It can be very useful in making a good seal, especially when the two surfaces already mate together. I used baking tins in my lid along with the original lid metal. It worked very well to reinforce it. Once you have sealed the lid will.need a relief hole drilled . There are other threads that explain this. And... remove and discard the plastic peice on the nose. Glad to see another hgbm user. Im tempted to update the pics i haveof recent improvements. Maybe soon.
Bad coffee prevails when good coffee roasters stand by and do nothing.
|
|
|
|
| CoryZ |
Posted on 10/07/2013 7:00 PM
|
|
Newbie Posts: 5 Joined: July 19, 2013 |
Now looking closer to complete. Picked up a $1 square cake pan at the thrift store today. Funny enough, it was sitting right next to a clever coffee dripper. Added another one to my collection! I don't want to admit how long it took me to bash the tin into some thing resembling a lid, but I'm happy with the results for now. Still have to see how it roasts. 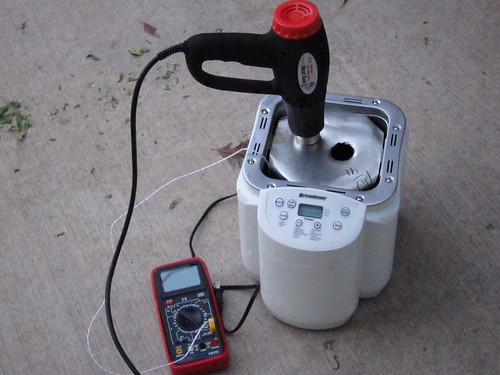 Setup now w. cover by mtntreks, on Flickr] The holes aren't very pretty. Straight tin snips are hard to cut holes with w/o a lot more practice than I have! Either hole is heat gun sized at the moment. I may buy a piece of that flexible automotive exhaust for better chaff containment / venting like I've seen in some other builds. I could see making the vent hole bigger too. I'm also considering a clamp of some sort to keep the gun connected to the lid. It's a reasonably tight squeeze, so I'm not sure about that right now. 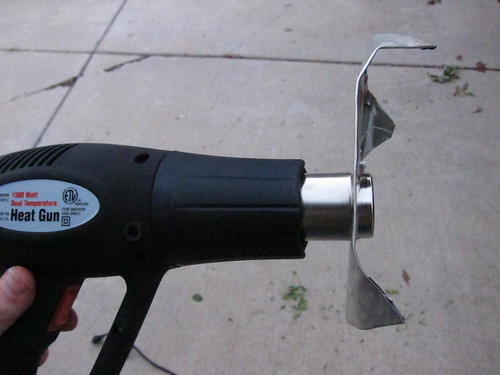 Side view cover w. heat gun by mtntreks, on Flickr While I was at it, I also enlarged the hole for the thermocouple probe. Singed away some insulation during the roast and it was a tight squeeze to remove it from the initial hole. Of course, there's always room for improvement. Anybody see anything glaring? |
|
|
|
| Lawnmowerman |
Posted on 10/07/2013 9:02 PM
|
|
Pounder Posts: 546 Joined: March 14, 2012 |
I have fou.d that the best results were had with the top outer lid SEALED. Exhaust air should all go out the bottom and through two layers or three layers of steel. I still havent petfected mine as it is a work in progress. But with air leaking out the top I got stalling. That was befire i got the router controller. I am a bit envioud that you are putting together a tc4 please excuse the typos. Ben.
Bad coffee prevails when good coffee roasters stand by and do nothing.
|
|
|
|

| Jump to Forum: |
Similar Threads
| Thread | Forum | Replies | Last Post |
|---|---|---|---|
| Kaleido Roaster PID parameters | Roasting Coffee | 2 | 04/13/2024 3:07 PM |
| Skywalker roaster mods | Other Roasters | 293 | 04/07/2024 4:31 PM |
| Skywalker, the ALM chinese one pound roaster | Other Roasters | 215 | 04/02/2024 1:48 AM |
| My first popcorn mod roaster (vahegan) | Fluidbed Roaster | 48 | 03/24/2024 12:04 PM |
| Fatamorgana electric drum roaster | Other Roasters | 2 | 03/24/2024 10:03 AM |
Powered by PHP-Fusion Copyright © 2024 PHP-Fusion Inc
Released as free software without warranties under GNU Affero GPL v3
Designed with ♥ by NetriXHosted by skpacman