
Login

Shoutbox
You must login to post a message.
allenb
04/19/2024 8:27 AM
eximwind 
renatoa
04/18/2024 12:36 AM
bijurexim, greyberry2, N C, 
renatoa
04/17/2024 9:27 AM
 , branchu
renatoa
04/14/2024 5:56 AM
TheOtherJim and papajim,
 !
!
!allenb
04/11/2024 6:33 PM
Zemona
Forum Threads
Newest Threads
Rainfrog's Roastmast...War on Farmers by Su...
Kaleido Roaster PID ...
Green coffee sellers
Wet beans - Estimati...
Hottest Threads
| Skywalker roaster... | [292] |
| Skywalker, the AL... | [214] |
| Skywalker Roasts | [94] |
| Rainfrog's Roastm... | [54] |
| My first popcorn ... | [47] |
In Memory Of Ginny

Donations
Latest Donations
dmccallum - 10.00
JackH - 25.00
snwcmpr - 10.00
Anonymous - 2.00
Anonymous - 5.00
dmccallum - 10.00
JackH - 25.00
snwcmpr - 10.00
Anonymous - 2.00
Anonymous - 5.00
Users Online
Guests Online: 2
Members Online: 0
Total Members: 8,212
Newest Member: eximwind
Members Online: 0
Total Members: 8,212
Newest Member: eximwind
View Thread
Who is here? 1 guest(s)
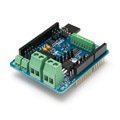
 TC4+ Arduino coffee roaster shield (TC4-compatible)
|
|
| renatoa |
Posted on 05/04/2019 7:01 AM
|
|
Administrator Posts: 3005 Joined: September 30, 2016 |
Is what I am doing, but the goal is to simplify, not complicate  AI assisted roasting, doesn't sound cool ? |
|
|
|
| CharcoalRoaster |
Posted on 05/05/2019 4:03 PM
|
 1 1/2 Pounder  Posts: 640 Joined: April 13, 2012 |
I've been trying to connect my SSRs to my TC4 and having some issues with my female dupont connectors. I get the connectors crimped onto my wire properly and inserted into the housing but when I go to slide it onto the male pins they are very loose Any suggestions on how to better connections? |
|
|
|
| mg512 |
Posted on 05/05/2019 4:15 PM
|
 1/4 Pounder  Posts: 189 Joined: March 04, 2018 |
Quote CharcoalRoaster wrote: I've been trying to connect my SSRs to my TC4 and having some issues with my female dupont connectors. I get the connectors crimped onto my wire properly and inserted into the housing but when I go to slide it onto the male pins they are very loose Any suggestions on how to better connections? Do you have a TC4, or a TC4+? If I recall correctly, the TC4 by default has angled male headers for the SSR connection, right? I went with screw terminals on the TC4+ precisely because I struggled with getting a good connection on the TC4 as well. ;) I think to an extent that's just the design of the Dupont connectors. It should be OK though - it's usually just the plastic housing that's loose, not the metal connector itself. Some suggestions if not: * You could get a 2-pin housing, that might make it a little more stable. (Assuming you have two 1-pin housings now.) * Or you could crimp something like a female Molex KK connector onto the wire, I think those should fit on the male Dupont headers on the board. * If you want to do it properly, desolder the male header from the board, and solder a different connector of your choice instead. Molex KK / JST / screw terminal - all should be pretty decent. You'd have to check if you have enough space, I think there's a whole row of connectors there on the TC4. * Or you could get a TC4+ of course. ;) |
|
|
|
| CharcoalRoaster |
Posted on 05/05/2019 6:21 PM
|
|
1 1/2 Pounder Posts: 640 Joined: April 13, 2012 |
TC4 - I considered the TC4+ but went with the TC4 since I didn't feel like I was running an AC fan and didn't need the bluetooth. Thanks for your work on the TC4+ though! It is a great board from what I've been reading/following. Yeah, it's male pins. I've got the wire crimped in nice and tight but can't get a firm connection with the metal female connectors in or out of the plastic housing. I was actually using a 2-pin housing which was making me so frustrated as I was thinking the same thing. Thanks mg512! I'll look into some screw terminals or another connector option. |
|
|
|
| mg512 |
Posted on 05/06/2019 3:50 AM
|
|
1/4 Pounder Posts: 189 Joined: March 04, 2018 |
Quote CharcoalRoaster wrote: TC4 - I considered the TC4+ but went with the TC4 since I didn't feel like I was running an AC fan and didn't need the bluetooth. Thanks for your work on the TC4+ though! It is a great board from what I've been reading/following. Yeah, it's male pins. I've got the wire crimped in nice and tight but can't get a firm connection with the metal female connectors in or out of the plastic housing. I was actually using a 2-pin housing which was making me so frustrated as I was thinking the same thing. Thanks mg512! I'll look into some screw terminals or another connector option. Haha, yep, the TC4+ has a few quality of life improvements beyond the headline features. ;) Any chance you bent the connector while crimping? I've found Dupont difficult to crimp well, especially with the ratchet-type crimp tools you can get on eBay. You could consider investing in a proper crimp tool - Engineer PAD-02 has been an amazing long-term investment for me - pricey, but I have not needed any other crimp tool ever since. Or you could just get some pre-crimped Dupont jumper wires, and strip the other side off. Screw terminal is probably the easiest option though. That way you can also use slightly thicker wires, which makes it easy to crimp a ring or spade connector onto the SSR end for a better connection there. |
|
|
|
| CharcoalRoaster |
Posted on 05/06/2019 6:39 AM
|
|
1 1/2 Pounder Posts: 640 Joined: April 13, 2012 |
I was looking at swapping out the pins with screw terminals but I'm not sure I'm confident enough in my (de)soldering abilities  |
|
|
|
| renatoa |
Posted on 05/06/2019 7:20 AM
|
|
Administrator Posts: 3005 Joined: September 30, 2016 |
Next release should provide welding pads |
|
|
|
| mg512 |
Posted on 05/06/2019 11:03 AM
|
|
1/4 Pounder Posts: 189 Joined: March 04, 2018 |
Quote You mean solder pads? As in surface-mount ones? I don't think most people want to deal with surface mount soldering. Besides, the TC4+ already solves this by using screw terminals, this is about the plain TC4. ;) Quote CharcoalRoaster wrote: I was looking at swapping out the pins with screw terminals but I'm not sure I'm confident enough in my (de)soldering abilities Yeah, desoldering can be tricky, I avoid it when I can. Maybe try it with something expendable first... ;) Or as I mentioned earlier, get (pre-crimped) Dupont jumper wires. Strip off the other end, or actually you could even just crimp a ring connector around the Dupont connector on the SSR end. Not pretty, but would probably do the trick. |
|
|
|
| greencardigan |
Posted on 05/06/2019 7:09 PM
|
 1 1/2 Pounder Posts: 1185 Joined: November 21, 2010 |
Or solder wires directly to the pins? I have a stack of pre built jumper wires with connectors pre installed. I just cut a connector off one end. |
|
|
|
| DavidLe |
Posted on 05/29/2019 12:11 AM
|
|
Newbie  Posts: 3 Joined: May 12, 2019 |
Hi @mg512, I have bought a Kit version with ship ID# (will send you if you need) via royalmail.com and paid via paypal, but the shipping were not track-able the status, its were not recognized ID# , please kindly advise how to check or please check on your side, i already email 2 times and over a week without any response from coffee@gerstgrasser.net. Please kindly advise. Thanks. |
|
|
|
| mg512 |
Posted on 05/29/2019 2:53 AM
|
|
1/4 Pounder Posts: 189 Joined: March 04, 2018 |
Quote DavidLe wrote: Hi @mg512, I have bought a Kit version with ship ID# (will send you if you need) via royalmail.com and paid via paypal, but the shipping were not track-able the status, its were not recognized ID# , please kindly advise how to check or please check on your side, i already email 2 times and over a week without any response from coffee@gerstgrasser.net. Please kindly advise. Thanks. Hi David, I received both your emails, and replied to both. I'm sorry that my messages don't seem to have gone through. Could you check your spam folder, just to see if that was the problem? Regarding tracking: There was an error in the tracking code, it should be 5443 instead of 5433. I've sent you the full code and tracking link by PM. Let me know in case this doesn't get through either. It looks like the parcel has arrived and they tried delivering it a few days ago already. |
|
|
|
| mg512 |
Posted on 06/06/2019 4:46 PM
|
|
1/4 Pounder Posts: 189 Joined: March 04, 2018 |
Hi all, I have a few updates about the boards. 1: Documentation There is now a new Quick-Start Guide available on the website: https://coffee.ge..._start.pdf This is a lot more streamlined than the manual I had before, and just walks you through connecting the TC4+ to fan, heater, power, thermocouples. I'm hoping this will make it easier to get started. The old manual is still available as well for reference, but contains a lot of information that most people won't ever need. Also, I have been meaning to write a guide on how I set up my popcorn machine roaster for a while, and finally got around to that over the last weeks. This is now available on Instructables: https://www.instr...e-Roaster/ When I built my own roaster I struggled to find a single resource covering everything, and had to piece together information from a number of sources, so my aim here is to try and get all the basics covered in one document. I've tried to be as clear and detailed as possible, and I'm trying to discuss both the common DC and AC fan popcorn machines. Focus is on the hardware side so far, as I think the Arduino sketches and Artisan are already fairly well described elsewhere. Any comments are welcome of course, and I will try to keep the guide updated in the future with any new developments or ideas. 2: Pre-configured Arduino and extras I am now offering pre-configured Arduinos, Bluetooth modules and LCD displays on Tindie. This is an effort to offering something similar to the old TC4C boards, which came with an Arduino sketch already pre-installed and were aimed at people not wanting to have to configure anything themselves. I have been asked about something like this a few times, and I have on occasion done pre-configured Arduinos for people before, but setting up each of those individually according to custom requirements was far too time-consuming to offer on a regular basis. I'm thus now offering an Arduino with a "standard" configuration that I believe will work for the vast majority of people. This has aArtisan in PWM configuration for use with a DC fan, or an AC PWM dimmer module. (The only setup this will NOT work with is with a ZCD and random-fire SSR.) The Bluetooth module and LCD can be configured with matching parameters and I2C address, meaning everything should work out of the box, plug and play. Again, I'm hoping that this will make the board more accessible to beginners. 3: New board revision Lastly, I have made a few updates to the PCB as of a few weeks ago. Nothing major, but a few minor quality-of-life improvements: * Silkscreen labels have been moved so they are not hidden by screw terminals anymore. * IO2 and IO3 connecters now have a 5V pin, for easier interface with PWM dimmer board. * Through-hole capacitors now have extra 5.08mm spaced holes for easier soldering and more flexibility. I hope these all will be useful to people. Any questions, as always, do let me know! :) |
|
|
|
| JackH |
Posted on 06/06/2019 5:20 PM
|
 Administrator Posts: 1809 Joined: May 10, 2011 |
Back when we had the old TC4, I found that most folks had trouble loading the Arduino sketch and configuring Artisan to get things working. Offering the TC4+ with a pre-configured sketch will help. Good work on the documentation and pulling everything together on the Instructable page. ---Jack
KKTO Roaster. |
|
|
|
| greencardigan |
Posted on 06/06/2019 7:06 PM
|
|
1 1/2 Pounder Posts: 1185 Joined: November 21, 2010 |
I found that it was too painful and time consuming to offer preloaded sketches. I tried for a while then stopped offering it. My personal opinion is that anyone using the TC4 should already be familiar with the Arduino system or be willing to learn it. |
|
|
|
| mg512 |
Posted on 06/07/2019 3:00 AM
|
|
1/4 Pounder Posts: 189 Joined: March 04, 2018 |
Quote JackH wrote: Back when we had the old TC4, I found that most folks had trouble loading the Arduino sketch and configuring Artisan to get things working. Offering the TC4+ with a pre-configured sketch will help. Good work on the documentation and pulling everything together on the Instructable page. Thank you! If you notice anything I've missed or that could be improved in the Instructable, let me know. :) Quote greencardigan wrote: I found that it was too painful and time consuming to offer preloaded sketches. I tried for a while then stopped offering it. My personal opinion is that anyone using the TC4 should already be familiar with the Arduino system or be willing to learn it. Really? Interesting - my experience has been the opposite. Pre-configured Arduinos made the least trouble post-sales, just that the back and forth beforehand about how to configure them was a bit tedious (hence the one standard config). On the other hand, soldering the kit version together seems to give people quite some trouble, as does configuring the Arduino to a lesser extent. Anyway, I think it can't hurt to have both options in any case. Everyone has to start somewhere, and this may well be a way for more people to get into Arduino. |
|
|
|
| JackH |
Posted on 06/07/2019 6:36 PM
|
|
Administrator Posts: 1809 Joined: May 10, 2011 |
I guess you would have to load a sketch to test everything anyway.
---Jack
KKTO Roaster. |
|
|
|
| renatoa |
Posted on 06/08/2019 1:26 AM
|
|
Administrator Posts: 3005 Joined: September 30, 2016 |
With the actual profiles handling in TC4, using a separate sketch, if an user want to use TC4 standalone and load a profile, then he is forced to play with Arduino, switching sketches. So a preloaded sketch is good only for those using full manual or connected to Artisan. Also, Artisan and BT are not allowed to be used in same sketch in current TC4 version, so an user wanting to use both should permanently switch sketches... Curious to hear what is the settings in user.h you load on a board ? Customised for a specific user? Artisan output active, or not, Bluetooth? What heating model PWM/PAC/ICC ? |
|
|
|
| mg512 |
Posted on 06/08/2019 5:44 AM
|
|
1/4 Pounder Posts: 189 Joined: March 04, 2018 |
Quote renatoa wrote: With the actual profiles handling in TC4, using a separate sketch, if an user want to use TC4 standalone and load a profile, then he is forced to play with Arduino, switching sketches. So a preloaded sketch is good only for those using full manual or connected to Artisan. Also, Artisan and BT are not allowed to be used in same sketch in current TC4 version, so an user wanting to use both should permanently switch sketches... Curious to hear what is the settings in user.h you load on a board ? Customised for a specific user? Artisan output active, or not, Bluetooth? What heating model PWM/PAC/ICC ? I don't think many people use the standalone mode these days. With Artisan, you don't need a different sketch to use Bluetooth. Only if you wanted to use the Android app, but again, I don't think many people use that. But good point - I will make that extra clear, the pre-flashed standard configuration is for use with Artisan. The standarc configuration is PWM mode, as this works with both DC and AC fans, the latter via an AC PWM dimmer board. |
|
|
|
| DavidLe |
Posted on 06/15/2019 5:37 AM
|
|
Newbie Posts: 3 Joined: May 12, 2019 |
Quote mg512 wrote: Quote DavidLe wrote: Hi @mg512, I have bought a Kit version with ship ID# (will send you if you need) via royalmail.com and paid via paypal, but the shipping were not track-able the status, its were not recognized ID# , please kindly advise how to check or please check on your side, i already email 2 times and over a week without any response from coffee@gerstgrasser.net. Please kindly advise. Thanks. Hi mg512, I got that shipment. Thanks much. Hi David, I received both your emails, and replied to both. I'm sorry that my messages don't seem to have gone through. Could you check your spam folder, just to see if that was the problem? Regarding tracking: There was an error in the tracking code, it should be 5443 instead of 5433. I've sent you the full code and tracking link by PM. Let me know in case this doesn't get through either. It looks like the parcel has arrived and they tried delivering it a few days ago already. Edited by JackH on 06/15/2019 4:05 PM |
|
|
|
| chmod755 |
Posted on 08/08/2019 1:44 PM
|
|
Newbie Posts: 10 Joined: March 31, 2019 |
Hi I hope someone sees this and can give me some guidance. I just received my TC4+ board and I'm not sure how to make the connections. I'm building an air blown, gas powered roaster. The air blower powered by an AC universal motor and is driven by a PWM AC dimmer circuit: https://www.tindi...50hz-60hz/ The dimmer circuit accepts 3.3V or 5V PWM signals up to 10kHz. The propane gas is controlled by a Clippard EVP proportional valve and driven by Clippard's EVPD driver board: https://clippard....lve-driver The driver board accepts signals as follows: 0 to 5 VDC, 0 to 10 VDC, 0 to 20 mA, 4 to 20 mA, PWM @ ?2 kHz duty cycle The TC4+ is able to control the dimmer circuit and the EVPD board on IO3 with IO3,x/n serial commands but I don't seem to be able to use IO2, OT1, or OT2. I'm using the aArtisanQ_PID sketch and i've configured it to use CONFIG_PWM. I've also tried installing a version of aArtisan_PID that enables high speed PWM on OT1 but it doesn't seem to work. Any ideas on how I can use the TC4+ to control both the blower and the gas valve? |
|
|
|
| mg512 |
Posted on 08/09/2019 3:57 AM
|
|
1/4 Pounder Posts: 189 Joined: March 04, 2018 |
Quote chmod755 wrote: Hi I hope someone sees this and can give me some guidance. I just received my TC4+ board and I'm not sure how to make the connections. I'm building an air blown, gas powered roaster. The air blower powered by an AC universal motor and is driven by a PWM AC dimmer circuit: https://www.tindi...50hz-60hz/ The dimmer circuit accepts 3.3V or 5V PWM signals up to 10kHz. The propane gas is controlled by a Clippard EVP proportional valve and driven by Clippard's EVPD driver board: https://clippard....lve-driver The driver board accepts signals as follows: 0 to 5 VDC, 0 to 10 VDC, 0 to 20 mA, 4 to 20 mA, PWM @ ?2 kHz duty cycle The TC4+ is able to control the dimmer circuit and the EVPD board on IO3 with IO3,x/n serial commands but I don't seem to be able to use IO2, OT1, or OT2. I'm using the aArtisanQ_PID sketch and i've configured it to use CONFIG_PWM. I've also tried installing a version of aArtisan_PID that enables high speed PWM on OT1 but it doesn't seem to work. Any ideas on how I can use the TC4+ to control both the blower and the gas valve? Hi chmod755! Good question. IO2 is meant for external interrupts, but you can do PWM on a number of other pins, for instance IO6. You should be able to use the command "AWRITE,D06,xxx" - could you give that a try and report back? It should work fine, it's just that aArtisan / aArtisanQ_PID don't have an extra command specifically for it. To connect to IO6, you can use 5V and GND from IO2 or from the power pins on the Arduino pin header, and IO6/D6 as the PWM pin (that's on the Arduino header near where the IO2/3 headers are). What's that version with high-speed PWM on OT1? I hadn't come across that before, but happy to have a look at what might be going on there. Edited by mg512 on 08/09/2019 4:23 AM |
|
|
|
| renatoa |
Posted on 08/09/2019 4:02 AM
|
|
Administrator Posts: 3005 Joined: September 30, 2016 |
Using AWRITE you should also pay attention to the frequency of generated PWM, if it is appropriate for the equipment being controlled. https://www.ardui...alogwrite/ PWM speed on OT1 can be changed using TIME_BASE in user.h, and indeed it seems there is someone who reserved a placeholder for a future intended high speed versions: // The faster frequencies below are for advanced users only, and will require changes to the PWM16 Library //#define TIME_BASE 15 // approx. 977 Hz //#define TIME_BASE 7 // approx. 1.95kHz //#define TIME_BASE 6 // approx. 2.2kHz //#define TIME_BASE 3 // approx. 3.9kHz No idea if such PWM16 custom library was ever been released... Edited by renatoa on 08/09/2019 4:47 AM |
|
|
|
| mg512 |
Posted on 08/09/2019 4:20 AM
|
|
1/4 Pounder Posts: 189 Joined: March 04, 2018 |
Quote renatoa wrote: Using AWRITE you should also pay attention to the frequency of generated PWM, if it is appropriate for the equipment being controlled. Oh, that's a good point, thank you for catching that. chmod755, you should probably be fine if you put the valve on IO3, and the PWM dimmer board on one of the standard PWM pins (e.g. IO6) with the AWRITE command. |
|
|
|
| tyrtok |
Posted on 08/18/2019 11:34 AM
|
|
Newbie Posts: 1 Joined: September 21, 2016 |
anyone got Artisan's 'follow background profile' to work with this? considering replacing the current fuji pxg4 with this. |
|
|
|
| renatoa |
Posted on 08/18/2019 12:03 PM
|
|
Administrator Posts: 3005 Joined: September 30, 2016 |
Depends a lot about how well is tuned the PID system. And also the machine build and working principle, especially the fact that the charging is made following a preheat phase, thus the machine having a turning point. If the above is true, then profile following is very tricky to tune, you should have set a minimum heater level, roughly in the same ballpark as used for preheat. When approaching turning point this level should be slightly bumped, else the PID logic will led to a massive undershot, in order to build an I term big enough to drive the roast, then will follow oscillation very hard to bring back the process on rails of the profile to follow. So you need a bit of practice to manually handle the roast to ensure a smooth landing on the desired profile path in the TP neighbourhood, then turn on the PID from that point. No wonder the best results testimonials are from FB users, that start the roast without preheat, from ambient temperature, so no TP and all the issues associated. |
|
|
|

| Jump to Forum: |
Similar Threads
| Thread | Forum | Replies | Last Post |
|---|---|---|---|
| Kaleido Roaster PID parameters | Roasting Coffee | 2 | 04/13/2024 3:07 PM |
| Green coffee sellers | Green Coffee | 19 | 04/10/2024 8:26 PM |
| Skywalker roaster mods | Other Roasters | 293 | 04/07/2024 4:31 PM |
| Shipping coffee overseas. | JAVA TRADING COMPANY | 4 | 04/04/2024 1:42 AM |
| Skywalker, the ALM chinese one pound roaster | Other Roasters | 215 | 04/02/2024 1:48 AM |
Powered by PHP-Fusion Copyright © 2024 PHP-Fusion Inc
Released as free software without warranties under GNU Affero GPL v3
Designed with ♥ by NetriXHosted by skpacman