Posted by rcwarship on 05/14/2009 11:58 PM
#15
John,
Thank you both very much for your comments & suggestions. I hope that I can generate enough heat out of a single element. If not, it can increase it to 3 if needed, while still remain withing the 15 amp self imposed limit. We'll have to see how it goes after I introduce air into the equation. I enjoyed your build log and thought that your design/build is great. Good stuff, thanks for sharing.
Chad,
I love the load/unload feature. Great idea, I just couldn't think of any way to include it in my build. Maybe in the next roaster!
I've made some progress over the past few days, shafting completed for the drum and couplings made. I am not too sure of my ability to get things lined up, so I figured I'd use leather to couple the shafts.
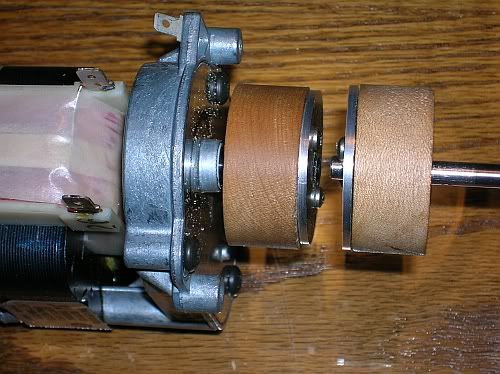
I turned a couple of maple rounds, roughed out a "trough", hammered a pin (coat hook) in each one so that the pin is just above the surface of the maple. After drilling a hole through the shafts for the pin, a big washer with a couple of screws in it holds it all together & the couplings are done. Just need to add the leather straps after mounting the motor. If the maple fails due to heat, I'll have to find some phenolic or something else (I don't have a way to mill anything, so I can't use metal).

Rollers, the drum internals next followed by mounting the oven & motor. Then the long awaited trial to see how the beans move around (angle on the internal vanes, no angle, etc).
Best regards to all,
Jon