
Login

Shoutbox
You must login to post a message.
allenb
09/15/2024 8:05 PM
JKnight 
renatoa
09/15/2024 1:26 AM
JonnyPanic,  ?
?
?renatoa
09/13/2024 1:32 PM
Krush and jdspainhour,

renatoa
09/12/2024 1:06 AM
 , KnittyBrew
allenb
09/10/2024 1:55 PM
Welcome to all new HRO members!!!

Forum Threads
Newest Threads
Hello from eastern PAUsing a TC4 with Art...
Skywalker roaster mods
Skywalker Roasts
My Sight Glass FB Ro...
Hottest Threads
| Skywalker roaster... | [386] |
| Skywalker Roasts | [102] |
| War on Farmers by... | [53] |
| Using a TC4 with ... | [41] |
In Memory Of Ginny

Donations
Latest Donations
dmccallum - 10.00
JackH - 25.00
snwcmpr - 10.00
Anonymous - 2.00
Anonymous - 5.00
dmccallum - 10.00
JackH - 25.00
snwcmpr - 10.00
Anonymous - 2.00
Anonymous - 5.00
Users Online
Guests Online: 4
Members Online: 0
Total Members: 8,494
Newest Member: JKnight
Members Online: 0
Total Members: 8,494
Newest Member: JKnight
View Thread
Who is here? 1 guest(s)
 CoffeeAir II Roaster Build
|
|
| jimcro55 |
Posted on 08/05/2010 1:45 PM
|
|
Newbie  Posts: 5 Joined: April 29, 2010 |
Quote freshbeans wrote: It looks great!. If you need to max-out airflow thru the perf, blow it all out and I'll send you some stainless mesh. Love the design ! -Scott The perforated metal never seems to do the trick for me. When trying to maximize the flow of air, I usually use Wire Mesh. Mainly stainless steel whether it be 304 or 316. Try these guys: http://www.bwire.... -J [Edit by mod - made link clickable] Edited by Koffee Kosmo on 08/05/2010 3:58 PM |
|
|
|
| seedlings |
Posted on 08/05/2010 2:45 PM
|
 1 1/2 Pounder  Posts: 4226 Joined: June 27, 2007 |
Mesh has the risk of too much air flow in areas where you don't want it, but I did use screen on my first leaf blower roaster. I have this CoffeeAir II setup re-welded and re-drilled. I'm using 1/8" drill bit this time, and I started with a sparse pattern, then put the air on it with 2# of greens. It took almost all the blower's power to get any movement, which means there's not enough flow. So I added a few more 1/8" holes and retested with air and coffee, and the flow was a little better with less power to the blower. I repeated the process until I had good circulation with as little blower power as possible (efficiency). Next step is saving up $120 for 50' of 10-3 copper wire to add a 220V outlet and put heat to it. CHAD Roaster: CoffeeAir II 2# DIY air roaster
Grinder: Vintage Grindmaster 500 Brewers: Vintage Cory DCU DCL, Aeropress, Press, Osaka Titanium pourover |
|
|
|
| Ringo |
Posted on 08/05/2010 3:50 PM
|
 Pounder  Posts: 474 Joined: January 14, 2010 |
Should only need 10-2, two hots and a ground.
All you need in life is ignorance and confidence, and then success is sure. Mark Twain
|
|
|
|
| SteveN |
Posted on 08/06/2010 6:27 AM
|
 1/4 Pounder  Posts: 127 Joined: March 16, 2010 |
Quote Ringo wrote: Should only need 10-2, two hots and a ground. Depends if you want anything to run on 110V (may need the neutral) or if it is only for a 220V element. |
|
|
|
| seedlings |
Posted on 08/06/2010 8:04 AM
|
|
1 1/2 Pounder Posts: 4226 Joined: June 27, 2007 |
Right, Steve. I actually want two separate 120V circuits as nothing will see full 240V. CHAD Roaster: CoffeeAir II 2# DIY air roaster
Grinder: Vintage Grindmaster 500 Brewers: Vintage Cory DCU DCL, Aeropress, Press, Osaka Titanium pourover |
|
|
|
| Dan |
Posted on 08/06/2010 12:16 PM
|
|
1 1/2 Pounder Posts: 1662 Joined: October 24, 2005 |
So, why not just run a 30-amp 110 V line and be done with it? That will get you 3300W. If you need two 110V circuits (can't imagine why) than you'll need to run 10/4. |
|
|
|
| seedlings |
Posted on 08/06/2010 1:27 PM
|
|
1 1/2 Pounder Posts: 4226 Joined: June 27, 2007 |
Dan, that makes too much sense. Now I'm trying to remember why I wanted it the other way <scratches head>. CHAD Roaster: CoffeeAir II 2# DIY air roaster
Grinder: Vintage Grindmaster 500 Brewers: Vintage Cory DCU DCL, Aeropress, Press, Osaka Titanium pourover |
|
|
|
| SteveN |
Posted on 08/06/2010 6:55 PM
|
|
1/4 Pounder Posts: 127 Joined: March 16, 2010 |
Quote seedlings wrote: Dan, that makes too much sense. Now I'm trying to remember why I wanted it the other way <scratches head>. CHAD I'm wiring mine with a 30A 220V line with 10/3 so I have access to both 110V and 220V, for the blower and element respectively. If you are using a two pole breaker (220V) then you could get away with a lower amperage breaker (if you split up the usage)... I'm trying to see if any of this reminds you of your previous rationale. Seems to make sense that if you want to use 110 then just wire it that way. |
|
|
|
| Beaner |
Posted on 08/06/2010 10:03 PM
|
 1/4 Pounder Posts: 143 Joined: July 22, 2009 |
Was thinking about the bean dumping door and was wondering if you considered a sliding up/down door. Held in place by a track on each side, a knob on the door to grab and pull up. I figure you've thought of this already but what the hay. I even pondered using this: http://www.woodcr...acity.aspx The rubber foot end (with rubber removed) would be attached to the door by whatever means you choose. Place the door in the desired position when closed, put the clamp in closed position and position it on the tube where you want the rubber foot end to attach to the door, then mark the screw holes holes on the clamp base. I know this is a funky idea but I thought I'd throw it out there. I don't have one of those clamps so haven't tested it out in theory. I've been thinking about using this as a possible way to open/close a bean dumping door on a batch size drum roaster. -Ron |
|
|
|
| dja |
Posted on 08/07/2010 9:16 AM
|
 1 1/2 Pounder Posts: 701 Joined: November 07, 2008 |
Should only need 10-2, two hots and a ground. Quoted from Ringo. to be within code for a 220 circuit he will need two L!'s one L2, and a Gnd(bare wire) he will have two seperate 120 volt circuits if he runs it with 10/3 W/Gnd. No reason to run to seperate L2 lines since they both end up on the same bus bar. he can then split the 220 up into one 220 plug and pull a 110 off of each side if it, with a 30 amp breaker which is enought for most cookstoves he'll have pleanty of power for his roaster. DJA Edited by dja on 08/07/2010 9:22 AM I pour Iron and roast Coffee Beans
 If life seems normal your not going fast enough Mario Andrette |
|
|
|
| Ringo |
Posted on 08/07/2010 10:48 AM
|
|
Pounder Posts: 474 Joined: January 14, 2010 |
Dja is right, three wire is old code. I did not know 4 wire was code now. There is a danger from using 110 of a 220 branch, if one leg pulls too much juice it may not trip, this could cause a fire. Also a danger of running 220 off two 110 branches, if one leg trips the motor or heaters running on 220 will stop running but will still be hot, if you touch a coil you will take a shock. Its is best if you need both 220 and 110 to run a small 220 sub pannel, these are cheap. You will have what ever power you need.
All you need in life is ignorance and confidence, and then success is sure. Mark Twain
|
|
|
|
| allenb |
Posted on 08/07/2010 11:03 AM
|
 Administrator Posts: 3885 Joined: February 23, 2010 |
Summary of electrical options: 1. Per Dan, one thirty-amp 120 V breaker for high amp 120 volt source. Requires 30 amp rated duplex receptacle ( plug has one vertical blade, one horizontal blade) to meet code. 2. 240 V circuit for two 120 volt loads. Requires 4 wires, two hots (A phase and a B phase, one neutral, one ground). One of your 120 volt loads from A phase, the other from B phase. Breaker can be a two pole 20 amp. Question for any electricians out there: For the 240 volt setup. Even though the loads through L1 and L2 will be less than 20 amps each, the neutral will be carrying return for both lines so does the wire have to be rated for 30 amps? Allen 1/2 lb and 1 lb drum, Siemens Sirocco fluidbed, presspot, chemex, cajun biggin brewer from the backwoods of Louisiana
|
|
|
|
| seedlings |
Posted on 08/07/2010 11:37 AM
|
|
1 1/2 Pounder Posts: 4226 Joined: June 27, 2007 |
(2) 8-ohm heat elements (1) 120v blower (1) 120v PID & 50A SSR Close to 15A to each heater, plus up to 6A for blower. #10 wire is rated up to 55A, so what would be the best way to wire this beast? The obvious is one 40A 120V circuit. Oh,and Ron, I like those latches! I am going to take the simple route and manually load/unload. CHAD Roaster: CoffeeAir II 2# DIY air roaster
Grinder: Vintage Grindmaster 500 Brewers: Vintage Cory DCU DCL, Aeropress, Press, Osaka Titanium pourover |
|
|
|
| seedlings |
Posted on 08/07/2010 1:35 PM
|
|
1 1/2 Pounder Posts: 4226 Joined: June 27, 2007 |
Circulation is good now. CHAD Roaster: CoffeeAir II 2# DIY air roaster
Grinder: Vintage Grindmaster 500 Brewers: Vintage Cory DCU DCL, Aeropress, Press, Osaka Titanium pourover |
|
|
|
| allenb |
Posted on 08/07/2010 2:31 PM
|
|
Administrator Posts: 3885 Joined: February 23, 2010 |
Quote seedlings wrote: (2) 8-ohm heat elements (1) 120v blower (1) 120v PID & 50A SSR Close to 15A to each heater, plus up to 6A for blower. #10 wire is rated up to 55A, so what would be the best way to wire this beast? The obvious is one 40A 120V circuit. Oh,and Ron, I like those latches! I am going to take the simple route and manually load/unload. CHAD Chad, I think you'll need a 50 amp breaker to service a full load of 36 + amps to meet the headroom requirements. I would install separate on-board fuse holders, one for each heater and one for fan and controls. If you're going the high amp 120 volt route you can just use an appropriately sized two row screw terminal strip with bridge plates to allow multiple outputs and wire from there to fuse holders... Also, great looking bean movement in the Coffeeair II! No erratic pulsing and a very even plume. Allen 1/2 lb and 1 lb drum, Siemens Sirocco fluidbed, presspot, chemex, cajun biggin brewer from the backwoods of Louisiana
|
|
|
|
| dja |
Posted on 08/07/2010 3:26 PM
|
|
1 1/2 Pounder Posts: 701 Joined: November 07, 2008 |
if he runs it with 10/3 W/Gnd he will be ok, put a breaker in the main panel rated for the full load or a little head run, then put in a sub panel with one double breaker for the 220 and two singles for the 110 legs, so that everything is covered at the load end. The L2 leg doesn't really have any load on it, if he was just going to run the heating coils and control the heat from both coils all he would need would be the two L1's but that won'e meet code anywhere in the states that I know of. Insurance people like things like that
Edited by dja on 08/07/2010 3:27 PM I pour Iron and roast Coffee Beans
If life seems normal your not going fast enough Mario Andrette |
|
|
|
| Ringo |
Posted on 08/07/2010 3:40 PM
|
|
Pounder Posts: 474 Joined: January 14, 2010 |
Seedlings One thing to think about, run 3 runs of 12-2 romex. 12-2 romex is cheap. You will get 20 amps each wire. One for each heater, third for controll and fans. I think you will save money. A 50 amp 110 is a lot of juice I think the wire would be expensive. Man that roaster really looks sweet, simple but works great. I believe you will have a very effecent roaster. All you need in life is ignorance and confidence, and then success is sure. Mark Twain
|
|
|
|
| seedlings |
Posted on 08/08/2010 5:05 PM
|
|
1 1/2 Pounder Posts: 4226 Joined: June 27, 2007 |
I think I like the sub-panel idea dja - especially since I already have a salvaged panel from work. Saving up for 10-3 w/gnd. CHAD Roaster: CoffeeAir II 2# DIY air roaster
Grinder: Vintage Grindmaster 500 Brewers: Vintage Cory DCU DCL, Aeropress, Press, Osaka Titanium pourover |
|
|
|
| JETROASTER |
Posted on 08/09/2010 7:40 AM
|
 Administrator Posts: 1782 Joined: March 06, 2010 |
Nice flow Bro'. -Scott |
|
|
|
| Dan |
Posted on 08/09/2010 12:14 PM
|
|
1 1/2 Pounder Posts: 1662 Joined: October 24, 2005 |
If you want to split off 110V, then you will need 10/3-w/G (aka 10/4). That will get you 6600 watts (30A * 220V = 6600W). Surely that is enough? If you install a 50A breaker, code requires wiring to carry 50A, which I believe is #8, not #10. I see no reason for a sub-panel unless this is in an outbuilding and you want to run other circuits (like lights and outlets), too. If you go with a sub-panel I believe you have to run its own ground to a ground rod. This varies, depending on the sub-panels location and distance from the main panel. You will need to put in a dedicated breaker in the main panel to match the sub's max loading. |
|
|
|
| seedlings |
Posted on 08/09/2010 12:50 PM
|
|
1 1/2 Pounder Posts: 4226 Joined: June 27, 2007 |
Wellll, it's a good thing I haven't started any wiring! My cousin is a master electrician. I'll ask him about it, so he'll know all the local regs. This site says 10 ga is good for 55A: http://www.powers...e_Size.htm CHAD Roaster: CoffeeAir II 2# DIY air roaster
Grinder: Vintage Grindmaster 500 Brewers: Vintage Cory DCU DCL, Aeropress, Press, Osaka Titanium pourover |
|
|
|
| Dan |
Posted on 08/09/2010 12:58 PM
|
|
1 1/2 Pounder Posts: 1662 Joined: October 24, 2005 |
"Ampacity" varies with application, regulations, and distance. You read the 'chassis' column. That is VERY short lengths contained within an electrical enclosure. Not the same application as a long run of romex in a wooden structure. There are formulas for calculating ampacity. The nominal ampacities for typical distances in home wiring (according to a wiring handbook) are: 16ga - 10A 14ga - 15A 12ga - 20A 10ga - 30A 8ga - 55A 6ga - 75A Ask your cousin to verify these for the group. Most states now subscribe to the same building codes. Thanks, Dan |
|
|
|
| seedlings |
Posted on 08/09/2010 1:54 PM
|
|
1 1/2 Pounder Posts: 4226 Joined: June 27, 2007 |
Then I want 10-3 with ground and a two pole 30A breaker. Get a hubble 4 conductor twist-lock outlet and do the wiring inside the roaster, which will be 240V to heaters in series, 120V to the PID and 120V to the blower. CHAD Roaster: CoffeeAir II 2# DIY air roaster
Grinder: Vintage Grindmaster 500 Brewers: Vintage Cory DCU DCL, Aeropress, Press, Osaka Titanium pourover |
|
|
|
| Dan |
Posted on 08/09/2010 2:20 PM
|
|
1 1/2 Pounder Posts: 1662 Joined: October 24, 2005 |
Sounds like a plan, to me. Make sure your SSR's are rated 220VAC. |
|
|
|
| seedlings |
Posted on 08/15/2010 6:15 PM
|
|
1 1/2 Pounder Posts: 4226 Joined: June 27, 2007 |
Quote Dan wrote: Sounds like a plan, to me. Make sure your SSR's are rated 220VAC. I have one 50A 240V SSR. Here are a bunch of pictures. No new information, just pictures: 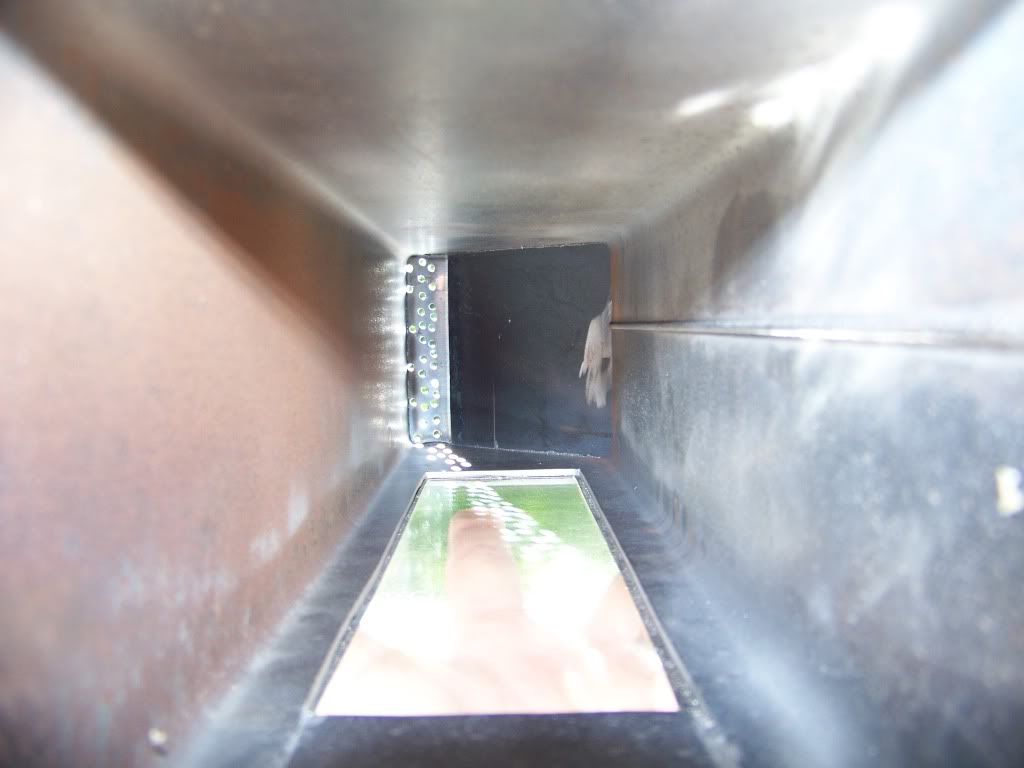 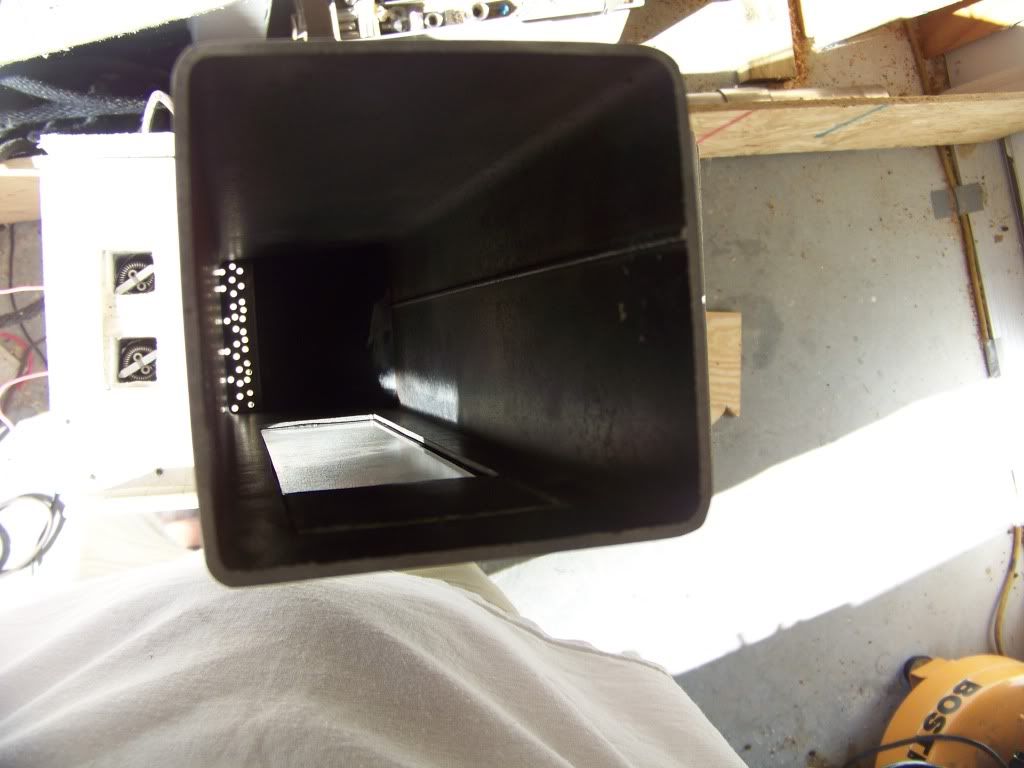 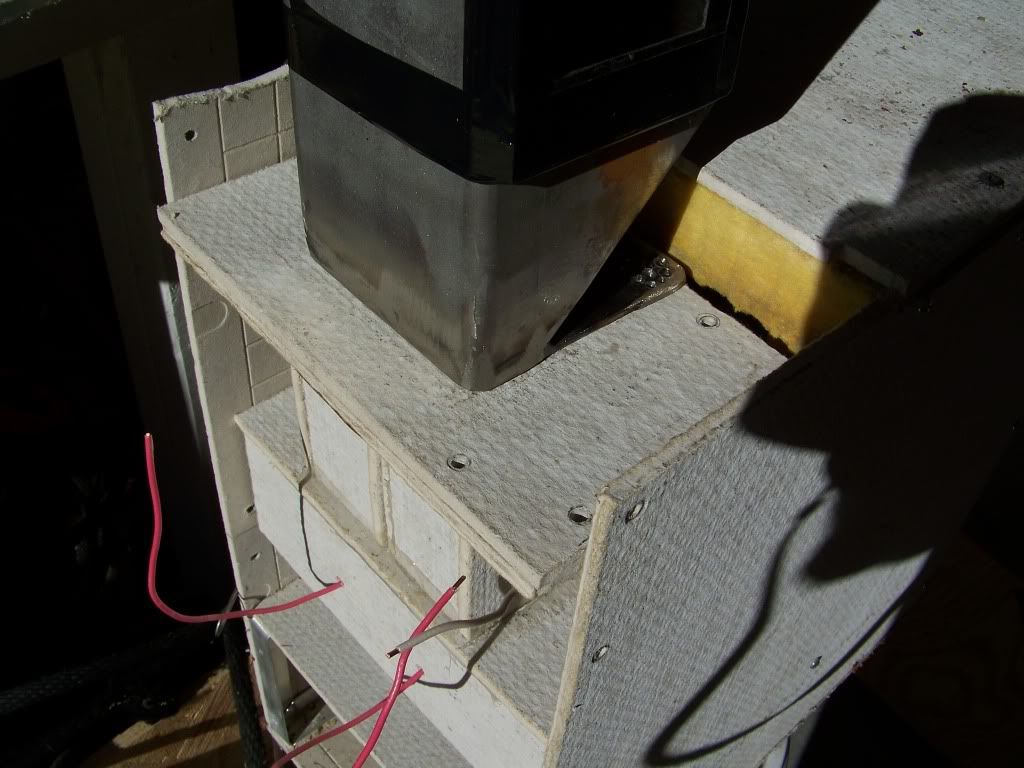 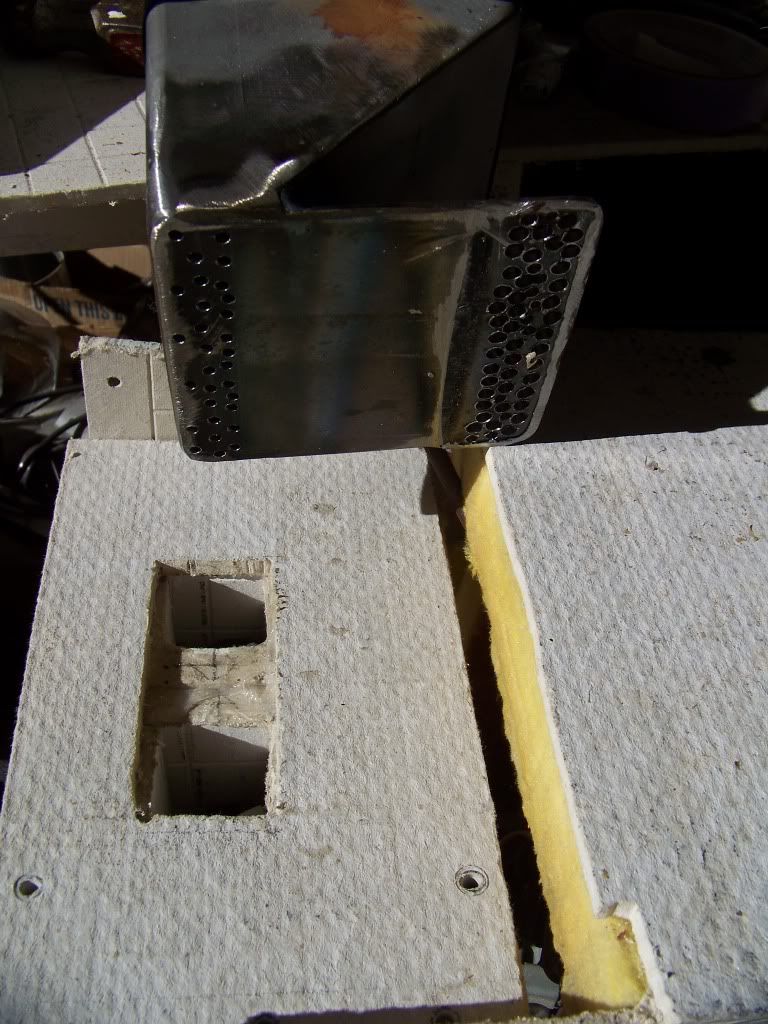 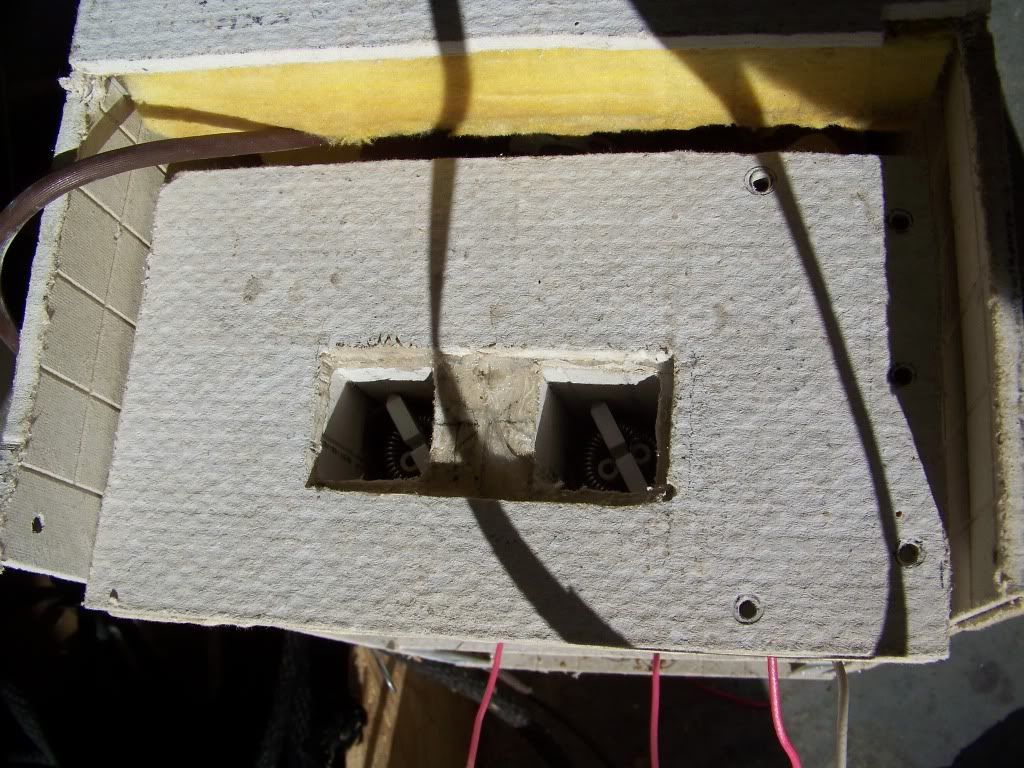 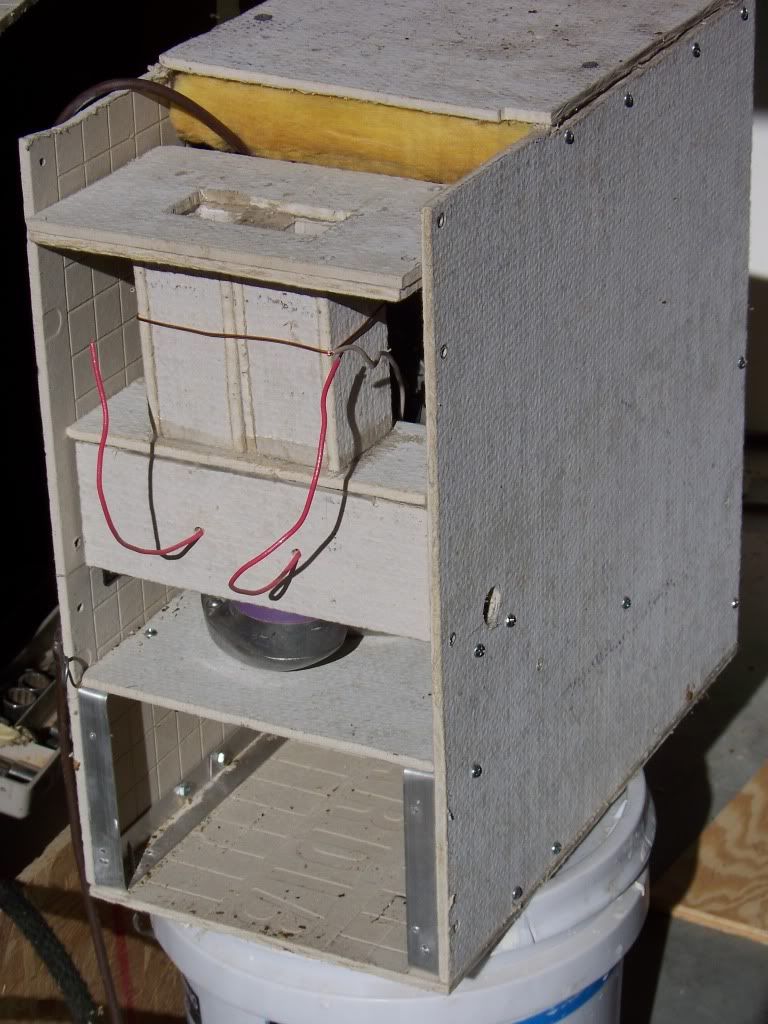 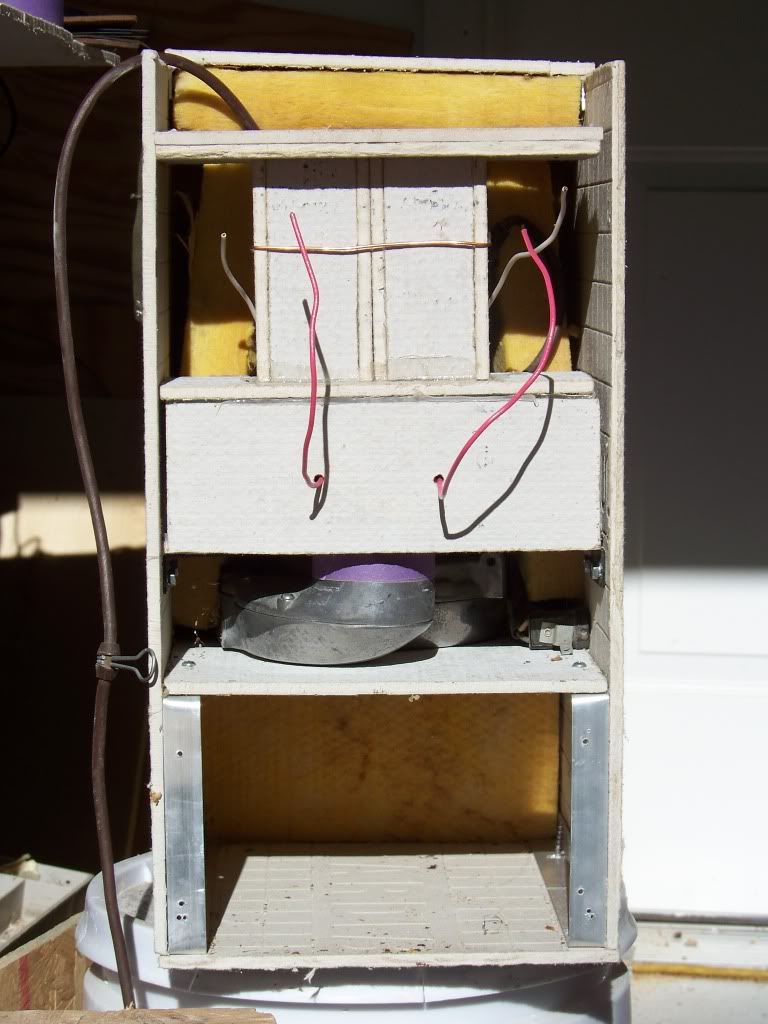 CHAD Roaster: CoffeeAir II 2# DIY air roaster
Grinder: Vintage Grindmaster 500 Brewers: Vintage Cory DCU DCL, Aeropress, Press, Osaka Titanium pourover |
|
|
|

| Jump to Forum: |
Powered by PHP-Fusion Copyright © 2024 PHP-Fusion Inc
Released as free software without warranties under GNU Affero GPL v3
Designed with ♥ by NetriXHosted by skpacman