
Login

Shoutbox
You must login to post a message.
renatoa
07/26/2024 3:49 PM
Bill grubbe and Jk, 
allenb
07/26/2024 5:15 AM
Spiderkw Welcome to HRO!

renatoa
07/24/2024 8:31 AM
ramiroflores and John123,

 ?
?
?renatoa
07/21/2024 1:18 AM
 , Luislobo
renatoa
07/19/2024 11:28 AM
Koepea,
Forum Threads
Newest Threads
Skywalker roaster modsBackground Roast Iss...
Hello from Arkansas
TC4ESP
Green coffee reviews
Hottest Threads
| Skywalker roaster... | [375] |
| TC4ESP | [115] |
| War on Farmers by... | [47] |
| Adventures in flu... | [26] |
| Hello! (soon) Roa... | [17] |
In Memory Of Ginny

Donations
Latest Donations
dmccallum - 10.00
JackH - 25.00
snwcmpr - 10.00
Anonymous - 2.00
Anonymous - 5.00
dmccallum - 10.00
JackH - 25.00
snwcmpr - 10.00
Anonymous - 2.00
Anonymous - 5.00
Users Online
Guests Online: 7
Members Online: 0
Total Members: 8,394
Newest Member: Bill grubbe
Members Online: 0
Total Members: 8,394
Newest Member: Bill grubbe
View Thread
Who is here? 1 guest(s)
 CoffeeAir II Roaster Build
|
|
| dja |
Posted on 12/13/2010 12:01 PM
|
 1 1/2 Pounder  Posts: 701 Joined: November 07, 2008 |
thats what I'm thinking also, be nice to try it the element didn't cost so darn much. I got to work on the new holder that I am making yesterday, but this leg problem keeps me pretty much in a chair, when I need to be standing in front of the mill cutting out the part that I need to put my roasters heater back together with. I was lucky yesterday, my brother in Tulsa brought me a heater coil from a motel type heat and air unit, it has some nice high temp wire with ceramic tube insulation on it that I can scavange for my hook up wire. anxiously awaiting the arrivial of the new Brazialian Burbon Beans, this D@@N roaster better be back together by the time they arrive. OOOOH well its all in fun and caffine. 
I pour Iron and roast Coffee Beans
 If life seems normal your not going fast enough Mario Andrette |
|
|
|
| dja |
Posted on 12/14/2010 6:06 AM
|
|
1 1/2 Pounder Posts: 701 Joined: November 07, 2008 |
Chad, I was finally able to get the new coils mounted in the roaster I connected them together in parrallel and checked the ohms on them, together they only pulled 17.5 ohms, so I went ahead and hooked up the power to them, surpise surpise when they build lots of heat in the heater section but very little coming out into the beans, guess I'm gonna have to open up the pref holes some to let the air flow better. I did have a beautiful spouting water fountain type air flow thru the beans though. I also plan on raising the elements closer to the air outlet (before final build I plan on cutting lower sections as short as possible) and I moved them closer to the rod that I have them mounted on, have not taken a pic yet but one will be forth coming this evening in my Air Roaster Thread. David I pour Iron and roast Coffee Beans
If life seems normal your not going fast enough Mario Andrette |
|
|
|
| seedlings |
Posted on 12/21/2010 12:07 PM
|
 1 1/2 Pounder Posts: 4226 Joined: June 27, 2007 |
Just roasted 2 pounds 3 ounces in 38F weather! I went to weigh out 1.75 pounds, and only had a little left, so I just roasted all of it. I did have to use the heatgun on low for about 5 minutes of the roast from bean temp 350F through about 410F, but it can be done! CHAD Roaster: CoffeeAir II 2# DIY air roaster
Grinder: Vintage Grindmaster 500 Brewers: Vintage Cory DCU DCL, Aeropress, Press, Osaka Titanium pourover |
|
|
|
| greencardigan |
Posted on 12/25/2010 7:19 PM
|
 1 1/2 Pounder Posts: 1185 Joined: November 21, 2010 |
Well done! That's 2 pounds 3 ounces (1kg) with 3600W of heating? So my 4800W shouldn't have trouble doing 1kg with a 60F ambient temp. |
|
|
|
| seedlings |
Posted on 12/26/2010 8:30 AM
|
|
1 1/2 Pounder Posts: 4226 Joined: June 27, 2007 |
Quote greencardigan wrote: Well done! That's 2 pounds 3 ounces (1kg) with 3600W of heating? So my 4800W shouldn't have trouble doing 1kg with a 60F ambient temp. 4800W sounds perfect! Heatgun is something like 1600W, but I used low, held 16" or so from the vac inlet... so that was surely less than 1000W? CHAD Roaster: CoffeeAir II 2# DIY air roaster
Grinder: Vintage Grindmaster 500 Brewers: Vintage Cory DCU DCL, Aeropress, Press, Osaka Titanium pourover |
|
|
|
| SteveN |
Posted on 12/26/2010 3:15 PM
|
 1/4 Pounder  Posts: 127 Joined: March 16, 2010 |
Quote seedlings wrote: Quote greencardigan wrote: Well done! That's 2 pounds 3 ounces (1kg) with 3600W of heating? So my 4800W shouldn't have trouble doing 1kg with a 60F ambient temp. 4800W sounds perfect! Heatgun is something like 1600W, but I used low, held 16" or so from the vac inlet... so that was surely less than 1000W? CHAD Agreed, I've managed 1.2kg with my 5500W element and I still think I can squeeze more efficiency out of it. |
|
|
|
| seedlings |
Posted on 02/07/2011 8:45 PM
|
|
1 1/2 Pounder Posts: 4226 Joined: June 27, 2007 |
Finally got this ridiculously long video to load to youtube: [video]http://www.youtube.com/watch?v=i7t78rf0z5k[/video] CHAD Roaster: CoffeeAir II 2# DIY air roaster
Grinder: Vintage Grindmaster 500 Brewers: Vintage Cory DCU DCL, Aeropress, Press, Osaka Titanium pourover |
|
|
|
| greencardigan |
Posted on 02/10/2011 4:36 PM
|
|
1 1/2 Pounder Posts: 1185 Joined: November 21, 2010 |
Thanks for the video! A video says a million words. I watched it at work with the sound low so I'll watch again later to hear what you're saying. You said previously that you only get minimal air leakage around the base of the RC. Is it leaking enough to feel the air coming out there? Also, what is the purpose of the wire around the HC? Edited by greencardigan on 02/10/2011 5:00 PM |
|
|
|
| seedlings |
Posted on 02/10/2011 10:24 PM
|
|
1 1/2 Pounder Posts: 4226 Joined: June 27, 2007 |
Yes I can feel hot air leaking out. If I could magically make the bottom plate differently, I would, but since it would take a re-weld (that I can't do) then it will stay this way. That wire held the cement board together while the silicone cured and I just never took it off. CHAD Roaster: CoffeeAir II 2# DIY air roaster
Grinder: Vintage Grindmaster 500 Brewers: Vintage Cory DCU DCL, Aeropress, Press, Osaka Titanium pourover |
|
|
|
| seedlings |
Posted on 04/13/2011 8:15 AM
|
|
1 1/2 Pounder Posts: 4226 Joined: June 27, 2007 |
An order has been placed for a CoffeeAir roaster, so the build will begin again. CHAD Roaster: CoffeeAir II 2# DIY air roaster
Grinder: Vintage Grindmaster 500 Brewers: Vintage Cory DCU DCL, Aeropress, Press, Osaka Titanium pourover |
|
|
|
| greencardigan |
Posted on 04/13/2011 9:47 AM
|
|
1 1/2 Pounder Posts: 1185 Joined: November 21, 2010 |
Do you plan to make any changes from your last build? Cement board heat chamber again? |
|
|
|
| seedlings |
Posted on 04/15/2011 8:44 AM
|
|
1 1/2 Pounder Posts: 4226 Joined: June 27, 2007 |
Quote greencardigan wrote: Do you plan to make any changes from your last build? Cement board heat chamber again? I'll have a new, different blower to design around, but otherwise only slight modifications, especially how the hopper sits on the heater. The hopper will have a wider base and sit shallower in the roaster top. Other than that, pretty much the same. CHAD
seedlings attached the following image:

Roaster: CoffeeAir II 2# DIY air roaster
Grinder: Vintage Grindmaster 500 Brewers: Vintage Cory DCU DCL, Aeropress, Press, Osaka Titanium pourover |
|
|
|
| seedlings |
Posted on 05/14/2011 10:03 PM
|
|
1 1/2 Pounder Posts: 4226 Joined: June 27, 2007 |
The CoffeeAirII 2 build is underway.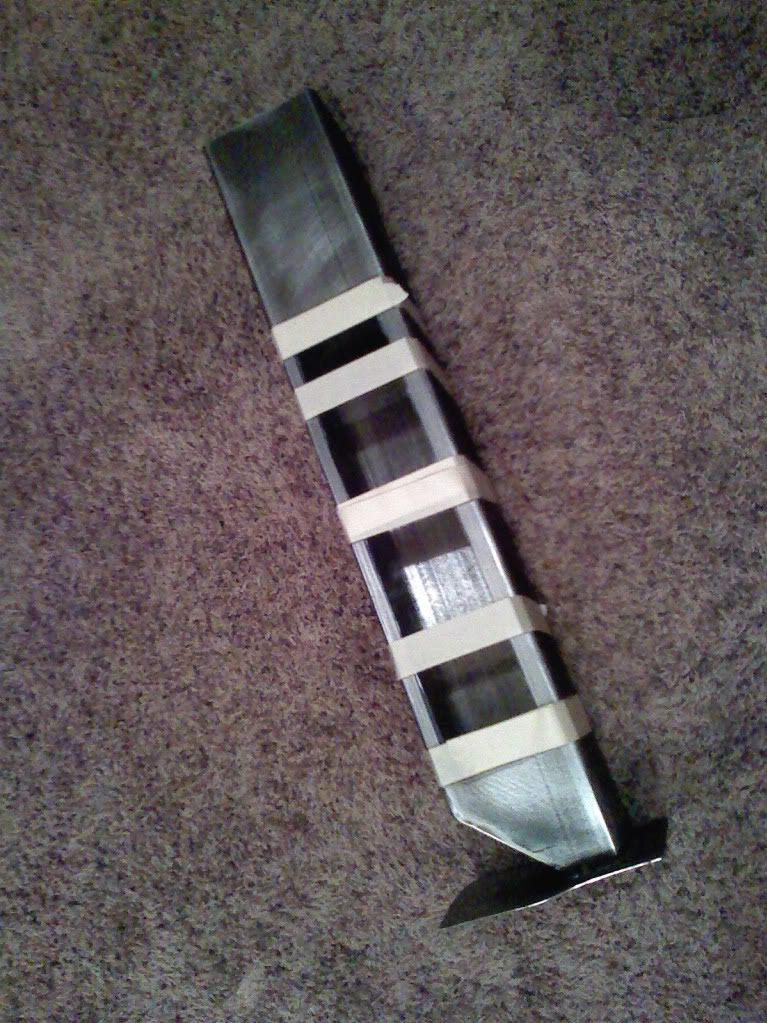 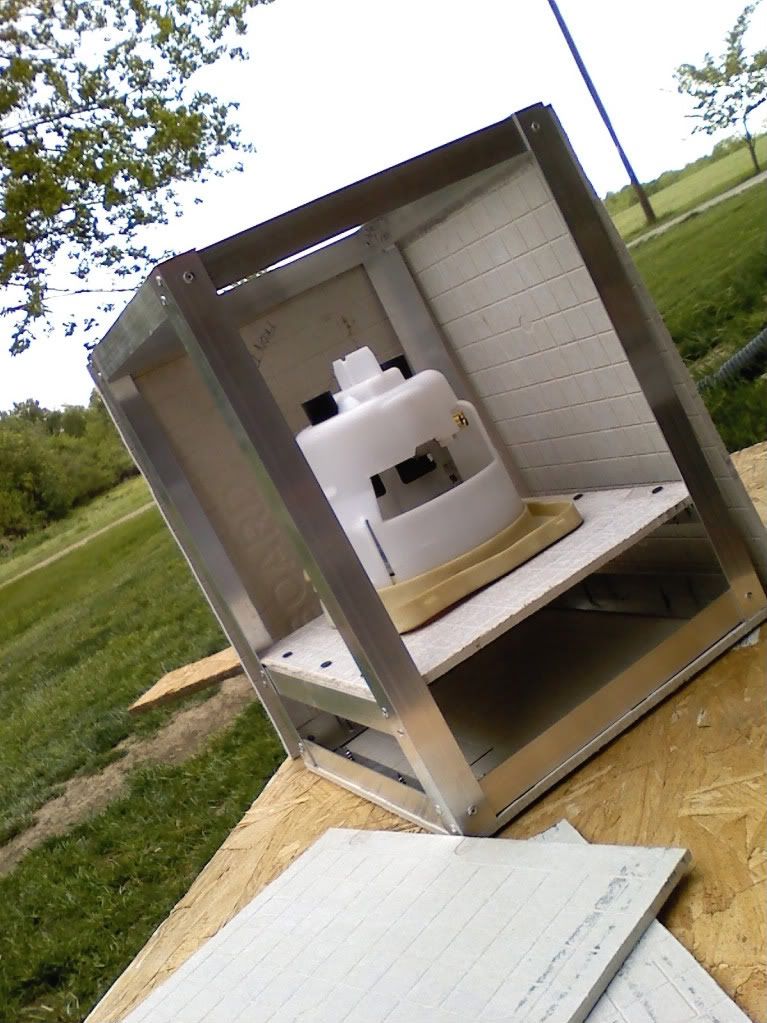 CHAD Roaster: CoffeeAir II 2# DIY air roaster
Grinder: Vintage Grindmaster 500 Brewers: Vintage Cory DCU DCL, Aeropress, Press, Osaka Titanium pourover |
|
|
|
| allenb |
Posted on 05/15/2011 11:02 AM
|
 Administrator Posts: 3869 Joined: February 23, 2010 |
Looking good Chad! Whats the white plastic looking thing inside your enclosure? 1/2 lb and 1 lb drum, Siemens Sirocco fluidbed, presspot, chemex, cajun biggin brewer from the backwoods of Louisiana
|
|
|
|
| seedlings |
Posted on 05/15/2011 3:23 PM
|
|
1 1/2 Pounder Posts: 4226 Joined: June 27, 2007 |
Quote allenb wrote: Looking good Chad! Whats the white plastic looking thing inside your enclosure? The vacuum motor came with a rubber 'shock' mount and a plastic cover. I figured it could help with reducing noise. The inside will be lined with 1.5" rigid industrial fiberglass. CHAD Roaster: CoffeeAir II 2# DIY air roaster
Grinder: Vintage Grindmaster 500 Brewers: Vintage Cory DCU DCL, Aeropress, Press, Osaka Titanium pourover |
|
|
|
| JETROASTER |
Posted on 05/16/2011 7:48 AM
|
 Administrator Posts: 1780 Joined: March 06, 2010 |
Looks great!! Is that main housing right-side up?( I'm trying to figure out the dark area hidden behind the blower.) .. Very cool. - Scott |
|
|
|
| seedlings |
Posted on 05/16/2011 7:52 AM
|
|
1 1/2 Pounder Posts: 4226 Joined: June 27, 2007 |
Right side up, no dark area - it's an optical illusion. There are two black rubber 'bushings' on top, and you're seeing the two square openings to the motor. CHAD Roaster: CoffeeAir II 2# DIY air roaster
Grinder: Vintage Grindmaster 500 Brewers: Vintage Cory DCU DCL, Aeropress, Press, Osaka Titanium pourover |
|
|
|
| seedlings |
Posted on 05/25/2011 8:39 PM
|
|
1 1/2 Pounder Posts: 4226 Joined: June 27, 2007 |
The new roaster is 'finished' awaiting decent weather for a test roast.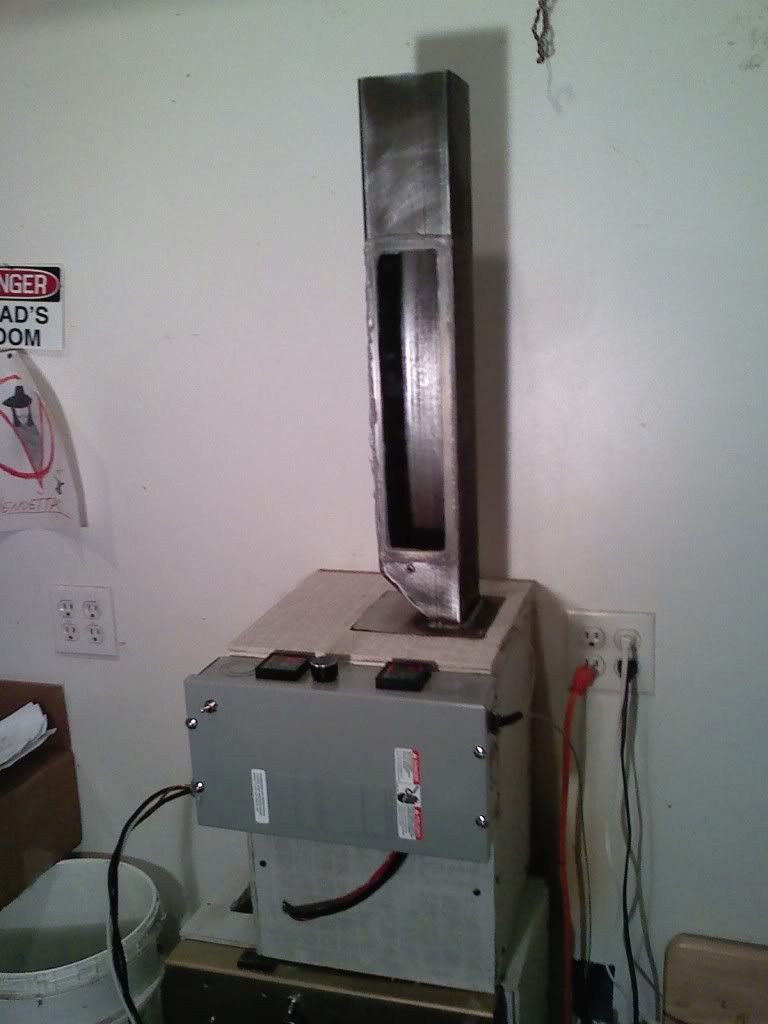 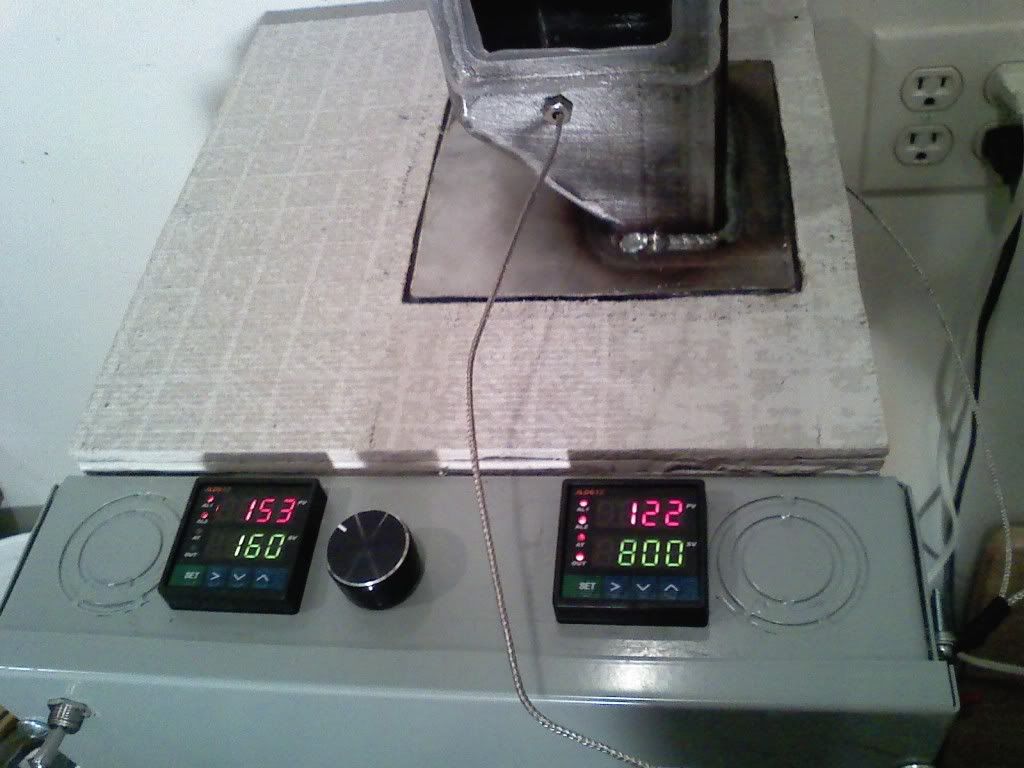 CHAD Roaster: CoffeeAir II 2# DIY air roaster
Grinder: Vintage Grindmaster 500 Brewers: Vintage Cory DCU DCL, Aeropress, Press, Osaka Titanium pourover |
|
|
|
| greencardigan |
Posted on 05/25/2011 8:48 PM
|
|
1 1/2 Pounder Posts: 1185 Joined: November 21, 2010 |
Nice! Keep this one and give the old one away? ;) |
|
|
|
| seedlings |
Posted on 05/25/2011 8:50 PM
|
|
1 1/2 Pounder Posts: 4226 Joined: June 27, 2007 |
Quote greencardigan wrote: Nice! Keep this one and give the old one away? ;) Nope. I was hired to make one like mine. I didn't cut quite as many corners since this was a paying customer. CHAD Roaster: CoffeeAir II 2# DIY air roaster
Grinder: Vintage Grindmaster 500 Brewers: Vintage Cory DCU DCL, Aeropress, Press, Osaka Titanium pourover |
|
|
|
| allenb |
Posted on 05/25/2011 10:54 PM
|
|
Administrator Posts: 3869 Joined: February 23, 2010 |
Great looking roaster Chad. I'm envious! Nice touch with the controls enclosure. Allen 1/2 lb and 1 lb drum, Siemens Sirocco fluidbed, presspot, chemex, cajun biggin brewer from the backwoods of Louisiana
|
|
|
|
| JETROASTER |
Posted on 05/26/2011 8:20 AM
|
|
Administrator Posts: 1780 Joined: March 06, 2010 |
Very Nice! I hope it was profitable as well! Had you considered a leasing program in the future? You retain the asset,... steady income(longterm)...scheduled maintainance program,..upgrades, yada,yada,yada. ....I'm jus' sayin'... -Nice machine! -Scott |
|
|
|
| dja |
Posted on 05/26/2011 9:52 AM
|
|
1 1/2 Pounder Posts: 701 Joined: November 07, 2008 |
you could go to the lumber yard and get one of them little pagoda style post toppers and drill some holes in it add some screen wire on the inside to top the bean hopper with. no legs, hows it gonna walk off in the middle of the night. if you put a flap inside that is hinged so when you flipped it in to partially close off the hopper you would have an automatice bean dump. I pour Iron and roast Coffee Beans
If life seems normal your not going fast enough Mario Andrette |
|
|
|
| seedlings |
Posted on 05/26/2011 10:22 AM
|
|
1 1/2 Pounder Posts: 4226 Joined: June 27, 2007 |
Quote dja wrote: if you put a flap inside that is hinged so when you flipped it in to partially close off the hopper you would have an automatice bean dump. That reminds me... I have to put a HANDLE on this one. I mishandled pliers dumping my hopper the other day and lost a pound of 435F coffee on the ground. CHAD Roaster: CoffeeAir II 2# DIY air roaster
Grinder: Vintage Grindmaster 500 Brewers: Vintage Cory DCU DCL, Aeropress, Press, Osaka Titanium pourover |
|
|
|
| seedlings |
Posted on 05/26/2011 10:26 AM
|
|
1 1/2 Pounder Posts: 4226 Joined: June 27, 2007 |
Quote freshbeans wrote: Very Nice! I hope it was profitable as well! Had you considered a leasing program in the future? You retain the asset,... steady income(longterm)...scheduled maintainance program,..upgrades, yada,yada,yada. ....I'm jus' sayin'... -Nice machine! -Scott Profitable? I dunno yet... spent all the money he sent for parts, but I'm several hours over my original quote... so I hope he's not too frustrated that my guesstimate was off. CHAD Roaster: CoffeeAir II 2# DIY air roaster
Grinder: Vintage Grindmaster 500 Brewers: Vintage Cory DCU DCL, Aeropress, Press, Osaka Titanium pourover |
|
|
|

| Jump to Forum: |
Powered by PHP-Fusion Copyright © 2024 PHP-Fusion Inc
Released as free software without warranties under GNU Affero GPL v3
Designed with ♥ by NetriXHosted by skpacman