Login
Shoutbox
You must login to post a message.
renatoa
07/26/2024 3:49 PM
Bill grubbe and Jk, 

allenb
07/26/2024 5:15 AM
Spiderkw Welcome to HRO!


renatoa
07/24/2024 8:31 AM
ramiroflores and John123,

 ?
?

 ?
?renatoa
07/21/2024 1:18 AM
 , Luislobo
renatoa
07/19/2024 11:28 AM
Koepea, 

Forum Threads
Newest Threads
Skywalker roaster modsBackground Roast Iss...
Hello from Arkansas
TC4ESP
Green coffee reviews
Hottest Threads
| Skywalker roaster... | [375] |
| TC4ESP | [115] |
| War on Farmers by... | [47] |
| Adventures in flu... | [26] |
| Hello! (soon) Roa... | [17] |
Donations
Latest Donations
dmccallum - 10.00
JackH - 25.00
snwcmpr - 10.00
Anonymous - 2.00
Anonymous - 5.00
dmccallum - 10.00
JackH - 25.00
snwcmpr - 10.00
Anonymous - 2.00
Anonymous - 5.00
Users Online
Guests Online: 10
Members Online: 0
Total Members: 8,393
Newest Member: Bill grubbe
Members Online: 0
Total Members: 8,393
Newest Member: Bill grubbe
View Thread
Who is here? 1 guest(s)
|
My 1kg Electric Air Roaster build
|
|
| greencardigan |
Posted on 06/18/2011 6:50 PM
|
|
1 1/2 Pounder  Posts: 1185 Joined: November 21, 2010 |
Not sure. I will spend time getting the heating elements and heat chamber better this time and go from there. I've decided I want to try electric again before I turn to gas. Brad |
|
|
|
| Will2 |
Posted on 11/10/2017 5:58 AM
|
|
1/4 Pounder  Posts: 154 Joined: March 24, 2015 |
Quote Will2 wrote: Quote greencardigan wrote: ... I am seriously considering scrapping the BM and building another 3/4 kg (1.5 pound) electric air roaster. Many advantages but a few disadvantages. More controllable, better mixing, easy cooling, lees chaff mess with chaff collector, no need handle hot parts with gloves. Downsides are less efficient (will need approx 3.5 - 4 KW of heating) and more expensive. You probably write exactly about this:  If the shipping costs were not so high, I would have sent it to you. And if you have a weak electricity supply then I have a friend of an electrician in Woollahra. Viliam
|
|
|
|
| Will2 |
Posted on 11/10/2017 5:59 AM
|
|
1/4 Pounder  Posts: 154 Joined: March 24, 2015 |
Quote greencardigan wrote: That looks fantastic! Here's my lame version. And yes, I would have to get a 15A 240V circuit installed sometime.  Viliam
|
|
|
|
| Will2 |
Posted on 11/11/2017 2:36 PM
|
|
1/4 Pounder  Posts: 154 Joined: March 24, 2015 |
On youtube I posted some of my videos. Many of you have already seen them. I focused mainly on showing the deficiencies of some of my constructions, I have corrected these shortcomings later. Their sense was not to show how well it works, but what needs to be improved. I hope it was so understood because I added a short explanation to the video. My philosophy is a bit different than the OGH roaster, I think we have the same opinion with Brad. That's why I do not even create my own thread. Now it's 5 years since I bought my first TC4 and thanks to Brad I use aArtisanQ_PID. Previously, I used manual control and Artisan on PC. I have not enough patience to write extensive contributions, not the ability to write in this language. But I think it will not be a big problem to fix Brad's lame roaster, I'd like to help and try it out beforehand. And perhaps also make further bigger. Edited by Will2 on 11/11/2017 2:44 PM Viliam
|
|
|
|
| Will2 |
Posted on 11/13/2017 11:21 AM
|
|
1/4 Pounder  Posts: 154 Joined: March 24, 2015 |
Nothing is resistant to improper handling. To TC4 I connected a smaller roaster 80/70mm, electric cord to the heating I forgot to replace. There is not much to guess what happened. Now I can take pictures of how to make a new heater 240V/4kW.
Will2 attached the following image:
Viliam
|
|
|
|
| Will2 |
Posted on 12/03/2017 10:54 AM
|
|
1/4 Pounder  Posts: 154 Joined: March 24, 2015 |
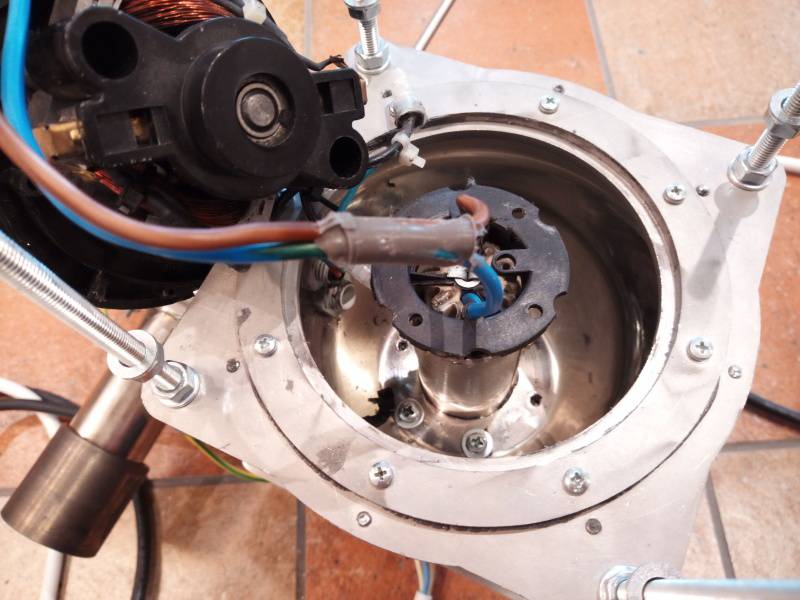
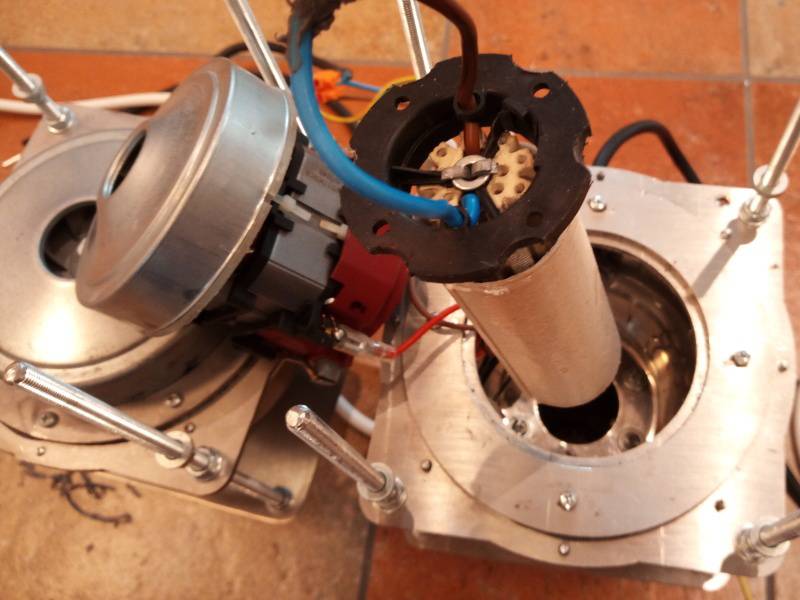
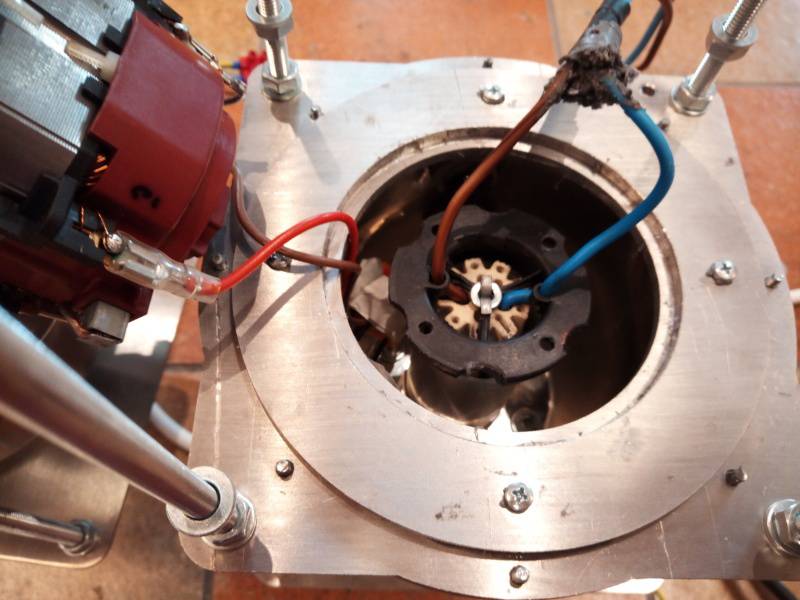
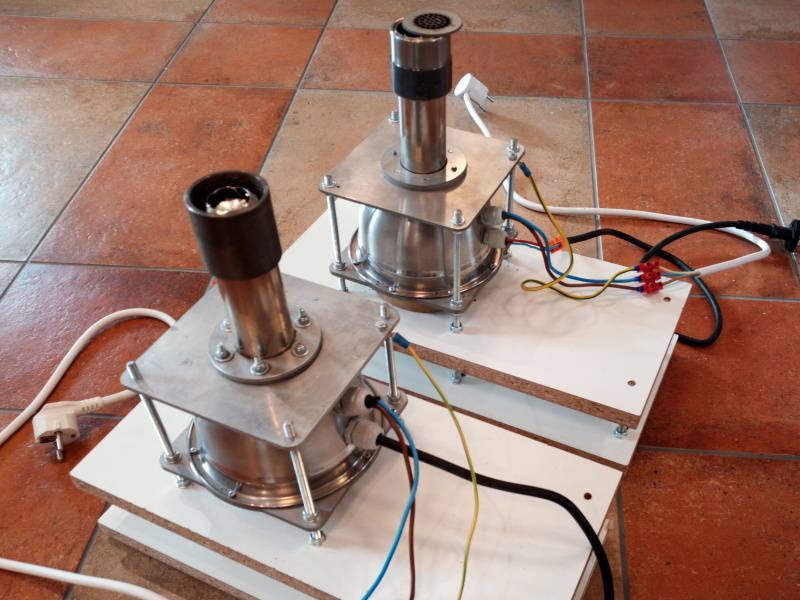
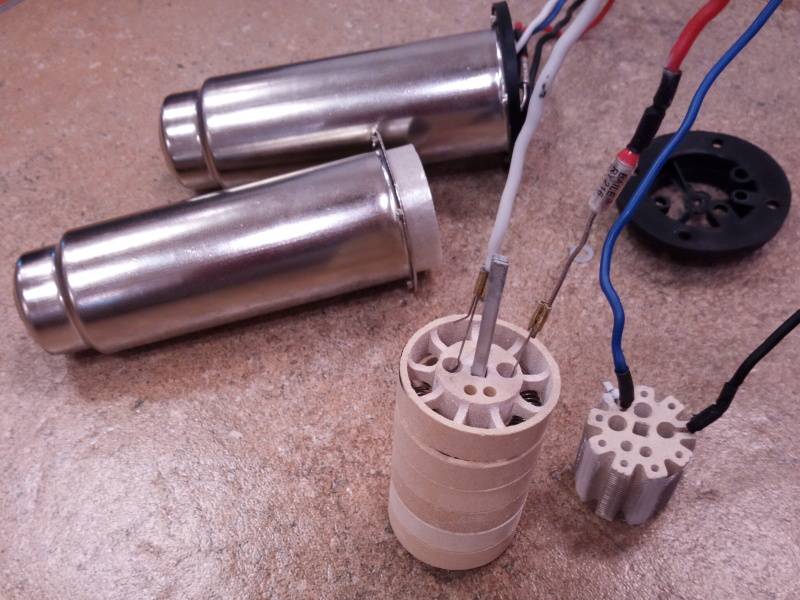
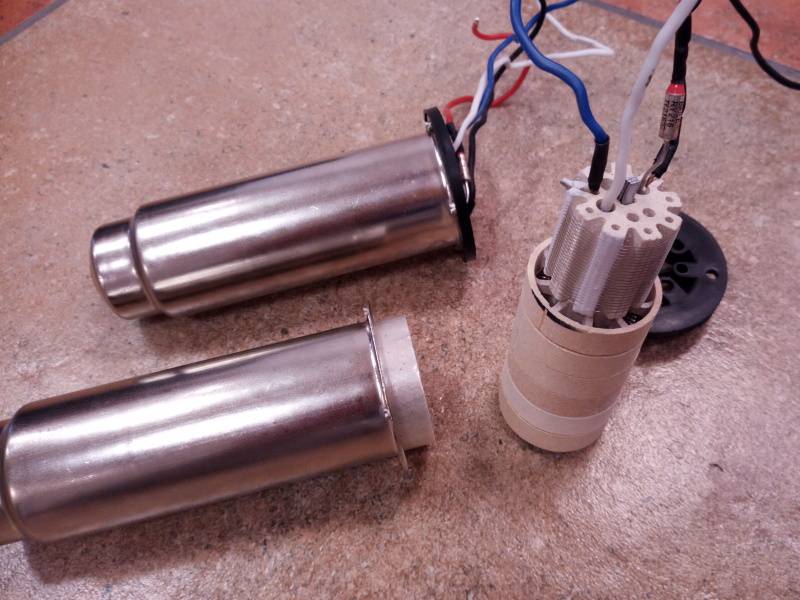
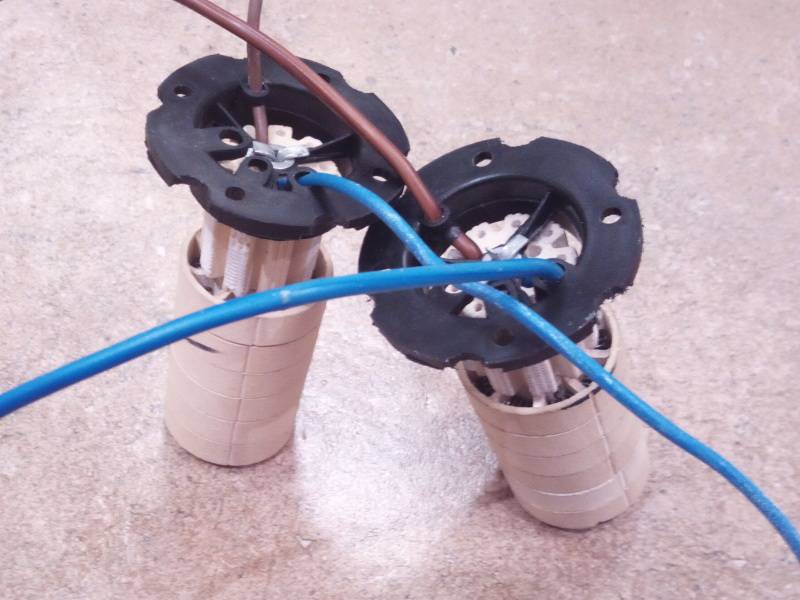
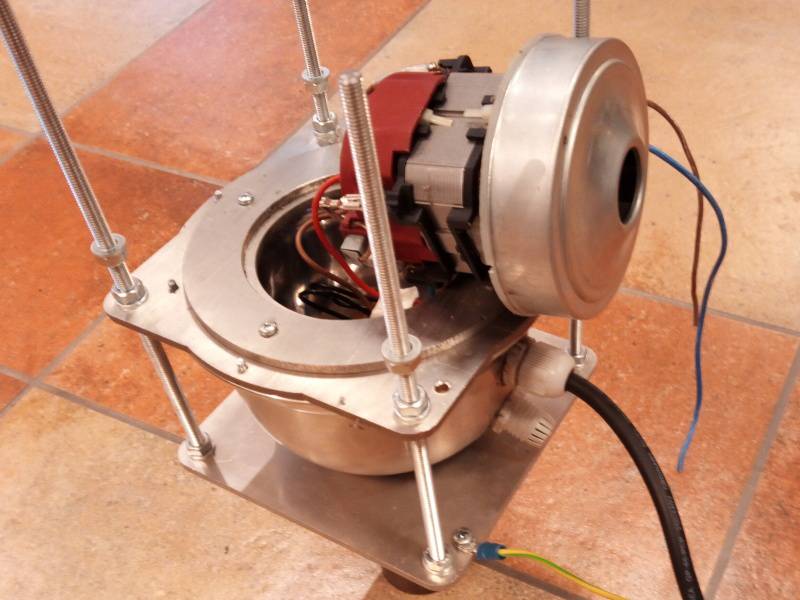
I had some time, so I changed the heaters in both roasters. There are more photos, so I'll continue step by step. In both roasters were used 4kw / 240V heaters, vacuum cleaner engines are 500 and 700W. Can you imagine how I roasted 150g of coffee with 4kw heat element? Photos as the heaters were removed from roasters:
Will2 attached the following images:
Viliam
|
|
|
|
| Will2 |
Posted on 12/03/2017 12:58 PM
|
|
1/4 Pounder  Posts: 154 Joined: March 24, 2015 |
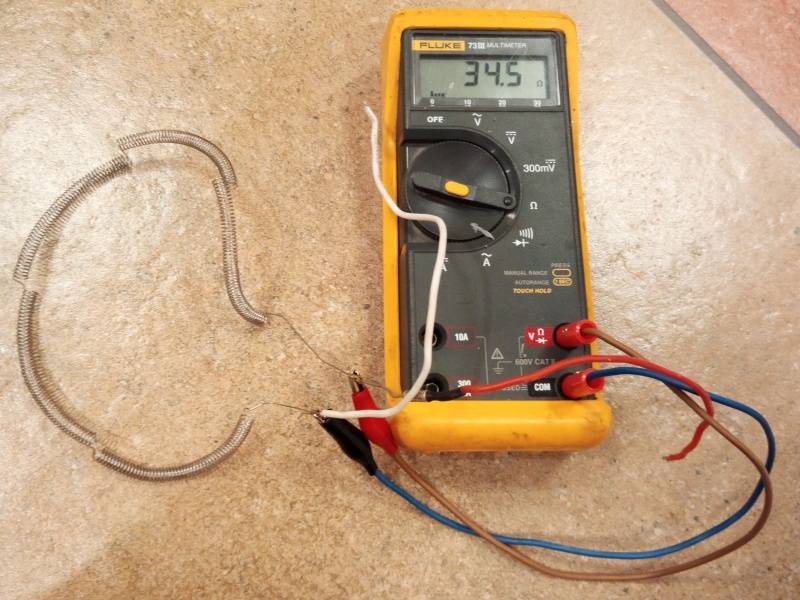
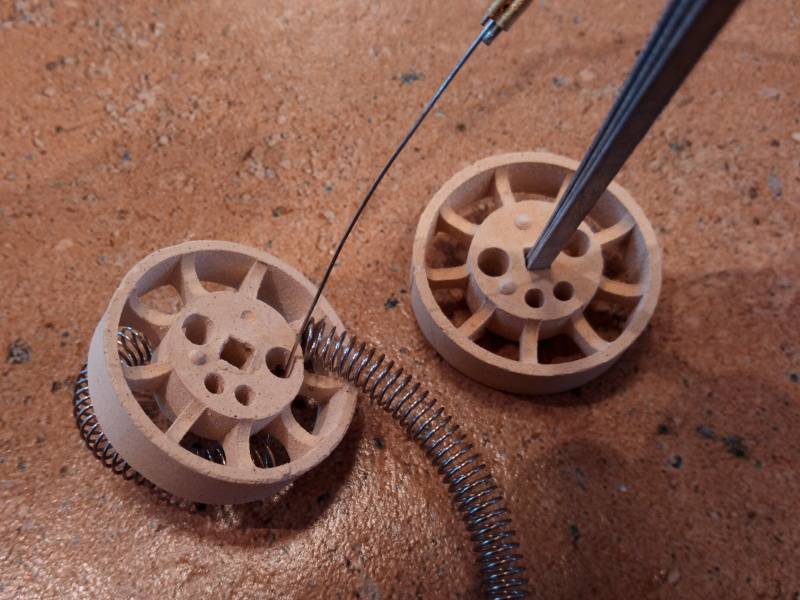
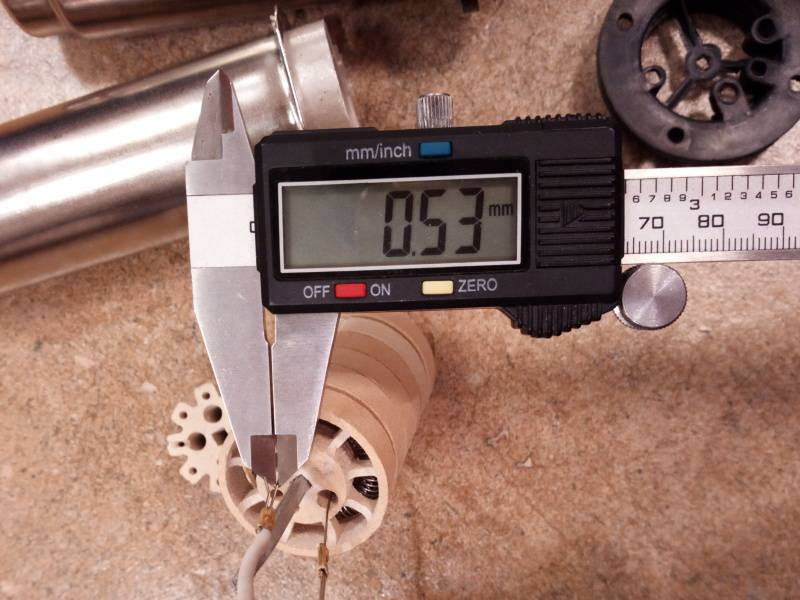
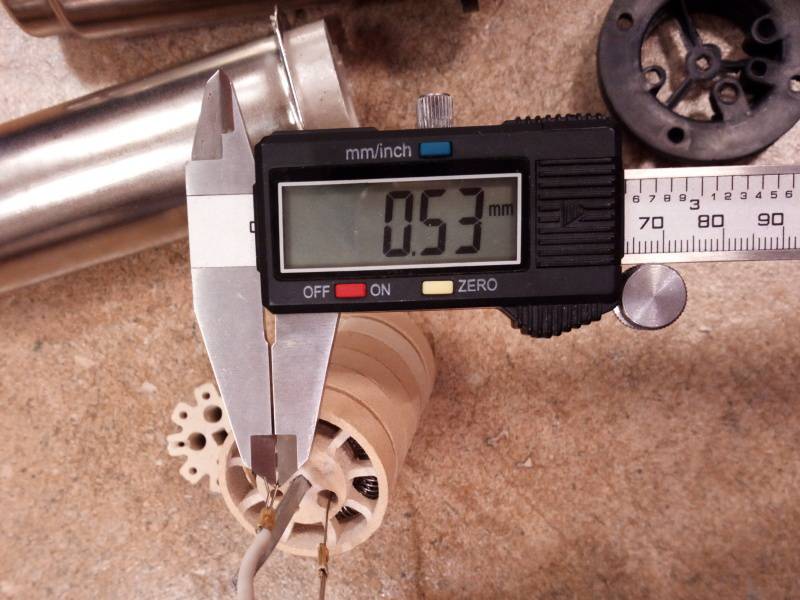
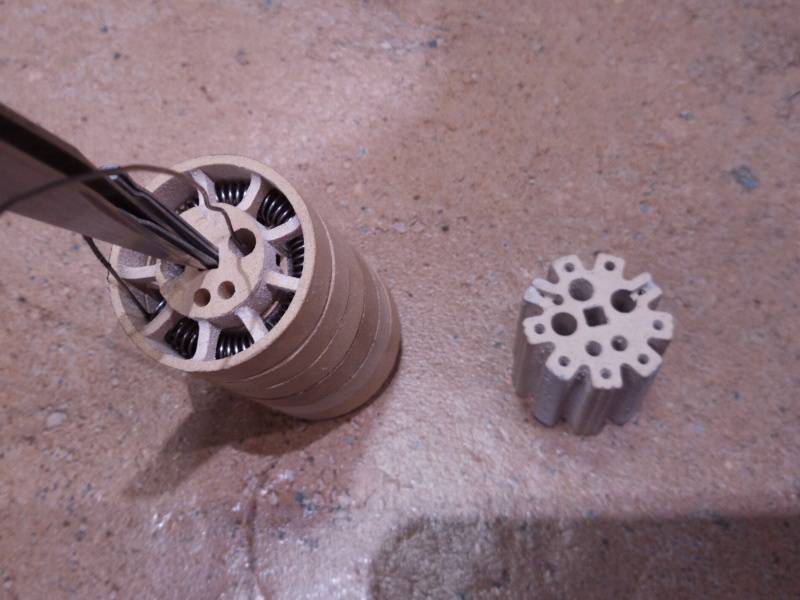
It is useful to find a heat gun with a suitable ceramic heating element for the reconstruction. We analyze the element and remove the original wire 0.5mm. P.S. pictures are always displayed in the reverse order.
Will2 attached the following images:
Viliam
|
|
|
|
| Will2 |
Posted on 12/03/2017 1:22 PM
|
|
1/4 Pounder  Posts: 154 Joined: March 24, 2015 |
After removing the original coils we will make new coils of Kanthal wire 0.7mm.
Edited by Will2 on 12/03/2017 1:31 PM Viliam
|
|
|
|
| Will2 |
Posted on 12/03/2017 1:40 PM
|
|
1/4 Pounder  Posts: 154 Joined: March 24, 2015 |
P: S: I have uploaded 10 photos, none can be seen.
Viliam
|
|
|
|
| Will2 |
Posted on 12/03/2017 1:40 PM
|
|
1/4 Pounder  Posts: 154 Joined: March 24, 2015 |
P: S: now one by one, order mixed.
Will2 attached the following images:
Edited by Will2 on 12/03/2017 1:54 PM Viliam
|
|
|
|
| Will2 |
Posted on 12/03/2017 2:07 PM
|
|
1/4 Pounder  Posts: 154 Joined: March 24, 2015 |
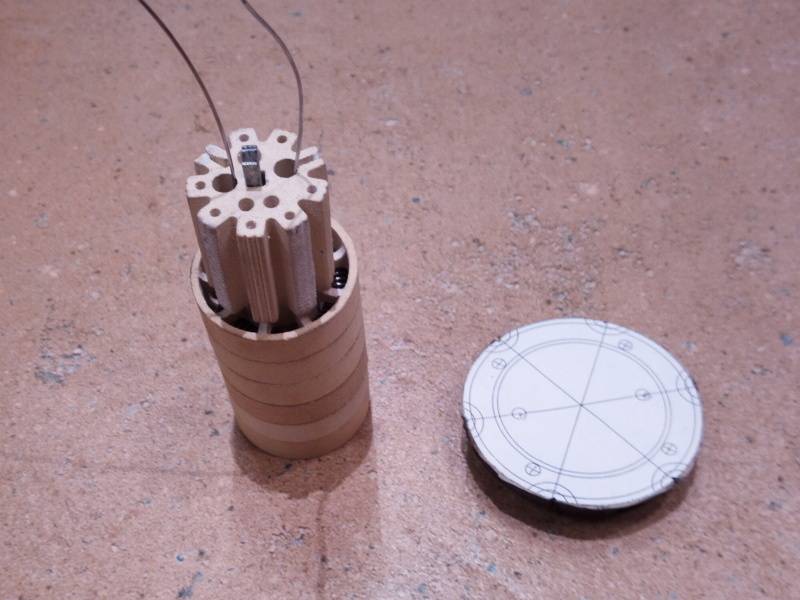
Finally mount the new elements back. That is all.
Will2 attached the following images:
Viliam
|
|
|
|
| JackH |
Posted on 12/03/2017 2:44 PM
|
|
Administrator  Posts: 1809 Joined: May 10, 2011 |
I thought you were going to use PicR.de to host your photos.
---Jack
KKTO Roaster. |
|
|
|
| Will2 |
Posted on 12/03/2017 3:02 PM
|
|
1/4 Pounder  Posts: 154 Joined: March 24, 2015 |
Yes, but so it was on many pages, now it's smaller, this photo could not be displayed:  I still see that in the photo img_20171113_145122_1.jpg is the original coil 0.5mm. The right picture is: 
Edited by Will2 on 12/03/2017 3:15 PM Viliam
|
|
|
|
| Will2 |
Posted on 12/03/2017 3:29 PM
|
|
1/4 Pounder  Posts: 154 Joined: March 24, 2015 |
Both pictures are correct, the first one is for disassembly. P.S. 2 pictures and as much space. (on HRO but less) Viliam
|
|
|
|
| JackH |
Posted on 12/03/2017 4:22 PM
|
|
Administrator  Posts: 1809 Joined: May 10, 2011 |
Can you set the thumbnail size ? Large thumbnail on imgur:  Small Thumbnail 
Edited by JackH on 12/03/2017 4:28 PM ---Jack
KKTO Roaster. |
|
|
|
| Will2 |
Posted on 12/03/2017 5:07 PM
|
|
1/4 Pounder  Posts: 154 Joined: March 24, 2015 |
I think picr.de does not allow it. You put it in?: https://imgur.com/vKUXYMzl https://imgur.com/vKUXYMzt   I see that yes. Viliam
|
|
|
|
| JackH |
Posted on 12/04/2017 1:35 PM
|
|
Administrator  Posts: 1809 Joined: May 10, 2011 |
Imgur allows you to select the size of the thumbnail view: I attached the image as usual, but right-clicked it to get the image location on the Homeroasters forum and used it to display and place the image. A trick Greencardigan showed me.
JackH attached the following image:
Edited by JackH on 12/04/2017 1:41 PM ---Jack
KKTO Roaster. |
|
|
|
| koffeegrounds |
Posted on 12/18/2017 7:38 PM
|
|
Newbie  Posts: 18 Joined: December 18, 2017 |
I have these heating elements I will offer to the group |
|
|
|
| Jump to Forum: |
Powered by PHP-Fusion Copyright © 2024 PHP-Fusion Inc
Released as free software without warranties under GNU Affero GPL v3
Designed with ♥ by NetriXHosted by skpacman


