
Login

Shoutbox
You must login to post a message.
renatoa
07/26/2024 3:49 PM
Bill grubbe and Jk, 
allenb
07/26/2024 5:15 AM
Spiderkw Welcome to HRO!

renatoa
07/24/2024 8:31 AM
ramiroflores and John123,

 ?
?
?renatoa
07/21/2024 1:18 AM
 , Luislobo
renatoa
07/19/2024 11:28 AM
Koepea,
Forum Threads
Newest Threads
Skywalker roaster modsBackground Roast Iss...
Hello from Arkansas
TC4ESP
Green coffee reviews
Hottest Threads
| Skywalker roaster... | [375] |
| TC4ESP | [115] |
| War on Farmers by... | [47] |
| Adventures in flu... | [26] |
| Hello! (soon) Roa... | [17] |
In Memory Of Ginny

Donations
Latest Donations
dmccallum - 10.00
JackH - 25.00
snwcmpr - 10.00
Anonymous - 2.00
Anonymous - 5.00
dmccallum - 10.00
JackH - 25.00
snwcmpr - 10.00
Anonymous - 2.00
Anonymous - 5.00
Users Online
Guests Online: 7
Members Online: 0
Total Members: 8,393
Newest Member: Bill grubbe
Members Online: 0
Total Members: 8,393
Newest Member: Bill grubbe
View Thread
Who is here? 1 guest(s)
Page 1 of 2: 12
|
 Vintage La Pavoni Re-build
|
|
| Lylabrown |
Posted on 03/10/2012 12:18 AM
|
 1/4 Pounder  Posts: 158 Joined: February 15, 2012 |
A friend found this beauty at a garage sale, and thought I might like it. "Like" is an understatement...It was love at first sight. She was built in February 1962, and recently had her 50th birthday.    Age and neglect have taken their toll. Most things are bent, broken, scratched, and chipped. (just how I like it) Everything needs a good once-over clean and polish. My goal is to get it back in good working order. After that, we can think about mods to make it better. From what I've read, these machines have a steep learning curve. And have a personality of their own. I like that. I'm currently using a "Silvia" with her own stubborn ways. They'll be a great pair. Here is a breakdown of this model: http://www.france...92_eng.htm First up is the heating element. It passed the continuity test, with no leaks to ground.  As you can see, 3 of the 4 studs are broken. It would blow the budget to replace the element. So a repair is needed. Found this forum where the poster came up with a great fix: http://www.home-b...19-20.html. Here's my version.  It would never get the UL seal of approval. And that's fine. It'll always be plugged into a Gfci outlet anyway. Next is disassembling the group.  On the early (1960-70) models the inner sheath of the group was only removable with a special tool.  The two on the left are my failed efforts to make that tool. Eventually the time-versus-money logic kicked in, and I coughed up the $42.50 and bought one pre-made from Orphan Espresso. It still required a lot of effort to break the threads free, but worked perfectly. More to come. All the parts are currently soaking in a water / citric-acid bath. Russ |
|
|
|
| jkoll42 |
Posted on 03/10/2012 8:23 AM
|
 1 1/2 Pounder  Posts: 860 Joined: February 14, 2011 |
Absolutely love those old levers. Congrats (jealous!) Keep us updated Jon -Jon
Honey badger 1k, Bunn LPG-2E, Technivorm, Cimbali Max Hybrid, Vibiemme Double Domo V3 |
|
|
|
| JETROASTER |
Posted on 03/10/2012 8:31 AM
|
 Administrator Posts: 1780 Joined: March 06, 2010 |
Yes, a little twinge of jealousy. Have fun! looking forward to your progress. -Scott |
|
|
|
| coffeeroastersclub |
Posted on 03/10/2012 9:55 AM
|
 Pounder  Posts: 535 Joined: May 26, 2009 |
I looked at the pictures and the power cable is indicating to me euro voltage not U.S. 110. I have the same la pavoni you have, and it has the euro voltage. I have it plugged into a step up converter I purchased from eBay for around $80. Works great. B) Len Edited by coffeeroastersclub on 03/10/2012 9:56 AM "If this is coffee, please bring me some tea but if this is tea, please bring me some coffee." ~Abraham Lincoln
|
|
|
|
| Lylabrown |
Posted on 03/10/2012 11:00 AM
|
|
1/4 Pounder Posts: 158 Joined: February 15, 2012 |
Thanks guys, I'm in awe of how well built this machine is. Modern appliances tend to use the minimum thickness of materials they can get away with. By comparison, this thing is built like a tank. Thick, solid brass everywhere. No wonder its still functional after 50 years of abuse. Sorry about the confusion coffeeroastersclub. The link with the pictures you saw isn't my machine. I used it for reference purposes. My boiler plate/element has 125v stamped on it. Russ |
|
|
|
| Lylabrown |
Posted on 03/10/2012 9:21 PM
|
|
1/4 Pounder Posts: 158 Joined: February 15, 2012 |
Found some time to work on the base today. It's cast aluminium, with grey hammertone paint.   The underside had what looks like old crusty varnish on it. A drill with a wire brush bit stripped it right off. A palm sander made quick work of the topside. It''ll be primed, top-coated with a dark grey hammertone, then sealed with spar urethane.  The switch is an ON-OFF-ON toggle that controls the two heating coils. Originally the machine had to be plugged in to power it on, with the switch toggling low or high mode, then unplugged to power off. What a hassle. It's hard to see in the photo - little half depth holes were drilled to indicate the heating mode: I = low, II = high. Subtle yet effective.  An indicator light is mounted front and center, It'll light up whenever the coil is energised. Regardless of mode. Now that enough progress has been made - she deserves a name. I like "Cranky".;) Russ |
|
|
|
| Lylabrown |
Posted on 03/17/2012 11:54 AM
|
|
1/4 Pounder Posts: 158 Joined: February 15, 2012 |
Made much progress this week.  Finished the base. The first coat was an etching primer intended for aluminium. Followed with 2 coats of hammertone. And sealed with 3 coats of oil based spray polyurethane. On to Re-assembly.  This is a view up into the grouphead. The hole in the center is for the piston shaft. The recessed area holds the shaft seal, followed by a brass washer, and held in place by a C-clip. The old c-clip was mild steel, and completely rusted out. Problem was, bits of the old clip were stuck in the tiny channel cut in the brass. It appears that as the steel rusted, it expanded just a little bit, and locked itself in place. No amount of picking with dental tools could get it out. I had to improvise with this:  It's a dremel bit chucked into the drill, which could be spun at very low rpm. It worked a charm. Now I know how a dentist feels, horrified by the damage a slip could do.  New SS c-clip in place. 3 hours of my life gone forever. :@ The rest of the parts, seals, and gaskets went together quickly. Not very interesting. I changed my mind about the power / HI-Low mode switch.  The element has 2 coils: 200w + 600w I decided to go with an off-on switch which powers the 200w coil, with a switch loop to for the 600w coil. That way both coils can be run at the same time for warm up / steaming. With the 200w coil as a brew temp sustain.  Very simple wiring. Look how much room is available for other gizmos and doodads.  Glamour shot. Aint she pretty?  Family Photo Russ Edited by Lylabrown on 03/17/2012 11:56 AM |
|
|
|
| yamhill |
Posted on 03/17/2012 12:45 PM
|
 1/4 Pounder Posts: 111 Joined: December 18, 2009 |
Awesome. You do really good work. The hammertone finish on the base close-up shot looks very nice. Here's hoping I stumble across one of these in my treasure hunting adventures. John |
|
|
|
| lmclaren |
Posted on 03/17/2012 5:38 PM
|
 1/4 Pounder Posts: 159 Joined: March 20, 2011 |
Very nice rebuild, lots of room in the base = PID conversion  |
|
|
|
| jkoll42 |
Posted on 03/17/2012 6:31 PM
|
|
1 1/2 Pounder Posts: 860 Joined: February 14, 2011 |
PID with a nixie tube temp display!!!
-Jon
Honey badger 1k, Bunn LPG-2E, Technivorm, Cimbali Max Hybrid, Vibiemme Double Domo V3 |
|
|
|
| Lylabrown |
Posted on 03/17/2012 7:11 PM
|
|
1/4 Pounder Posts: 158 Joined: February 15, 2012 |
Thanks Guys, Funny you should mention a PID conversion, I was just on Auberins site looking at this: http://www.auberi...04b4b69a5b And this: http://www.auberi...cts_id=108 The nixie tube is an awesome idea. It totally matches the aesthetic of the machine. 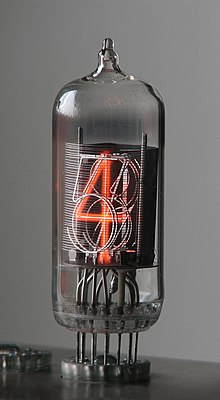 First, I'd like to be able to pull a decent shot on the original setup. My girlfriend is getting a kick out of watching me make a funny face - then spit shot after shot into the sink. I'm at 1.5# of wasted beans so far. None of it being what I'd call drinkable. The HB site is full of useful tips and tricks. But, I've yet to have that magical moment where all the pieces fell into place. Pre-heat, Grind, Tamp, Flush, Lever Pressure, 1/4 Pumps at the top, Etc. Cranky little B^$%#. Yep...Cranky is a good name. Russ |
|
|
|
| Dan |
Posted on 03/17/2012 7:33 PM
|
|
1 1/2 Pounder Posts: 1662 Joined: October 24, 2005 |
I was originally going to get into espresso by buying a La Pavoni, but heard that they are cranky. Having never pulled a shot in my life, nor having someone to teach me, I moved on to something with a better learning curve. I ended up with an E-61 machine. You have a Rancilio, so you already know how to pull a shot. Aren't you glad we both didn't begin with that little monster!?
Edited by Dan on 03/17/2012 7:34 PM |
|
|
|
| jkoll42 |
Posted on 03/17/2012 7:39 PM
|
|
1 1/2 Pounder Posts: 860 Joined: February 14, 2011 |
What is the issue with the shots? bitter, sour, all of the above? I assume you have been able to pull decent (although somewhat inconsistent) shots from the temperamental Silvia? You may want to pull a shot of water into a styro cup and test the actual water temp as a starting point. We can troubleshoot from there. You need this next to it with the temp reading 
-Jon
Honey badger 1k, Bunn LPG-2E, Technivorm, Cimbali Max Hybrid, Vibiemme Double Domo V3 |
|
|
|
| Koffee Kosmo |
Posted on 03/17/2012 9:00 PM
|
 Administrator Posts: 1621 Joined: December 31, 2008 |
Nice restoration mate These little machines are prone to temp fluctuations If only they had a larger boiler I am sure someone has tried the PID conversion and I would be keen to find out if it works ? KK I home roast and I like it. Designer of the KKTO
Roaster Build information https://homeroast...ad_id=1142 https://docs.goog...lide=id.i0 Blog - http://koffeekosm...gspot.com/ Bezzera Strega, Mazzer Robur Grinder, Pullman Tamper Convex, (KKTO) Turbo Oven Home Roaster. |
|
|
|
| allenb |
Posted on 03/17/2012 9:24 PM
|
 Administrator Posts: 3869 Joined: February 23, 2010 |
Quote jkoll42 wrote: You need this next to it with the temp reading Jon, I think you're mistaken, isn't that a victorian era time machine? 1/2 lb and 1 lb drum, Siemens Sirocco fluidbed, presspot, chemex, cajun biggin brewer from the backwoods of Louisiana
|
|
|
|
| Lylabrown |
Posted on 03/17/2012 9:49 PM
|
|
1/4 Pounder Posts: 158 Joined: February 15, 2012 |
Hey Dan, Back in 2005 I was in the market for my first espresso machine. It was a toss up between the Pavoni, Silvia, and Francis X5. I ended up getting the X5 mostly because it was the cheapest option. And it looked really cool:  I used it up until I got the silvia 6 months ago. It was a little workhorse. No problems, and fairly consistent. I doubt I'd be here today If I picked the Pavoni. Youre right, She's a little monster, but, an endearing one. I'll stick with her, with Silvia's consistency being a balancing force. jkoll42, That's insane. I want one. Probably out of my price range though. I just ran her through a warm-up, 2 shot pull, with flushes between shots. From cold, the boiler was heated on high (800w) till the steam started to purge, and first few drops came out of the pressure relief tube. Then set to low (200w). Raised the lever to flush excess steam/pre-heat the group. 184f in cup. Grind, tamp, locked in machine. Lifted lever to top, held 10 seconds, then cranked down slowly. Around 20# of force required, 15 seconds till bottomed out. Came out thin. Tasted sour. 154f in cup. Flushed again. 193f in cup. Same as first. Extracted....Better, thin crema (light), slightly bitter, liquidy. 165f in cup. Flushed again - 204f in cup. For reference, I used the same grind setting as Silvia's. #7 on the Rocky. The beans / grind produce nice, sweet, fluffy espresso on the silvia. Any ideas? Russ |
|
|
|
| RoasterRob |
Posted on 03/18/2012 2:22 AM
|
 1/2 Pounder  Posts: 330 Joined: March 03, 2007 |
I had a la Pavoni Europiccola in the late 90s. It was over 30 years old then, wish i had kept just for the cool factor. Moved on to a Silvia/Rocky combo. Now I have a VBM minimax 2 group & SJ mazzer in the kitchen. In the garage I have a Reneka Techno, a la Pavoni Pub 2grp and a la Cimbali M28 2grp it's a long story.
VBM Minimax 2gp, 1gp Reneka Techno, 2 gp la Pavoni Pub, la Cimbali M28, SJ Maz, FB 6kg HM roaster and other stuff
|
|
|
|
| jkoll42 |
Posted on 03/18/2012 7:27 AM
|
|
1 1/2 Pounder Posts: 860 Joined: February 14, 2011 |
A few thoughts (having never used that machine before) First, do you think the group/portafilter are coming up to full temp? 20-30 min warmup is a general rule but I have no idea if your machine would take more/less time. Second thought is to start grinding finer until your pull time gets closer to the 25 second +/- range. Only other thing can think of for now is the headroom for the shower screen. Maybe your puck is contacting the shower screen breaking the puck and causing channeling? Dose and tamp your basket and lock in place. Unlock it and make sure there arent marks in the puck from contact with the shower screen. If so, reduce the dose and grind finer from there. Keep us updated! -Jon
Honey badger 1k, Bunn LPG-2E, Technivorm, Cimbali Max Hybrid, Vibiemme Double Domo V3 |
|
|
|
| Dan |
Posted on 03/18/2012 9:52 AM
|
|
1 1/2 Pounder Posts: 1662 Joined: October 24, 2005 |
Do you have the user manual? Dunno how helpful it might be. http://www.pavoni...pavin.html This claims to be the best instructions. http://coffee.gur... |
|
|
|
| Lylabrown |
Posted on 03/18/2012 12:46 PM
|
|
1/4 Pounder Posts: 158 Joined: February 15, 2012 |
Hey Rob, Sounds like you're growing great collection. What's next in line to bump the VBM to garage status? It'll have to be a beast. Thanks for the links Dan. The "guru" site is a good one. The official manual was entertaining as usual. Koffee kosmo, jkoll42, The thermal issue is one of the major faults of this machine. It tends to get too hot - too fast. The group overheats quickly. After 4 pulls of the lever - it's crosses the temperature threshold, and produces burnt + bitter tasting shots. The ideal routine is to preheat for 5-10 min. Then purge steam pressure from the boiler. And pull 2 shots within the next 10 min. After that - the group needs a cool-down period. The machine was designed to pull 225-235f water into the group. Which acts as a heatsink, cooling the water, and delivering 190-210f water to the basket. The thought crossed my mind to create a thermal break between the grouphead and the boiler. Which would slow the heat exchange with the boiler body. Which gets insanely hot. jkoll42 - You mentioned headroom between the puck and dispersion screen. Occasionally I'll notice that there was screen contact post-extraction. Most of the time the puck looks clean. Some shots show severe erosion - an actual pencil eraser width indent that is half the depth of the grounds. I suspect the 50 year old shower screen might be the culprit. The portafilter basket is newer, and has very consistent sized holes. Will do a few more cycles with various grinds. And report back. Any input is appreciated. Russ |
|
|
|
| Dan |
Posted on 03/18/2012 3:45 PM
|
|
1 1/2 Pounder Posts: 1662 Joined: October 24, 2005 |
I think this would respond well to PIDing. My guess is that you'd have to flush some water in order to stabilize the grouphead temperature. After that, if the PID was adjusted just right, you should be able to pull a few shots in a row. The problem is, will you have enough water to purge some and still have enough water left for brewing? |
|
|
|
| jkoll42 |
Posted on 03/18/2012 4:44 PM
|
|
1 1/2 Pounder Posts: 860 Joined: February 14, 2011 |
Quote allenb wrote: Quote jkoll42 wrote: You need this next to it with the temp reading Jon, I think you're mistaken, isn't that a victorian era time machine? What's wrong with a steampunk La Pavoni? I wouldn't be worried about seeing a screen imprint post pull - the puck will expand. As long as you aren't seeing contact with a dry puck you should be fine. That's strange to have a channeling hole that large (can imagine why the shout would taste thin ) Did you have the screen apart during the rebuild? It does sort of sound like a water dispersion issue. Or a million other things!
-Jon
Honey badger 1k, Bunn LPG-2E, Technivorm, Cimbali Max Hybrid, Vibiemme Double Domo V3 |
|
|
|
| Lylabrown |
Posted on 03/18/2012 6:19 PM
|
|
1/4 Pounder Posts: 158 Joined: February 15, 2012 |
Finally some good results. Desperate times call for desperate measures: Made a bottomless portafilter.  Sure enough...It gave excellent visual feedback during the pull. Always thought they were kind of trendy, and not worth the trouble. Found the #3 setting on the Rocky, along with a 30# tamp was producing something resembling espresso. The preheat routine is the same as the earlier post. Here's some video action: http://youtu.be/J... (cant get it to embed) The 4 pumps at the top help build pressure in the chamber. It's now producing crema with some regularity. The last 6 or so pulls have come out roughly the same. Tastes good too. Dan, Jkoll, At this point I think you're right. A pid would help on the temp control side of things. Looks like RayJohns at HB has blazed this trail already: http://www.home-b...17073.html He installed an RTD through the boiler (element) plate. I'm thinking of going into the side of the boiler, just above the heating element. What do you think? Russ |
|
|
|
| Dan |
Posted on 03/18/2012 8:04 PM
|
|
1 1/2 Pounder Posts: 1662 Joined: October 24, 2005 |
Russ, I think that would work fine. PIDing will also give you some time to deal with tamping and pulling the shot without having to worry about what is going on with the temperature. I've used the 3/16" SS thermocouple probes for this type of thing. |
|
|
|
| Lylabrown |
Posted on 03/18/2012 10:01 PM
|
|
1/4 Pounder Posts: 158 Joined: February 15, 2012 |
Much appreciated Dan, A friend just stopped by. He was able to drink a shot I pulled for him "straight". He's a milk + sugar kind of guy. That's a good sign. As for the pitting problem in the puck: The shower screen does have some odd sized holes. It looks like somebody in the past used a pin to clean the holes out. The problem seems to be manageable though. It shows up when the tamping and lever pressure are out of sync. The PID idea is a go. It will have to live under the base. The digital readout doesn't suit the aesthetics of the machine. Jkoll42 was quick to point that out with his nixie tube idea. Luckily, it's not something that requires constant adjustment. One concern with the location of the thermoprobe is it's proximity to the coil. There's really nowhere else to put it. The IR + boiling action will cause a bit of skew in the temperature reading. Leading to more cycling than necessary. Any ideas to help minimise this? The major benefit will be the limit control. Currently there is no high temp cutoff to protect the coil. Sooner or later, some distraction will cause the machine to be left on. The water will boil off within an hour or two, and the coil will eat itself. Not good. I'll order these in the morning: http://www.auberi...04b4b69a5b http://www.auberi...cts_id=250 http://www.auberi...cts_id=108 Any objections, alternatives, or criticisms, are most welcome. Russ |
|
|
|

Page 1 of 2: 12
| Jump to Forum: |
Powered by PHP-Fusion Copyright © 2024 PHP-Fusion Inc
Released as free software without warranties under GNU Affero GPL v3
Designed with ♥ by NetriXHosted by skpacman