
Login

Shoutbox
You must login to post a message.
renatoa
07/26/2024 3:49 PM
Bill grubbe and Jk, 
allenb
07/26/2024 5:15 AM
Spiderkw Welcome to HRO!

renatoa
07/24/2024 8:31 AM
ramiroflores and John123,

 ?
?
?renatoa
07/21/2024 1:18 AM
 , Luislobo
renatoa
07/19/2024 11:28 AM
Koepea,
Forum Threads
Newest Threads
Skywalker roaster modsBackground Roast Iss...
Hello from Arkansas
TC4ESP
Green coffee reviews
Hottest Threads
| Skywalker roaster... | [375] |
| TC4ESP | [115] |
| War on Farmers by... | [47] |
| Adventures in flu... | [26] |
| Hello! (soon) Roa... | [17] |
In Memory Of Ginny

Donations
Latest Donations
dmccallum - 10.00
JackH - 25.00
snwcmpr - 10.00
Anonymous - 2.00
Anonymous - 5.00
dmccallum - 10.00
JackH - 25.00
snwcmpr - 10.00
Anonymous - 2.00
Anonymous - 5.00
Users Online
Guests Online: 6
Members Online: 0
Total Members: 8,393
Newest Member: Bill grubbe
Members Online: 0
Total Members: 8,393
Newest Member: Bill grubbe
View Thread
Who is here? 1 guest(s)
 My Dual Heat KKTO Style
|
|
| BadHabitRoasters |
Posted on 06/29/2013 10:20 PM
|
 Newbie  Posts: 46 Joined: March 18, 2013 |
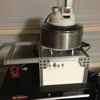
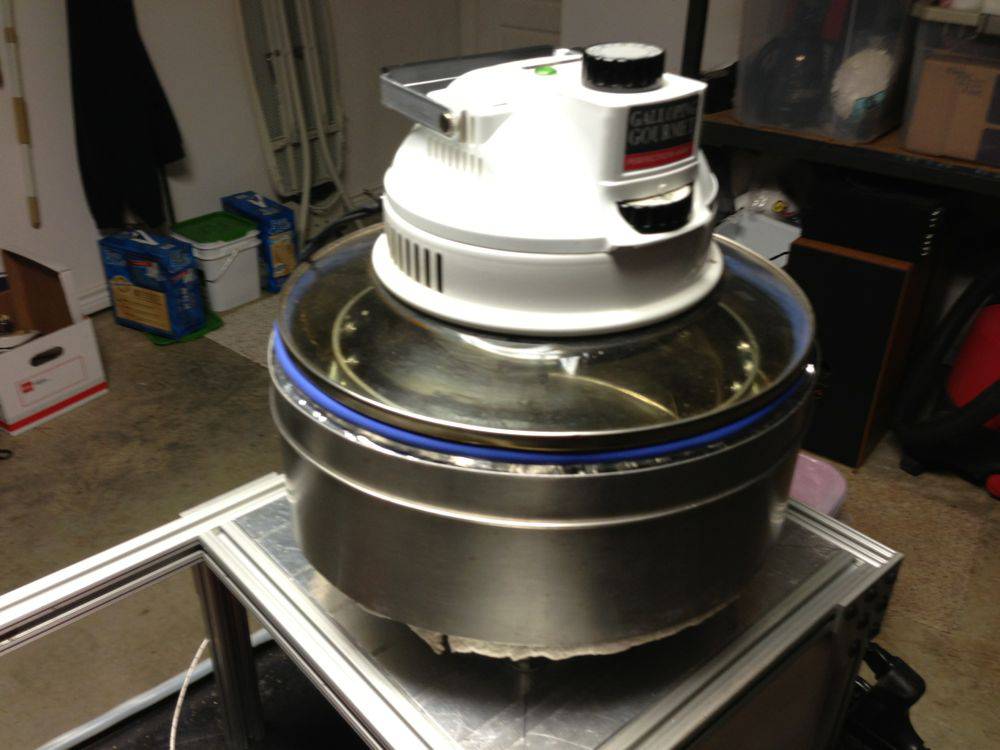
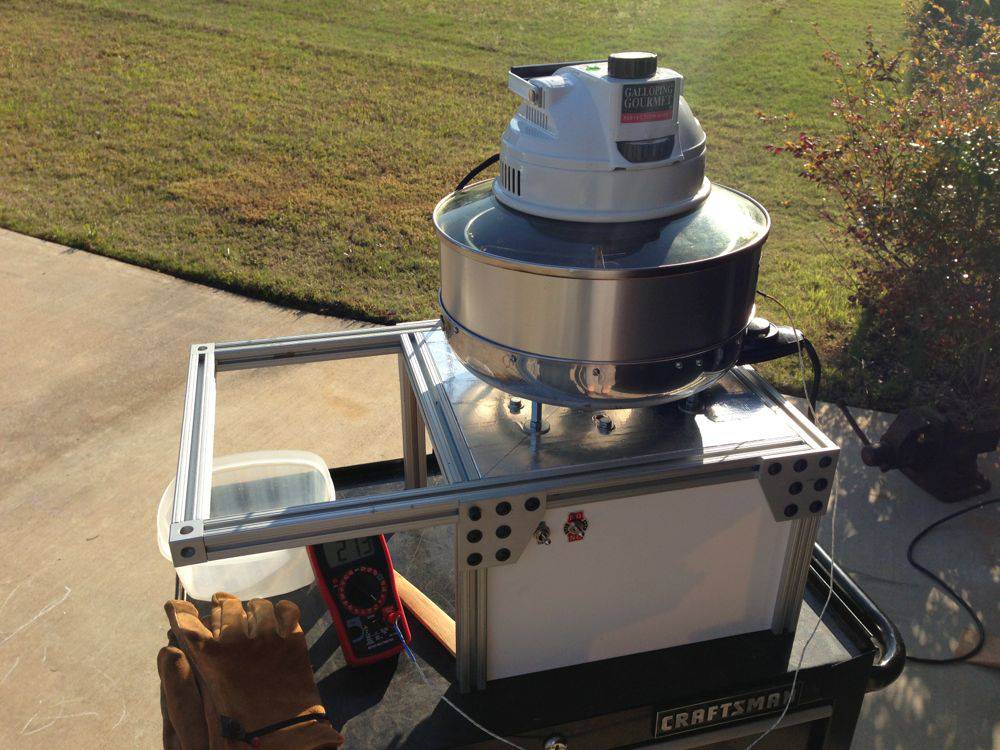
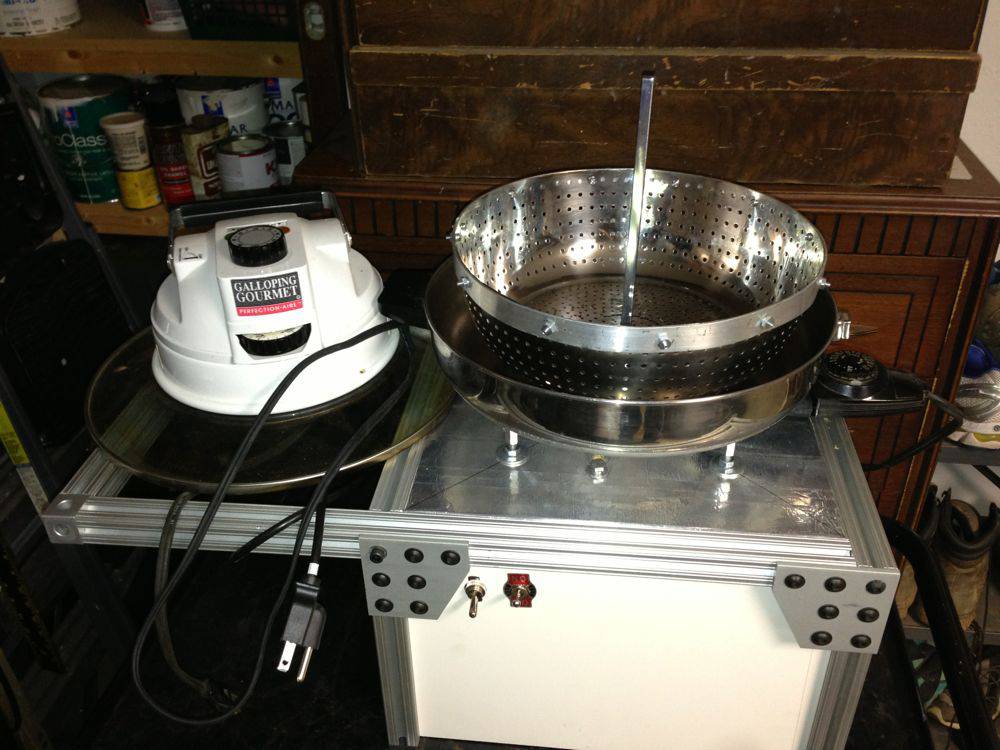
This will be an ongoing documentation of my roaster. I've gotten so much information and advice on this project from this forum and I wanted to let everybody who's contributed to see it as a thanks. Addition of a data logger / electronic controller is in process. I need to make a modification to the height of both the inner and outer chamber and I will probably build a new roast chamber out of a heavier pot but I've roasted 2) 1 lb and 1) 2 lb (brown bean weight) batches so far. Even after I removed the t-stat control from both the GG and the skillet (the fan runs full time and the heater elements are controlled by SSRs controlled by toggle switches while I wait for my TC4 kit to arrive), it took 18 minutes to get to FC+. I believe that the reduction in height will get my bean temp rising fast enough to get this time down. I wanted to make this system easily portable. Roasting can be a social event for us coffee geeks so might as well make it possible to take it to someone else's house. The tool box it's sitting on in the pictures is not part of the roaster.
BadHabitRoasters attached the following images:


|
|
|
|
| BadHabitRoasters |
Posted on 06/29/2013 10:43 PM
|
|
Newbie Posts: 46 Joined: March 18, 2013 |
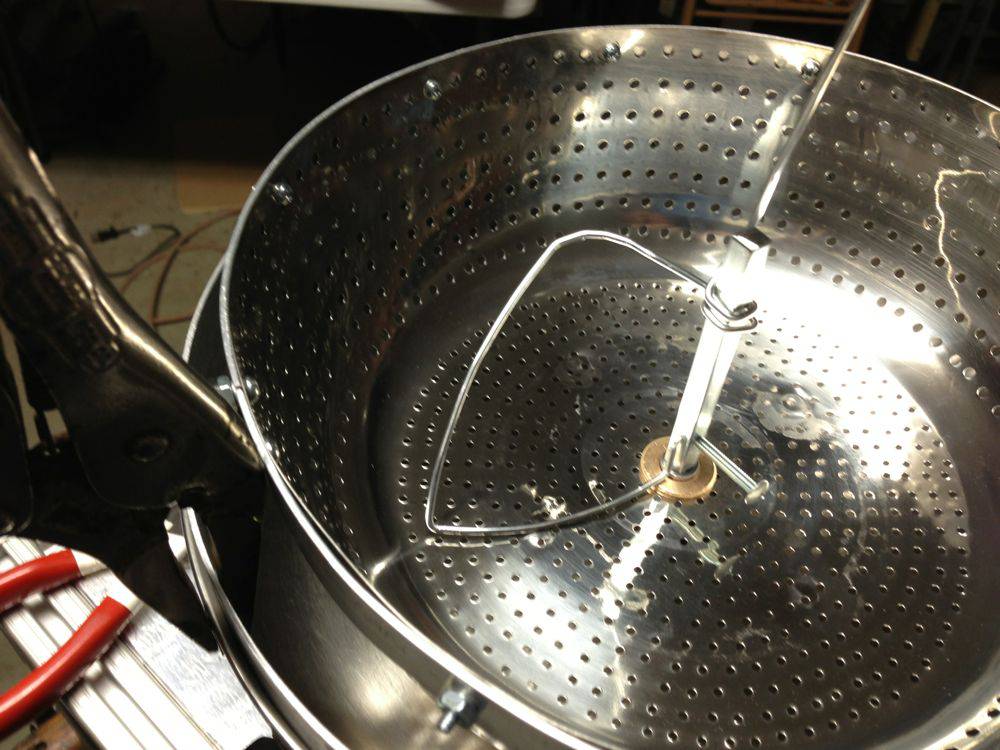
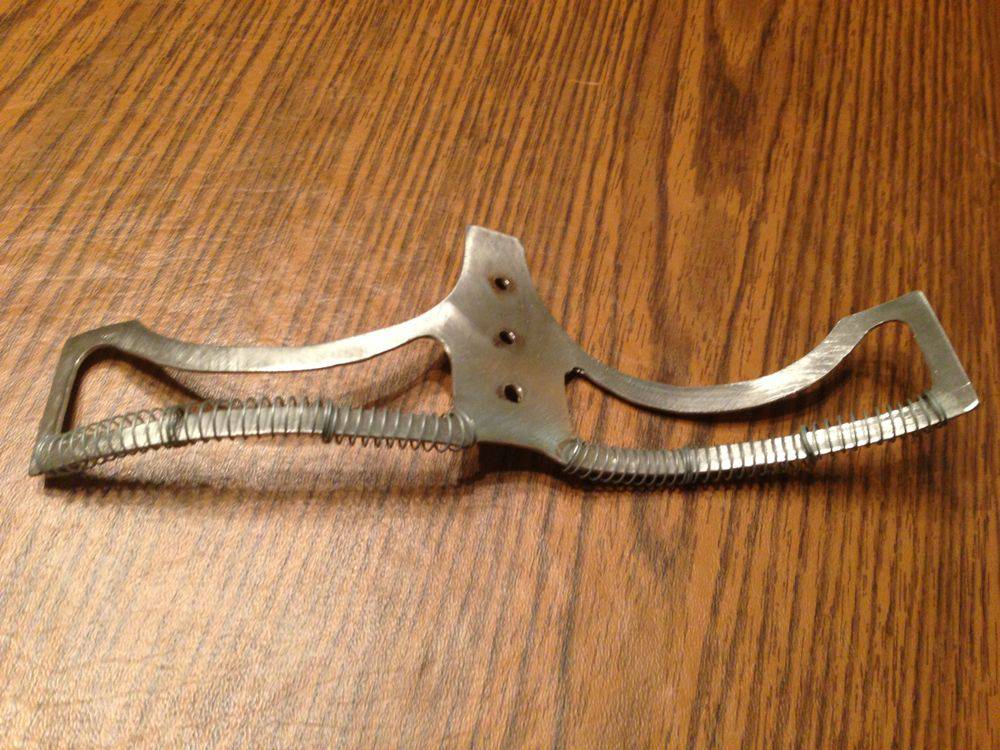
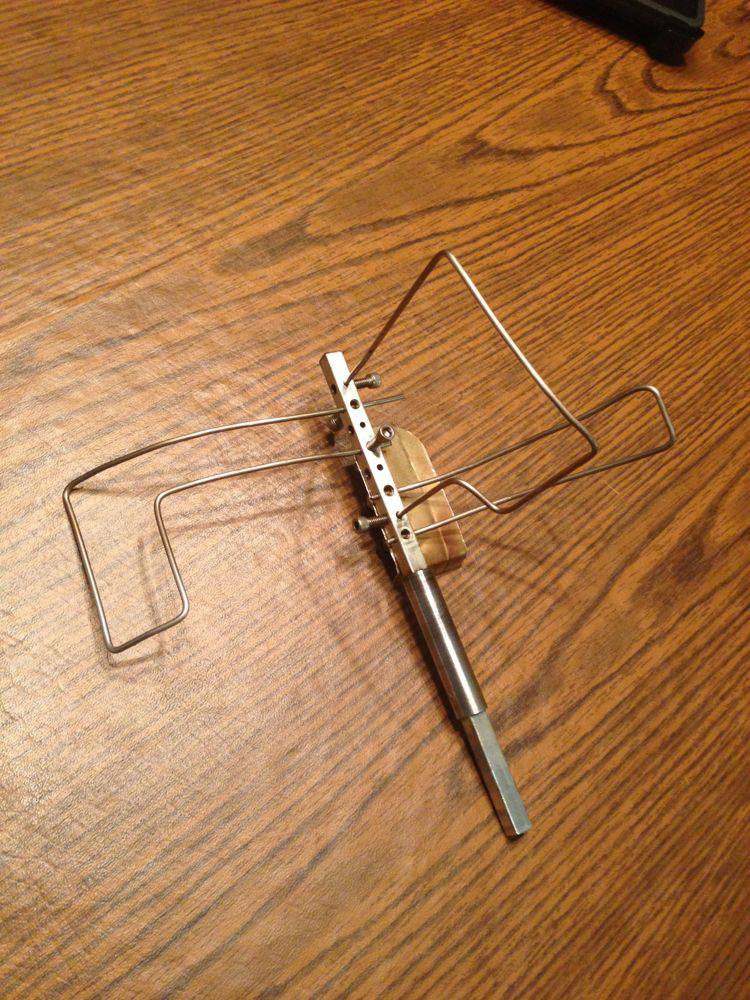
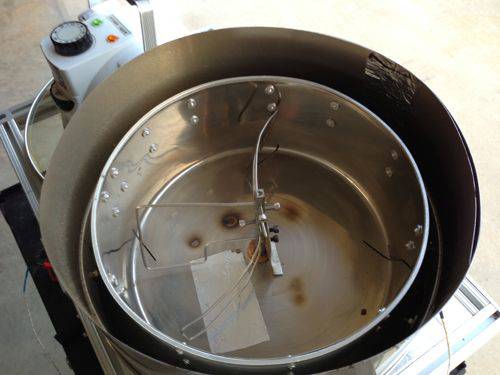
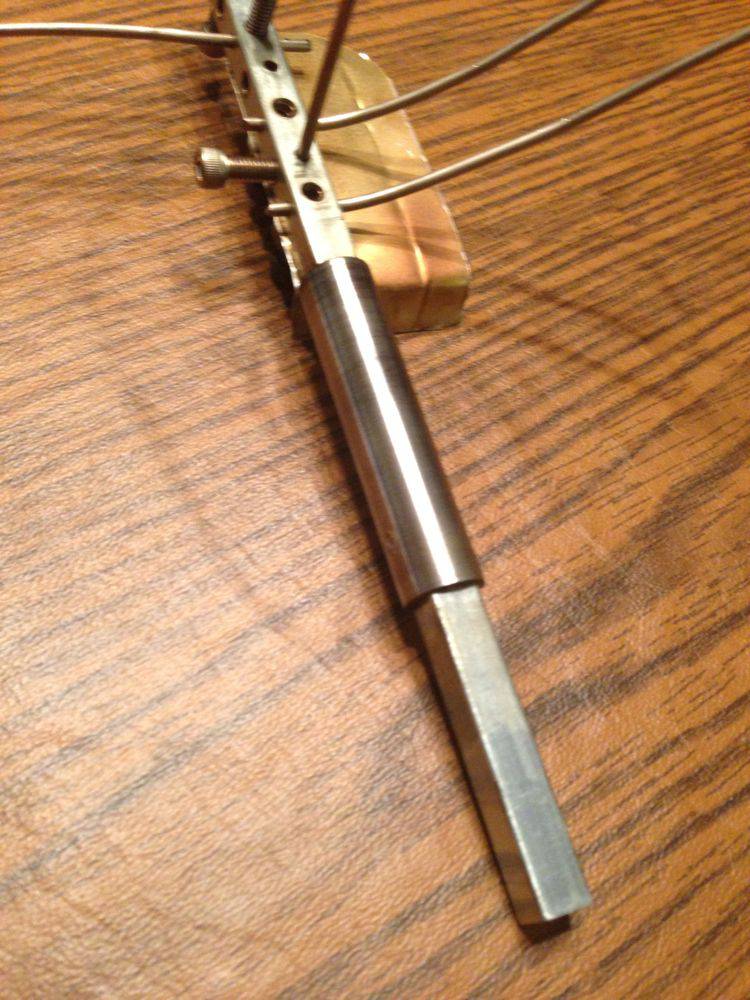
I wanted to be able to roast a 2 lb (finished weight) batch so I used a second heat source and larger diameter chambers. The Electric skillet is an old 12" stainless clad with aluminum on the bottom. The original roast chamber was a Chinese colander but I had to swap it out to something with steeper sides to get good agitation. I made a KKTO type agitator (I had to make my own because I have a larger diameter roast chamber than the KKTO) but due to unevenness in the bottom of the roast chamber, I converted to bent wire elements. It does a pretty good job of mixing but I I plan to rebuild the roast chamber with a heavier pan so I can go back to the KKTO style agitator. I really do want to achieve the uniform mixing that Paul from KKTO gets in his videos. But for now the bent wire pretty good. The shaft was made to easily accommodate changes so that experimentation wouldn't be a burden. The shaft that you'll see with the wires attached to it is the same shaft for the KKTO agitator. The wire is 3/32" bare welding electrode.
BadHabitRoasters attached the following images:


|
|
|
|
| BadHabitRoasters |
Posted on 06/29/2013 10:50 PM
|
|
Newbie Posts: 46 Joined: March 18, 2013 |
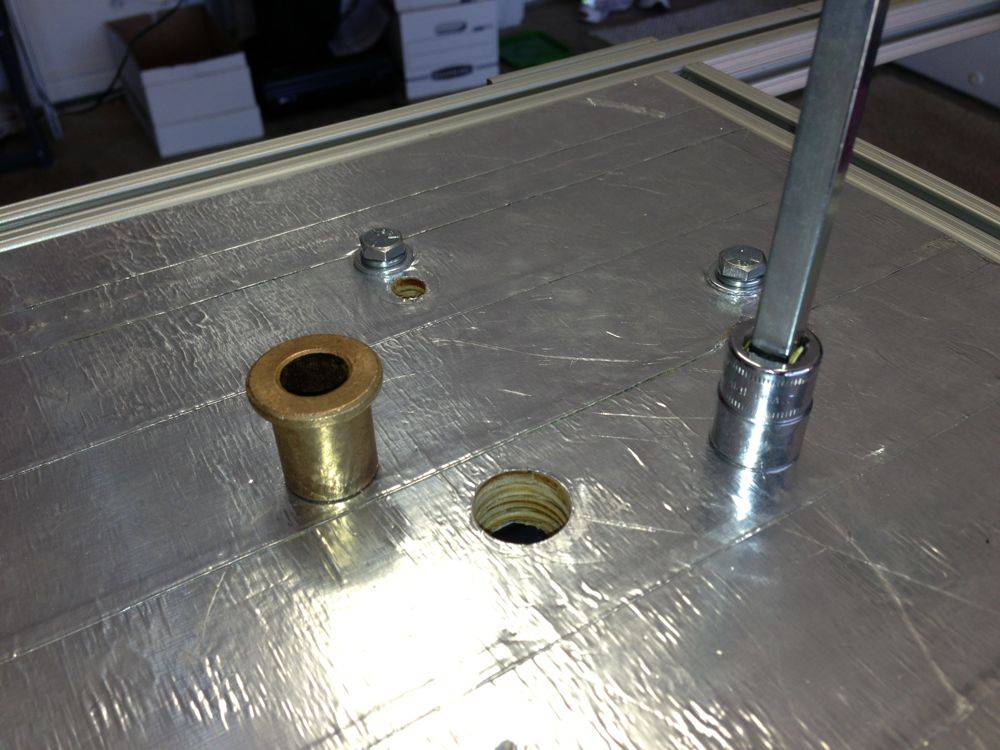
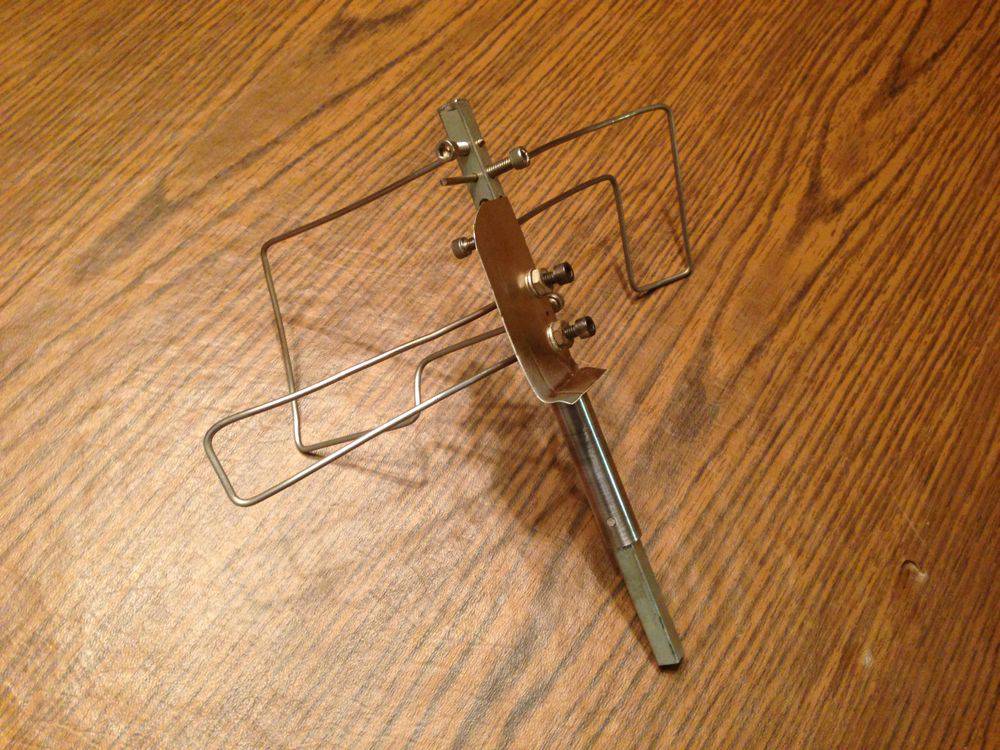
The shaft is a 5/16" keystock. The bearing surface is a 1/2" round cylinder with a 5/16" square hole through the center. The flange bushings in the base plate, electric skillet and roast chamber are bronze with 3/4" O.D and 1/2" I.D.
BadHabitRoasters attached the following image:
|
|
|
|
| BadHabitRoasters |
Posted on 06/29/2013 10:58 PM
|
|
Newbie Posts: 46 Joined: March 18, 2013 |
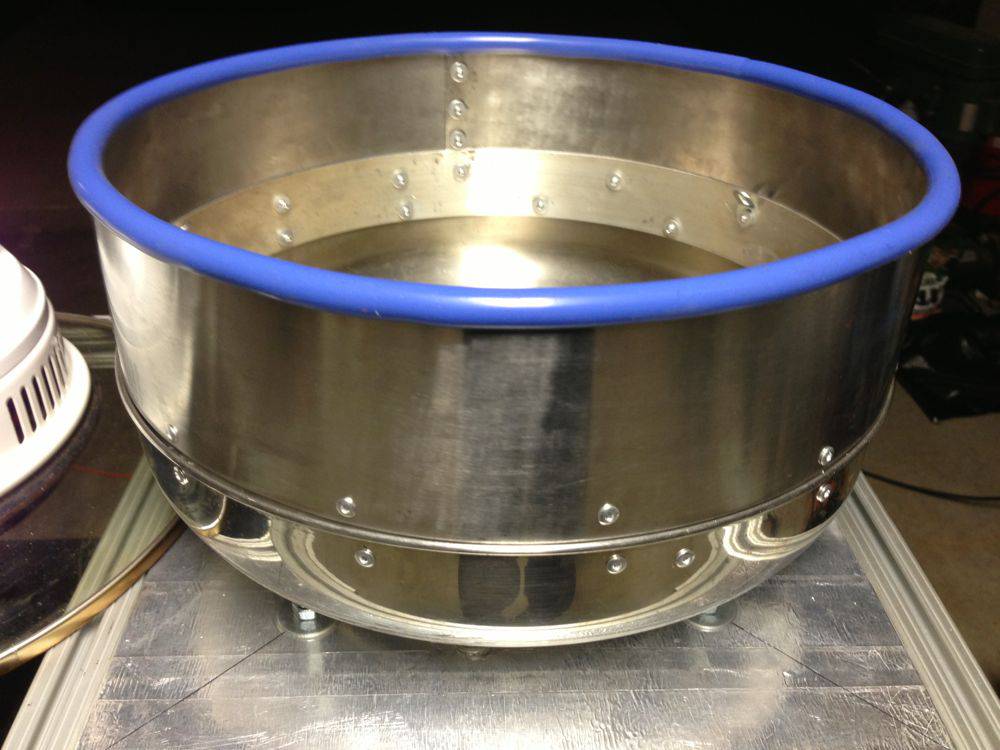
Insulation is fiberglass tape, a layer from ceramic mat (from an old commercial deep fat fryer) and then a shell of stainless. The shell is currently held on by the same 3/32" stainless wire as the agitator is made from. I'm working on a really cool looking twisted .045" titanium welding wire but am not done with it yet.
BadHabitRoasters attached the following images:


|
|
|
|
| BadHabitRoasters |
Posted on 06/29/2013 11:14 PM
|
|
Newbie Posts: 46 Joined: March 18, 2013 |
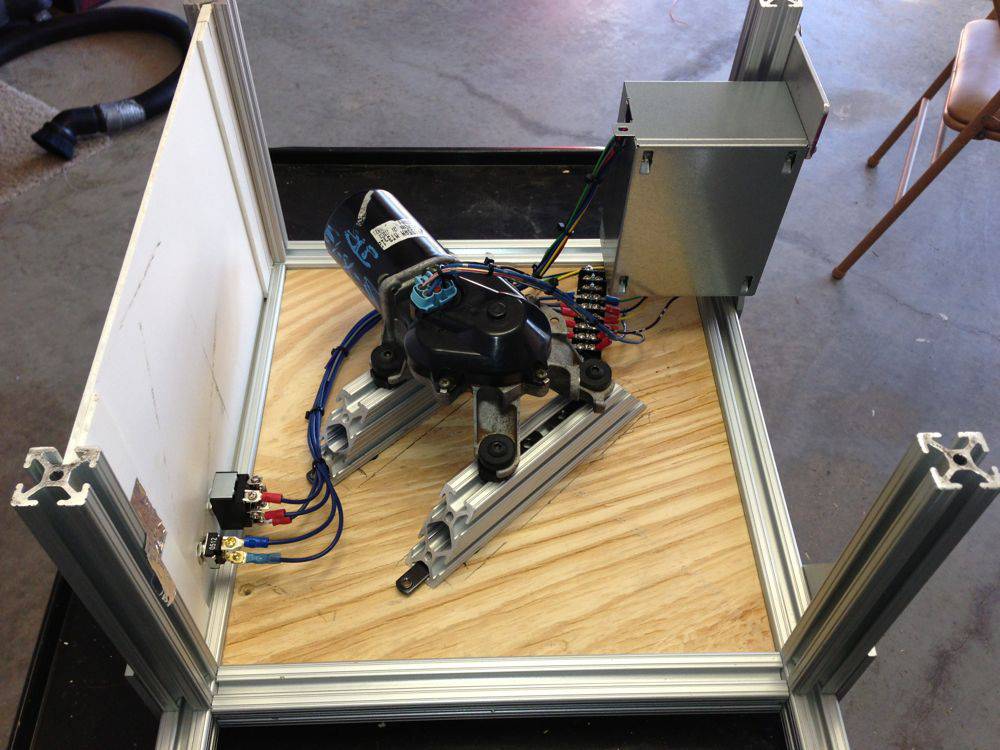
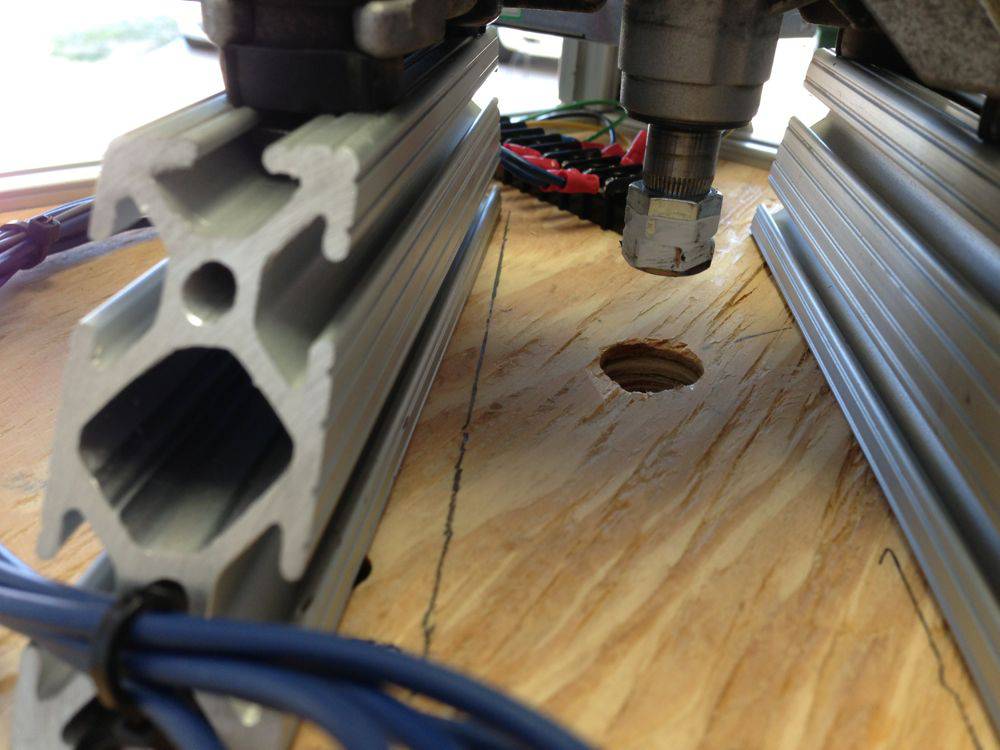
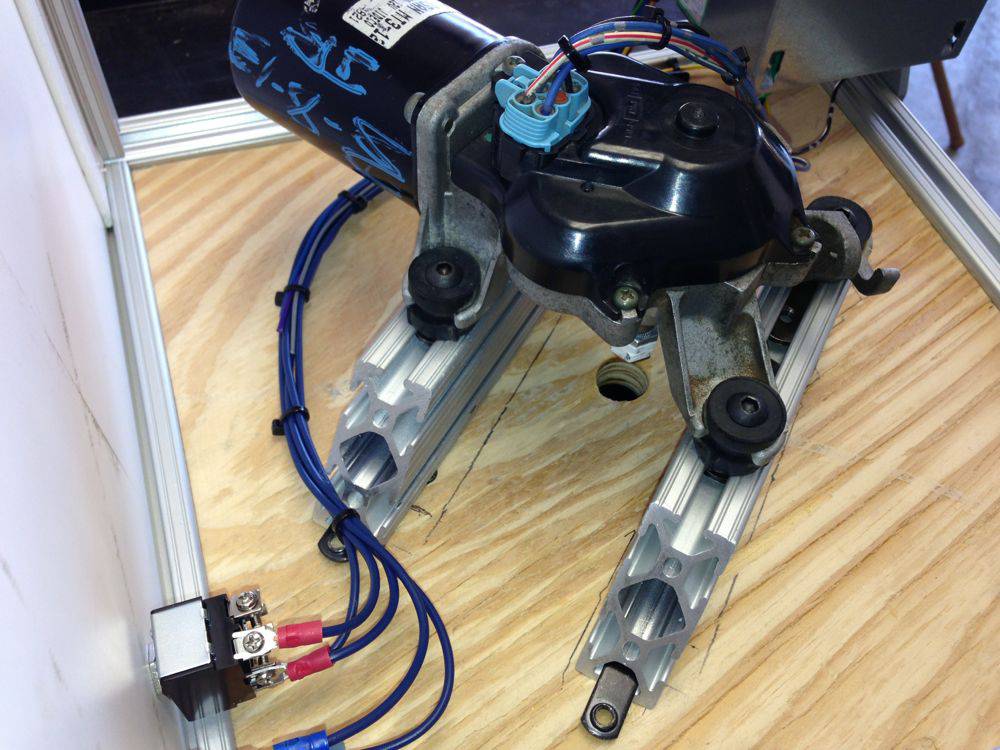
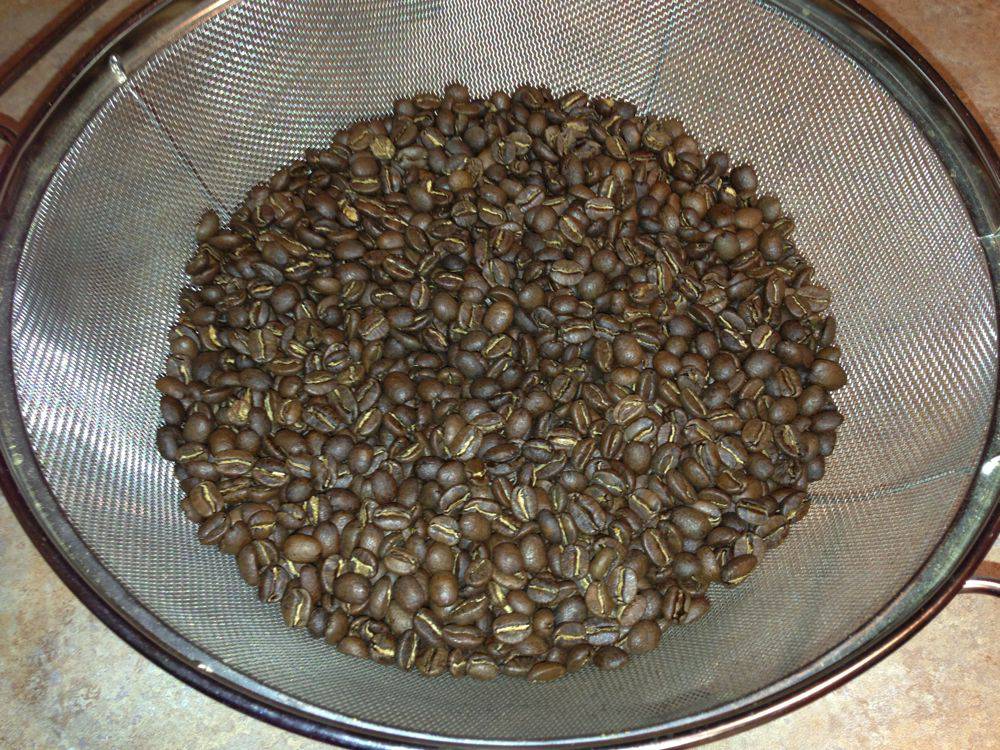
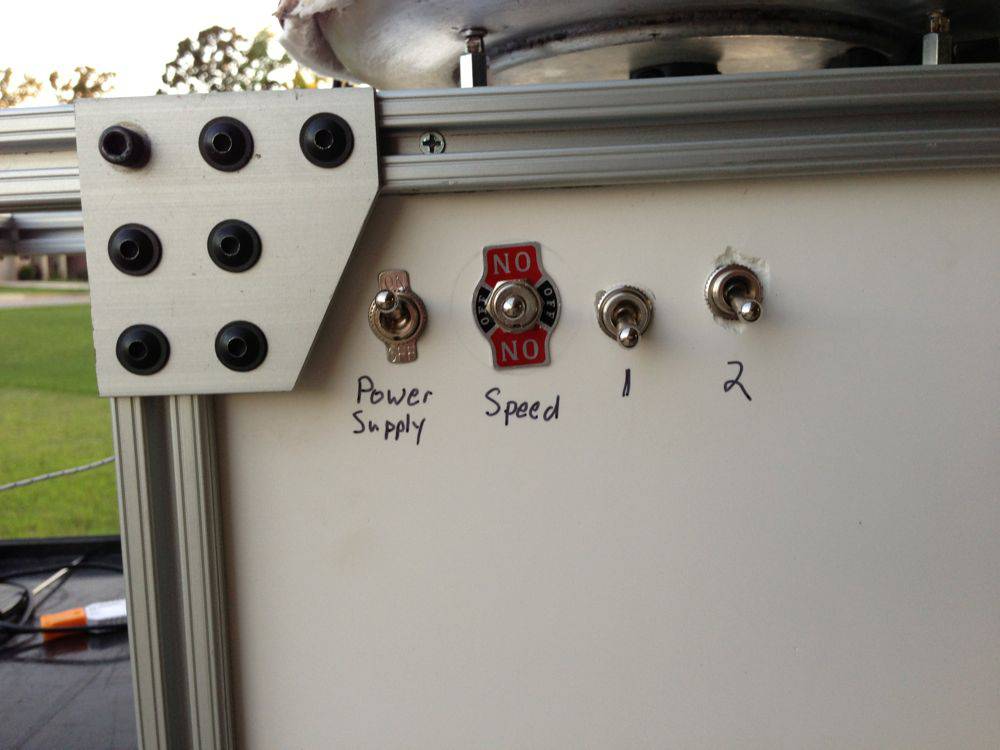
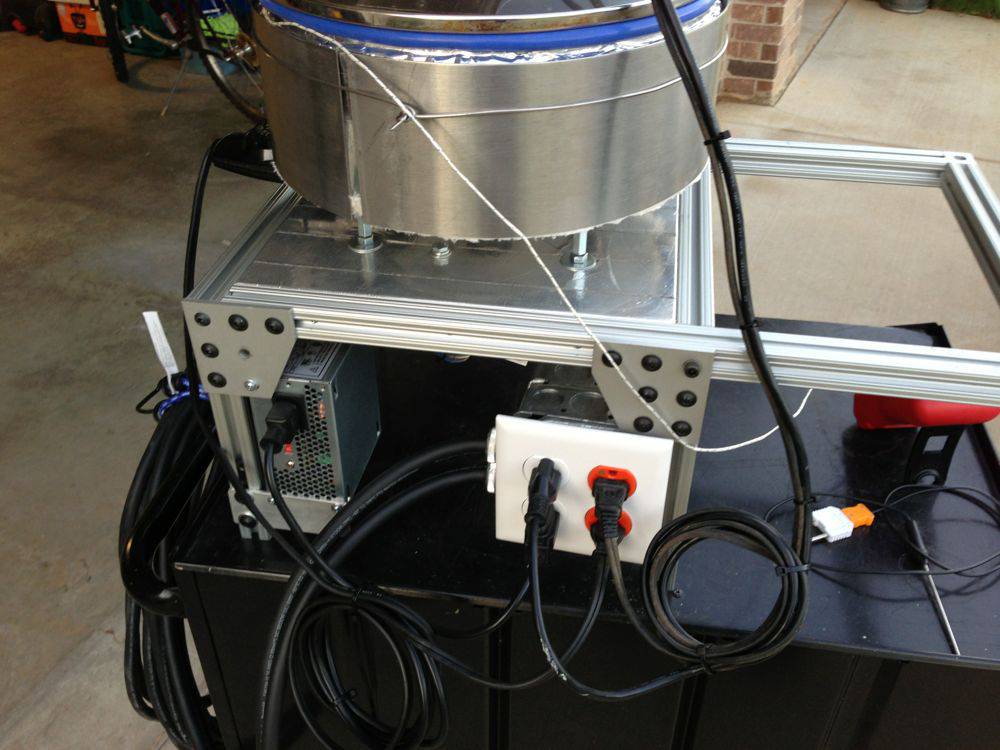
The rear of the roaster has 2 unswitched receptacles for the GG fan and computer power supply (powers the Nissan truck wiper motor that spins at 66 RPM on high and 44 rpm on low) and 2 switched outlets for the electric skillet heating element control and the GG oven heating element. The heating elements are currently controlled with simple toggle switches on the front panel. Roasted beans are evacuated from the roaster with a vacuum/blower system. The roasted beans are sucked into the pail with a colander in it. As soon as all the beans are in the cooler, I remove the lid of the cooler and move the hose from the suction side of the vacuum to the exhaust side of the vacuum. This works pretty well except that when evacuating large batches, the vacuum hose gets hot and collapses on itself. I'll be replacing it with something heavier. Moving the hose to the exhaust side of the vacuum doesn't seem to cool as fast but it is easier on the vacuum (cooling 2 lbs requires removing a lot of heat) and it helps to clean off any little pieces of chaff left.
BadHabitRoasters attached the following images:

|
|
|
|
| JackH |
Posted on 06/30/2013 5:47 AM
|
 Administrator Posts: 1809 Joined: May 10, 2011 |
Thanks for posting your build! Nice to see another KKTO setup. I started out with a car wiper motor and it worked for a while but it started making noise. I took it apart and found plastic gears had shifted and deformed from the heat transferred by the shaft. Maybe the truck wiper motor you have is better made. I am using a motor with a metal gearbox now. That bean evac/cooler works very well for me too. I do notice the lower hose get hot but it does not collapse for me. I generally do only 600 to 700g batches for my needs. I was looking around for hose that is heat resistant and was told that hose from a fireplace cleaning vac might be better. I never did follow up on that idea. I like the electric skillet setup. The problem with skillets is that the pan is too shallow. Your extension to the sides is a good idea and the extra heat will help. Nice build and please let us know if you have any questions once you get the TC4. --Jack |
|
|
|
| Koffee Kosmo |
Posted on 06/30/2013 7:09 AM
|
 Administrator Posts: 1621 Joined: December 31, 2008 |
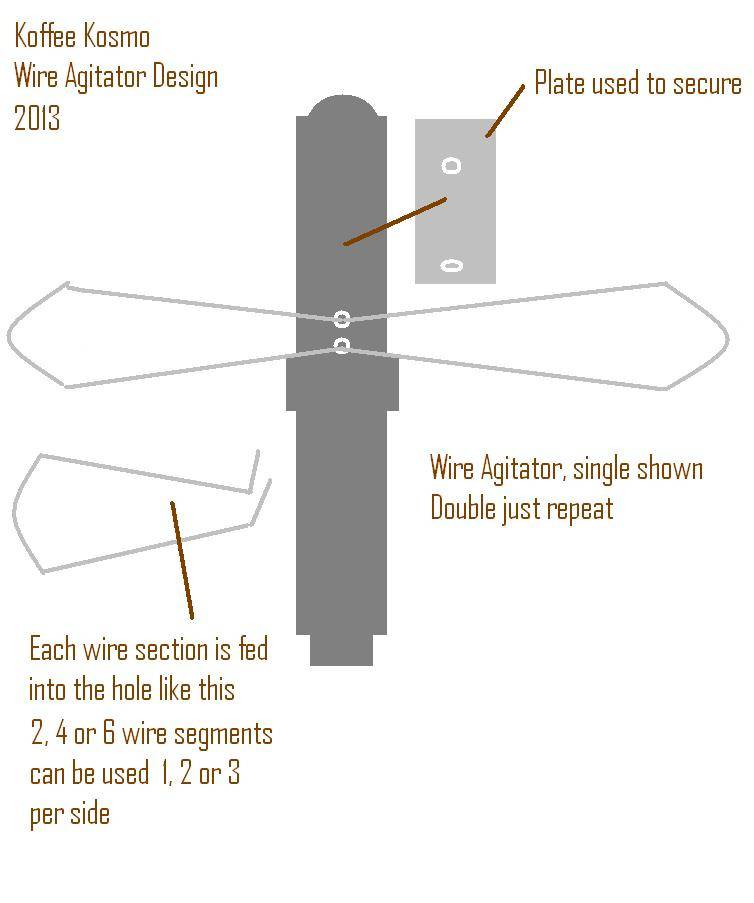
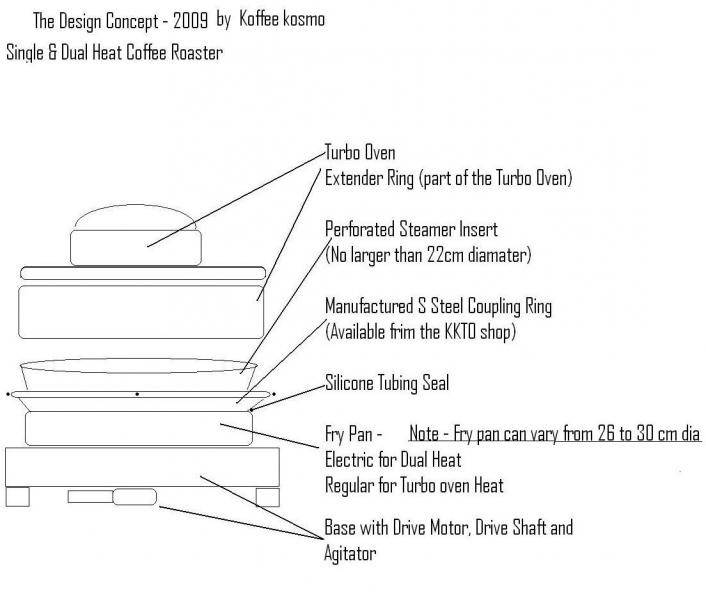
It makes me feel like a proud father to see so many of my original designs take shape The attached drawing is the original plan of this design and the other drawing is of new wire agitator design The original dual heat KKTO roaster design utilised the included extender ring that most Turbo Ovens have as standard, but in some cases this may need to be cut shorter if the volume of the roast chamber exceeds my preferred 7 to 8 litres Please note that the stainless steel double blade design has a specific bend and radius that took about a hundred trials to get right The spring is approx 8mm in diameter - and it's purpose is to spin the beans on contact and in turn not allow beans to become wedged under the blade After many trials I have found that the new flexible wire design works in a similar fashion and allows for perforated roast chambers that flex with or without heat ( think of a drum skin flexing) up to 10mm either way It's secret is the dragonfly wing shape and I actually got the idea from insect wing design and how they flex to account for any turbulence to keep steady Hope my input is helpful to others that follow on the same path KK
Koffee Kosmo attached the following images:
I home roast and I like it. Designer of the KKTO
Roaster Build information https://homeroast...ad_id=1142 https://docs.goog...lide=id.i0 Blog - http://koffeekosm...gspot.com/ Bezzera Strega, Mazzer Robur Grinder, Pullman Tamper Convex, (KKTO) Turbo Oven Home Roaster. |
|
|
|
| farmroast |
Posted on 06/30/2013 2:12 PM
|
|
1/2 Pounder  Posts: 295 Joined: December 20, 2006 |
I think you'll like the skillet plate heater to supplement and balance the heat application. A feature I added to the Dreamroast from the start and worked out well. You'll just have to find the sweet spot settings that work best.
Ed B.
DreamRoast 1kg roaster, Levers, Hand Mills http://coffee-roa...gspot.com/ |
|
|
|
| Koffee Kosmo |
Posted on 08/10/2013 5:33 AM
|
|
Administrator Posts: 1621 Joined: December 31, 2008 |
I have just completed a roaster and used the wire agitator So I took some photos to share with the HRO members KK I home roast and I like it. Designer of the KKTO
Roaster Build information https://homeroast...ad_id=1142 https://docs.goog...lide=id.i0 Blog - http://koffeekosm...gspot.com/ Bezzera Strega, Mazzer Robur Grinder, Pullman Tamper Convex, (KKTO) Turbo Oven Home Roaster. |
|
|
|
| JackH |
Posted on 08/10/2013 5:46 AM
|
|
Administrator Posts: 1809 Joined: May 10, 2011 |
I would like to see that KK. I am happy with the wire agitator mod.
---Jack
KKTO Roaster. |
|
|
|

| Jump to Forum: |
Powered by PHP-Fusion Copyright © 2024 PHP-Fusion Inc
Released as free software without warranties under GNU Affero GPL v3
Designed with ♥ by NetriXHosted by skpacman