
Login

Shoutbox
You must login to post a message.
renatoa
07/26/2024 3:49 PM
Bill grubbe and Jk, 
allenb
07/26/2024 5:15 AM
Spiderkw Welcome to HRO!

renatoa
07/24/2024 8:31 AM
ramiroflores and John123,

 ?
?
?renatoa
07/21/2024 1:18 AM
 , Luislobo
renatoa
07/19/2024 11:28 AM
Koepea,
Forum Threads
Newest Threads
Skywalker roaster modsBackground Roast Iss...
Hello from Arkansas
TC4ESP
Green coffee reviews
Hottest Threads
| Skywalker roaster... | [375] |
| TC4ESP | [115] |
| War on Farmers by... | [47] |
| Adventures in flu... | [26] |
| Hello! (soon) Roa... | [17] |
In Memory Of Ginny

Donations
Latest Donations
dmccallum - 10.00
JackH - 25.00
snwcmpr - 10.00
Anonymous - 2.00
Anonymous - 5.00
dmccallum - 10.00
JackH - 25.00
snwcmpr - 10.00
Anonymous - 2.00
Anonymous - 5.00
Users Online
Guests Online: 6
Members Online: 0
Total Members: 8,393
Newest Member: Bill grubbe
Members Online: 0
Total Members: 8,393
Newest Member: Bill grubbe
View Thread
Who is here? 1 guest(s)
 Hybrid Drum Roaster build
|
|
| broeker |
Posted on 08/04/2014 3:42 AM
|
 1/4 Pounder  Posts: 75 Joined: June 23, 2014 |
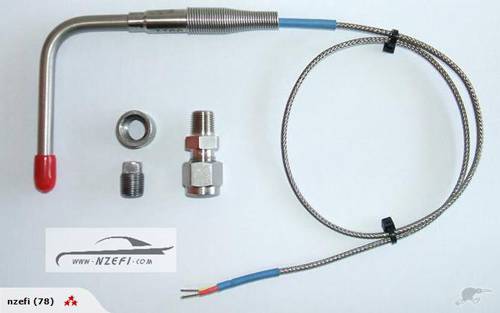
Haha thanks Mike, I love the Sky Captain movie :-) Na I don't have any Probes lying around, but the more I look into getting some pretty much everyone has a different opinion... grounded un-grounded... etc. the list goes on, its just a local auction website (to NZ) has some probes for $140 as shown on the attached image, its seems handy they have a fitting I could tap into the rear plate on my roaster..... I stopped my vanes 15mm from the end plate to accommodate some sort of BT probe Pieter
broeker attached the following image:
|
|
|
|
| broeker |
Posted on 08/04/2014 7:40 AM
|
|
1/4 Pounder Posts: 75 Joined: June 23, 2014 |
Monday night update - My bean/drum dump mech works perfectly...... No hydrulic cylinders required..... Just a nice rat rod styled lever bar :-) I'm so stoked....
broeker attached the following images:


|
|
|
|
| MikeW |
Posted on 08/04/2014 2:02 PM
|
|
1/4 Pounder Posts: 50 Joined: April 14, 2012 |
OK, for a bean probe you want it shielded, not exposed. If that red cap is not hiding an exposed junction, it may be fine. I think you can get a good probe for a lot less at auberins.com. Do you know what type you need and/or what you are connecting it to? What are your plans. Grounded just means the junction is connected to the shield, to make it more responsive. In that case one must isolate the probe housing electrically. Or, an ungrounded probe will still be responsive enough. You can find a compression fitting elsewhere too but I don't know where. |
|
|
|
| broeker |
Posted on 08/09/2014 6:35 AM
|
|
1/4 Pounder Posts: 75 Joined: June 23, 2014 |
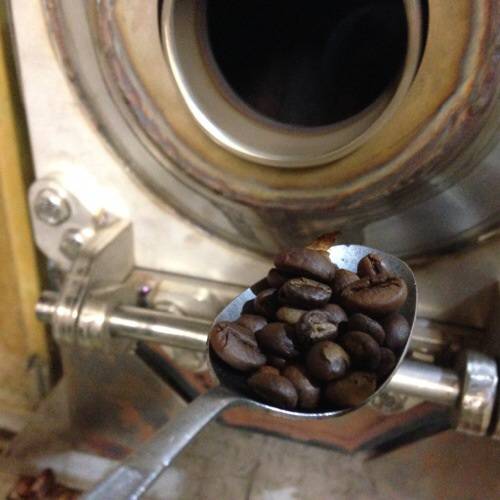
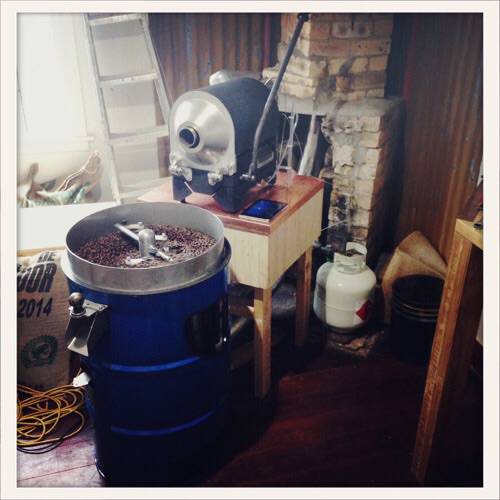
All systems go........ Did a seasoning batch with some old robusta, then into it... 2kg load..... The vanes are perfect.... The dump mech is great, the load emptying out in seconds.. Probably on 1/4 power, so plenty of btu's there....... Got some proper volumes so can now design the cooling tray & chaff collector... Booya !
broeker attached the following images:

|
|
|
|
| broeker |
Posted on 08/10/2014 6:47 AM
|
|
1/4 Pounder Posts: 75 Joined: June 23, 2014 |
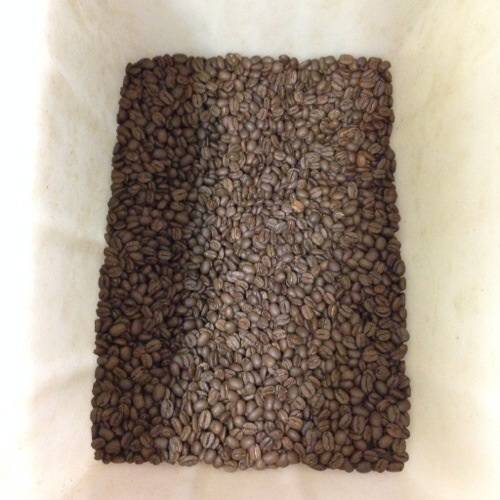
Moved the roaster to my brothers roastery this evening for a proper test.... First run 2 kg of Colombian it did what was expected ( by the experts in the room...) plenty of power there & very responsive.... The drum vanes appear to be functioning perfectly (thanks Allenb for the help with that :-). ) Second roast 4 kg of Colombian..... Needed a little more power (like still at 1/4 throttle). Perfect result at 17 min..... It appears like 4kg is the maximum load as on almost dump time the beans had expanded to just allow the odd bean to fall out of the nozzle... That sucker was full :-) All beans run out of the roaster in seconds once I pulled the dump lever..... Very happy at this stage. :-) Now about those thermocouples........
broeker attached the following images:


|
|
|
|
| broeker |
Posted on 08/17/2014 4:57 AM
|
|
1/4 Pounder Posts: 75 Joined: June 23, 2014 |
So we just ran 32kg through the roaster over 5 hours, using a fan to cool the beans in a wire mesh basket (4kg batches) 8 different varieties.... Everything worked wickedly:-) got some good ideas to improve 2.0 Tested a cyclone/ chaff collection set up (plastic cyclone & bucket) Next plan, design proper cooling tray & chaff collection based on the mockup. |
|
|
|
| broeker |
Posted on 09/06/2014 3:24 AM
|
|
1/4 Pounder Posts: 75 Joined: June 23, 2014 |
Thermocouples installed Bluetooth link to iPad -check 2kg test roast - check Data logged.... Now if only I knew exactly what the curves ment....... :-)
broeker attached the following images:


|
|
|
|
| broeker |
Posted on 01/17/2015 11:26 PM
|
|
1/4 Pounder Posts: 75 Joined: June 23, 2014 |
So I installed the roaster & cooling system in The Roast Office yesterday.... Did a couple of trial roasts...... It's looking good........ So far.......
broeker attached the following images:

|
|
|
|
| broeker |
Posted on 02/13/2015 3:36 AM
|
|
1/4 Pounder Posts: 75 Joined: June 23, 2014 |
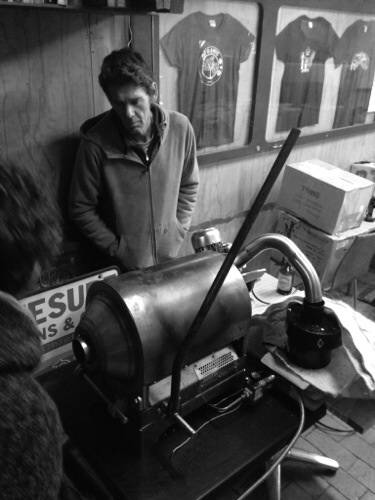
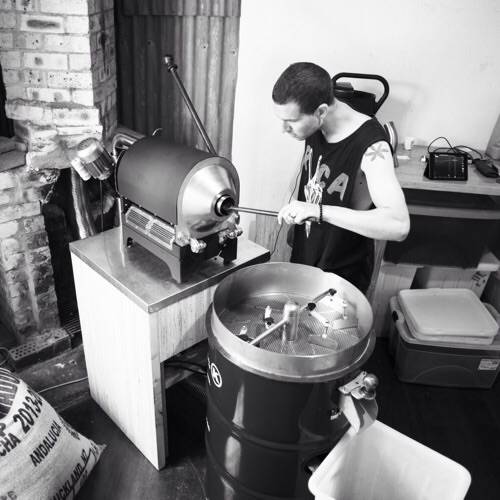
My brother on the roast :-)
broeker attached the following image:
|
|
|
|
| broeker |
Posted on 05/29/2015 3:41 AM
|
|
1/4 Pounder Posts: 75 Joined: June 23, 2014 |
So....... Issue 02 x2 is in full effect :-)
broeker attached the following images:

|
|
|
|
| jairon |
Posted on 05/29/2015 8:39 AM
|
 Newbie  Posts: 8 Joined: May 26, 2015 |
Very impressive design!  |
|
|
|
| BobbyM15 |
Posted on 05/29/2015 4:03 PM
|
 1/4 Pounder Posts: 64 Joined: January 23, 2015 |
That is an amazing design and build. I too would be interested to know more about the burner as it looks like it really does the job.
Coffee is a language in itself.
Jackie Chan |
|
|
|
| broeker |
Posted on 05/30/2015 7:20 AM
|
|
1/4 Pounder Posts: 75 Joined: June 23, 2014 |
Quote BobbyM15 wrote: That is an amazing design and build. I too would be interested to know more about the burner as it looks like it really does the job. The burner tube is made by a company called polidoro, they have a huge range of sizes & types..... I can't be more happy with it.... Just pick your output and length/diameter and go for it... :-) |
|
|
|
| broeker |
Posted on 06/08/2015 6:36 AM
|
|
1/4 Pounder Posts: 75 Joined: June 23, 2014 |
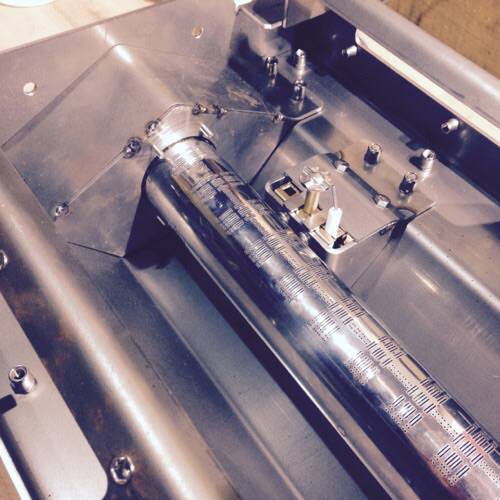
So my gas install is coming together along with the rest of the issue 02 build.... Waiting for drives & bearings........ I did use high temp bearings on issue 01 and so have chosen to again..... Mostly because it's been roasting 5 days a week 3 roasts per hour at 4 kg per load since early jan..... Plus weekends when I can get there.... Roastmaster is showing over 8500kg since I installed it........ So one little pump of grease at they're still going strong..... It was explained to me by the bearing guy that the high temperature bearings have slightly looser tolerances so when they heat up and expand that they are pretty perfect for continuous running at temp ( with suitable lubrication)
broeker attached the following images:


|
|
|
|
| Axel |
Posted on 07/29/2015 4:43 PM
|
 Newbie Posts: 32 Joined: July 23, 2015 |
Quote broeker wrote: First burner test..... To determine the gap between it and the drum..... ( I've got 20mm of adjustment in both directions) It's goes better than I had expected. :-) how windproof are these burners? where can I order them from? Edited by Axel on 07/29/2015 4:52 PM |
|
|
|
| broeker |
Posted on 01/02/2016 6:35 AM
|
|
1/4 Pounder Posts: 75 Joined: June 23, 2014 |
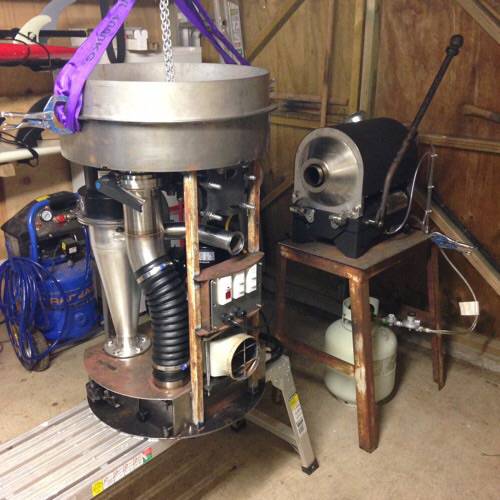
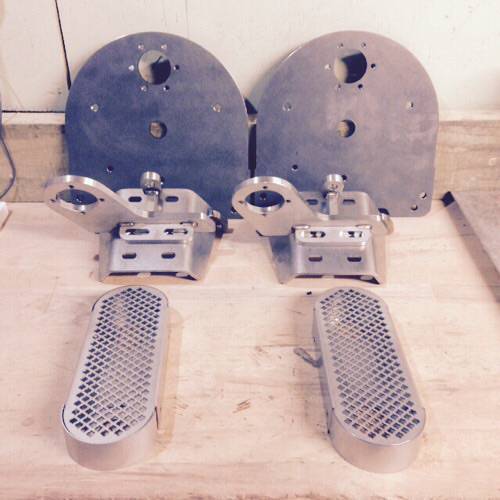
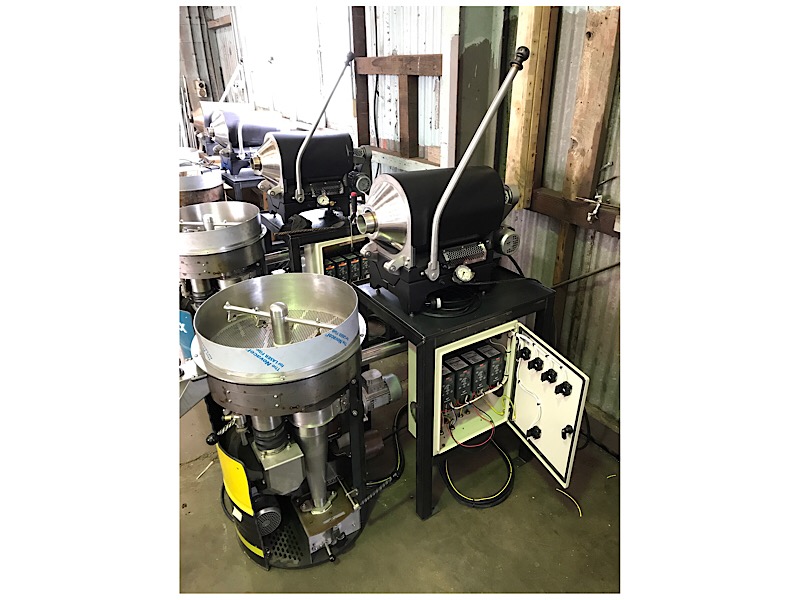
Busy building the Cyclones for my new cooling tray/chaff collector design.... I feel it's important to keep the sizes to a pretty fixed set of proportions ( lots of research out there) mostly based around the diameter chosen.... I've ended up with a twin mirror pair :-). Why will become clearer as I get more fab done...... Happy new year friends :-)
broeker attached the following images:


|
|
|
|
| dmccallum |
Posted on 01/04/2016 11:17 AM
|
|
1/4 Pounder Posts: 93 Joined: November 24, 2015 |
Looking good. Are you making your own impellers for these ? |
|
|
|
| broeker |
Posted on 01/04/2016 5:08 PM
|
|
1/4 Pounder Posts: 75 Joined: June 23, 2014 |
Quote I am using two blowers that have been designed for use in "pellet" fire places..... They burn little pellets of wood in an controlled way.... But use blower fans designed to take heat and have straight bladed centripetal fans......... In my experience unless your air stream is 100% free of chaff, the squirrel cage fans clog up... For the cooling tray I'm fabricating my own impeller.... :-) |
|
|
|
| rxstar |
Posted on 02/12/2016 12:19 PM
|
|
Newbie Posts: 1 Joined: February 11, 2016 |
Looks awesome! Got a possibly stupid question, how do you add the beans to the roaster? Some sort of removable chute? |
|
|
|
| broeker |
Posted on 02/12/2016 4:14 PM
|
|
1/4 Pounder Posts: 75 Joined: June 23, 2014 |
Yep rxstar stainless chute and spout.... I tip directly from the container the green beans are weighed into (4kg) Given it all tips up... It's the easiest way to go. |
|
|
|
| LongLeafSoaps |
Posted on 02/13/2016 7:35 PM
|
|
1/4 Pounder Posts: 167 Joined: August 09, 2015 |
Quote I remember this thread is one of the reasons I joined this forum...superb fabrication & build..the cyclones look awesome! 
Carpe Diem With Coffee
|
|
|
|
| broeker |
Posted on 02/14/2016 3:32 PM
|
|
1/4 Pounder Posts: 75 Joined: June 23, 2014 |
Thanks Long Leaf, your comment is much appreciated :-) I'm fortunate to work in a metal fabrication/design industry so at least things look tidy (doesn't mean they always function as I wish) :-) lots of testing & roasting going on at the moment before the latest version gets installed in the Caf? :-) Learning some valuable lessons about the collection of chaff. But getting 100% separation with the new cyclones. when everything is working. |
|
|
|
| broeker |
Posted on 02/14/2016 3:37 PM
|
|
1/4 Pounder Posts: 75 Joined: June 23, 2014 |
Little update :-)
broeker attached the following image:

|
|
|
|
| LongLeafSoaps |
Posted on 02/14/2016 10:36 PM
|
|
1/4 Pounder Posts: 167 Joined: August 09, 2015 |
broeker...it certainly makes creating easier if you have all of the machinery/tools you need at your disposal, but really, it shows you are an artist in neatness of your execution. I am trying to figure out where the cyclone is installed on your build form the photo you posted...is it under the cooling tray? Would you indulge us with another photo taken from a different perspective? ETA: nevermind...I went back and looked at some of the previous photos..nice! Carpe Diem With Coffee
|
|
|
|
| broeker |
Posted on 11/11/2017 3:36 PM
|
|
1/4 Pounder Posts: 75 Joined: June 23, 2014 |
Latest batch getting wired ????
broeker attached the following images:

|
|
|
|

| Jump to Forum: |
Powered by PHP-Fusion Copyright © 2024 PHP-Fusion Inc
Released as free software without warranties under GNU Affero GPL v3
Designed with ♥ by NetriXHosted by skpacman