Login
Shoutbox
You must login to post a message.
renatoa
07/26/2024 3:49 PM
Bill grubbe and Jk, 

allenb
07/26/2024 5:15 AM
Spiderkw Welcome to HRO!


renatoa
07/24/2024 8:31 AM
ramiroflores and John123,

 ?
?

 ?
?renatoa
07/21/2024 1:18 AM
 , Luislobo
renatoa
07/19/2024 11:28 AM
Koepea, 

Forum Threads
Newest Threads
Skywalker roaster modsBackground Roast Iss...
Hello from Arkansas
TC4ESP
Green coffee reviews
Hottest Threads
| Skywalker roaster... | [375] |
| TC4ESP | [115] |
| War on Farmers by... | [47] |
| Adventures in flu... | [26] |
| Hello! (soon) Roa... | [17] |
Donations
Latest Donations
dmccallum - 10.00
JackH - 25.00
snwcmpr - 10.00
Anonymous - 2.00
Anonymous - 5.00
dmccallum - 10.00
JackH - 25.00
snwcmpr - 10.00
Anonymous - 2.00
Anonymous - 5.00
Users Online
Guests Online: 12
Members Online: 0
Total Members: 8,393
Newest Member: Bill grubbe
Members Online: 0
Total Members: 8,393
Newest Member: Bill grubbe
View Thread
Who is here? 1 guest(s)
|
Dereks 1-2Kg drum roaster build
|
|
| broeker |
Posted on 08/18/2016 10:47 PM
|
|
1/4 Pounder  Posts: 75 Joined: June 23, 2014 |
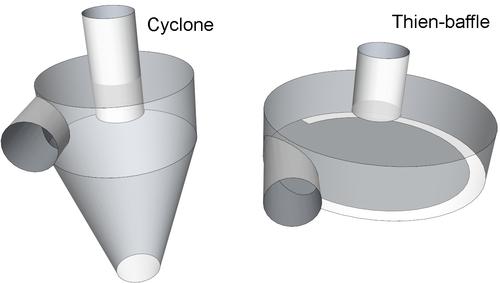
Also Google "thien separator" if you want another angle to take........ I went the cyclone way my self given the los mass of the average chaff particle....... but didn't built one to try it out... :-) |
|
|
|
| dmccallum |
Posted on 08/19/2016 5:04 AM
|
|
1/4 Pounder  Posts: 93 Joined: November 24, 2015 |
Thanks very much Broeker. That paper is one of the better ones I've seen and I wasn't aware of the Thien approach - might be worth experimenting with, fabrication is probably easier. In fact you could possibly incorporate the concept into a barrel cyclone depending on the dimensions. For the most part I have duplicated the design/dimensions of the San Fransican SF-1s cyclone and made it a little taller (a chap called Moshe from Seattle was kind enough to take his SF-1 cyclone apart and give me very detailed measurements and photos). So I have 'assumed' SFs design is solid and will work for my purposes - might be wise, it might not. I've also assumed the high-temp squirrel cage blower I intend to use will not suffer unduly. I'll digest the paper some more, hopefully I'm good to go as I am.
dmccallum attached the following image:
|
|
|
|
| broeker |
Posted on 08/19/2016 4:38 PM
|
|
1/4 Pounder  Posts: 75 Joined: June 23, 2014 |
Ah cool, you are fortunate to have a good working start point, It gets very scientific very fast the cyclone game. All I can add is my first effort worked ok (like 1d2d with a very basic tangentel circular inlet) with some chaff 1-2% getting through to eventually block the squirrel cage fan, but my new ones ( the 1d3d proportion with the rectangular inlet that slowly over 180 deg merges into the body) are 100%. But the taller more efficient cyclones do require the air flow to work properly.... Umm don't over look making the collection volume large enough, if you make it to small when it fills up to a certain point the chaff will get re-entrained and get sucked out of the cyclone were it isn't wanted.... Try to make things were you can clean every surface..... Because internal crud will rob your fans power and reduce the performance of the whole deal... |
|
|
|
| dmccallum |
Posted on 09/02/2016 4:15 AM
|
|
1/4 Pounder  Posts: 93 Joined: November 24, 2015 |
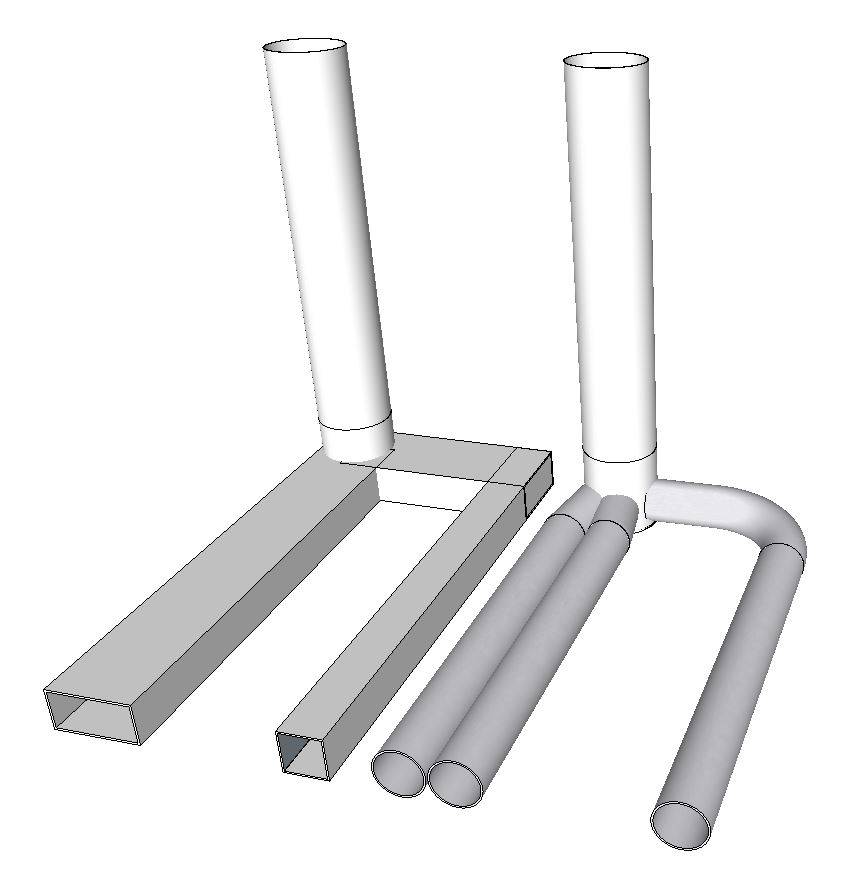
Another thought I've had is the throughput of the two 1 3/4" pipes I've got going to the cooling tray and whether they're enough. The area of the 3" inlet pipe is 4,200mm2 and the combined area of the two 1 3/4" pipes is 2,666mm2. Even if I squeaked another pipe in its only going to 3,999mm2. If I put box section in I can equal or exceed the 3" inlet pipe. I rather prefer the asthetic of the pipes over box, but functionality comes first and don't want to build this to find the pipes are a choke point. The cooling tray has a much larger area around 45,000mm2+ and so I want to ensure I get adequate flow. Anyone have any thoughts ?
dmccallum attached the following images:
|
|
|
|
| dmccallum |
Posted on 09/28/2016 5:33 AM
|
|
1/4 Pounder  Posts: 93 Joined: November 24, 2015 |
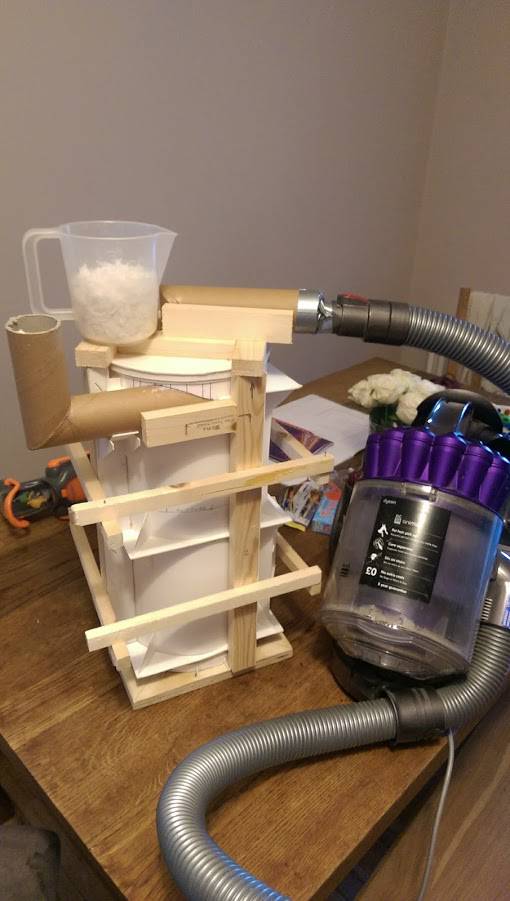
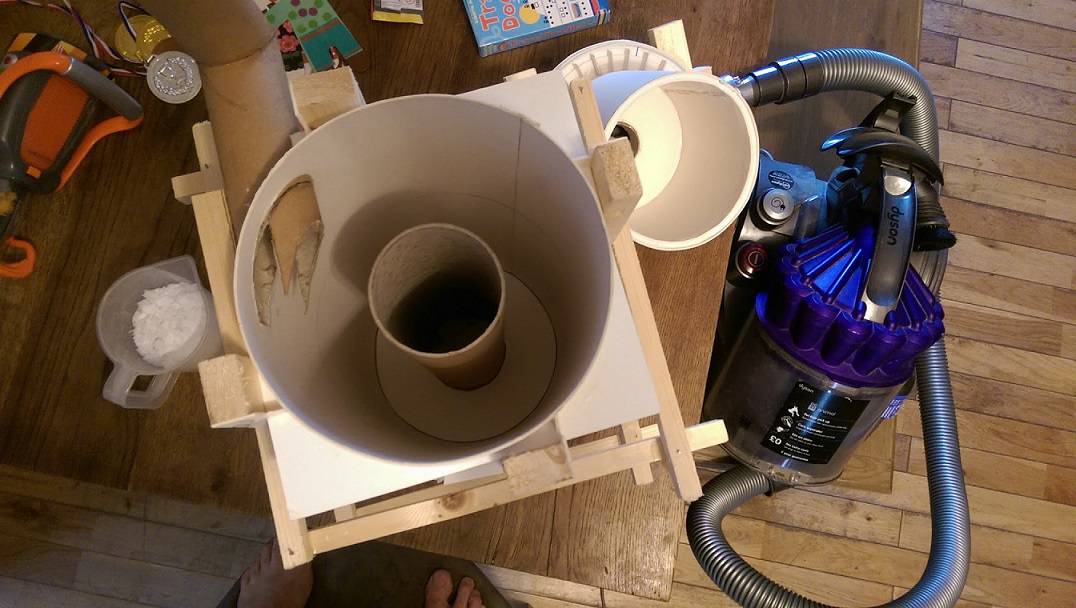
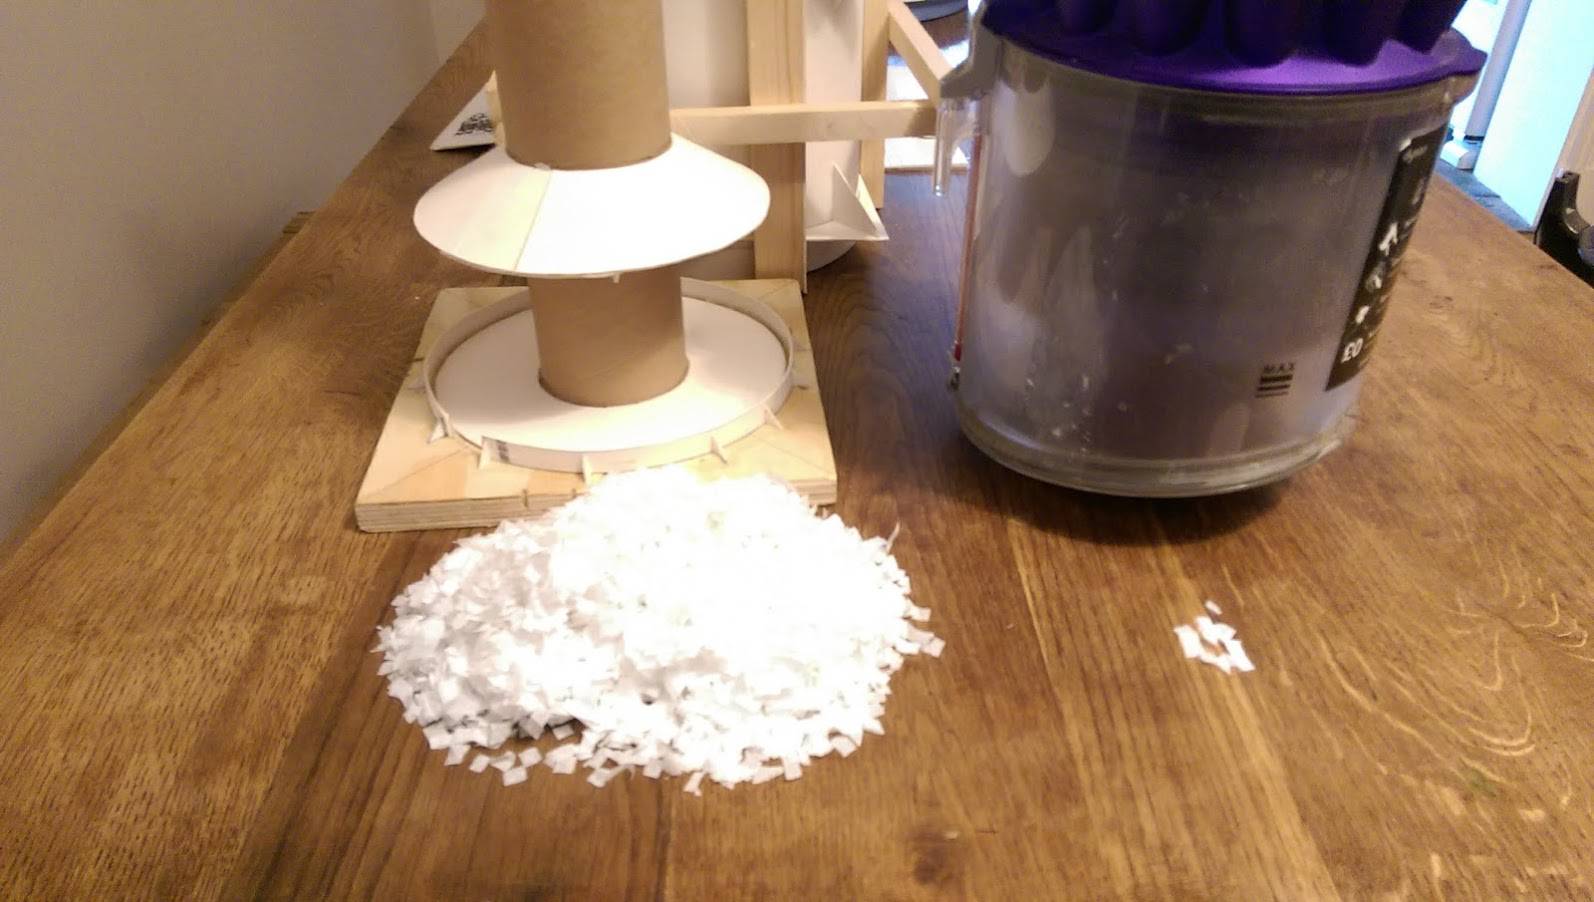
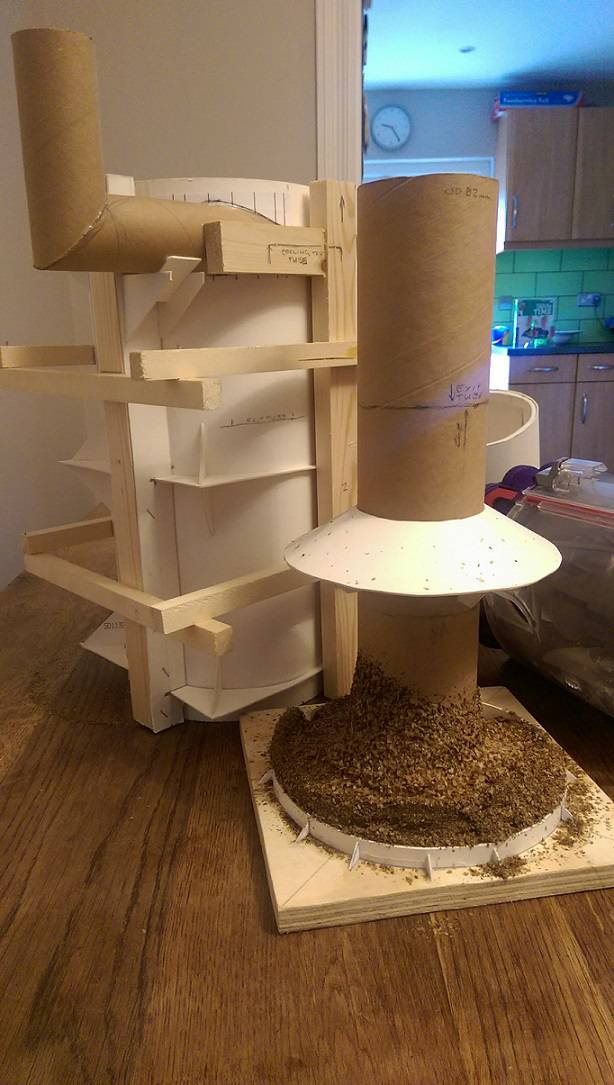
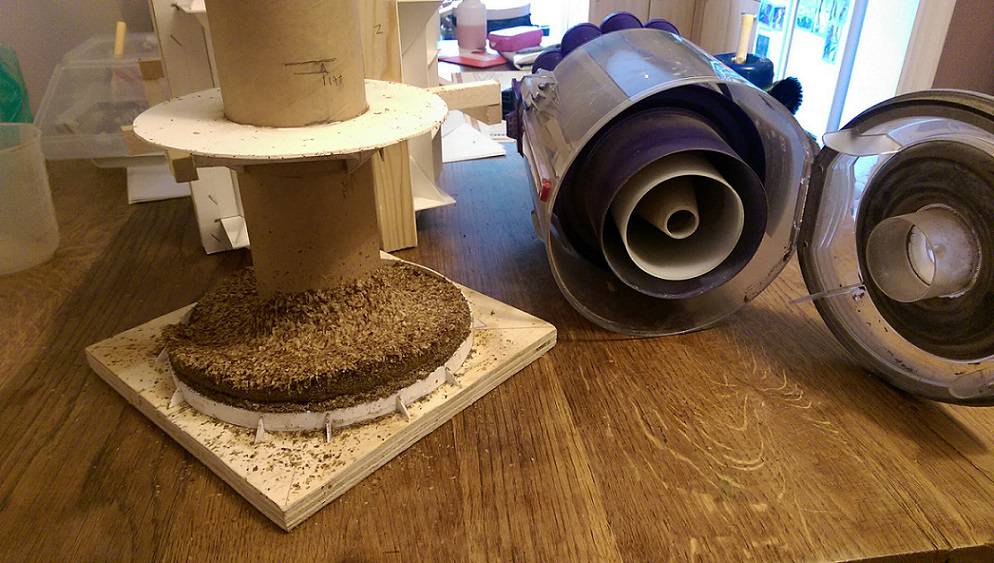
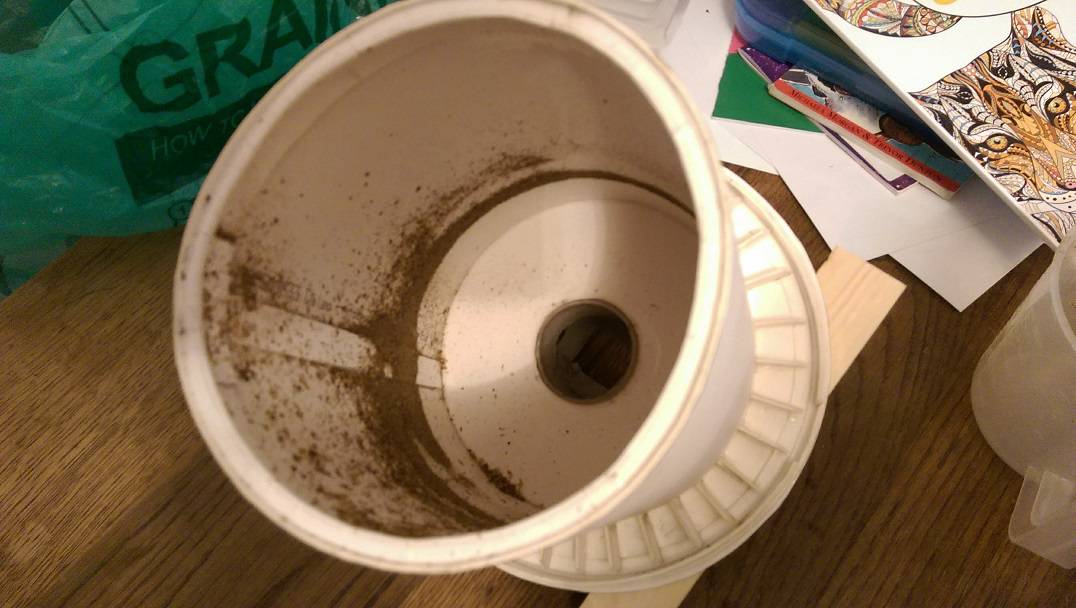
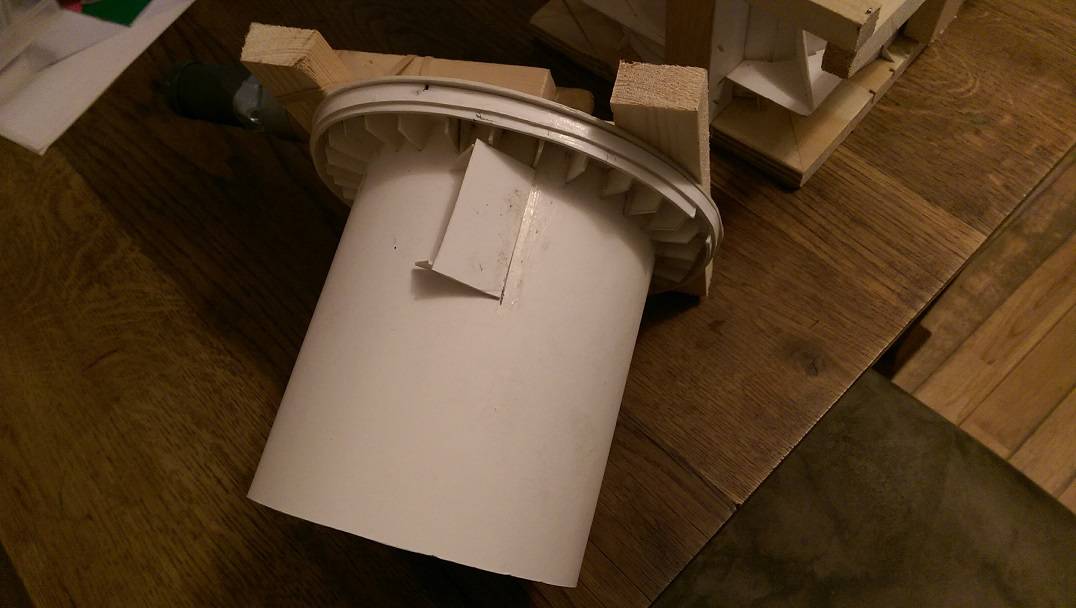
I have been minded to do some further research and testing on how well my proposed cyclone would work, so I?ve mocked up a model of my design and this is what we?ve got so far. I?ve kept it simple for the first round of testing with no additional cones, air ramps or Thien baffles. I?m using my Dyson vacuum and figure it has roughly the same CFM as the blower I plan to use. It has quite a bit more power though, and you can see what it did to my model within 2 seconds of having absent-mindedly put my hand over the inlet to test for leaks. To test initially I?m using about 600ml of finely cut up tissue wrapping paper. This is a pretty close approximation of chaff although I will have to find a source and test with this also. Pleased with first pass and remarkably only about 10 pieces of tissue made it through to the vac. Noted however that this got worse on repeated test and wonder if static-electricity is playing a part.
dmccallum attached the following images:
Edited by dmccallum on 09/28/2016 5:39 AM |
|
|
|
| dmccallum |
Posted on 09/28/2016 5:36 AM
|
|
1/4 Pounder  Posts: 93 Joined: November 24, 2015 |
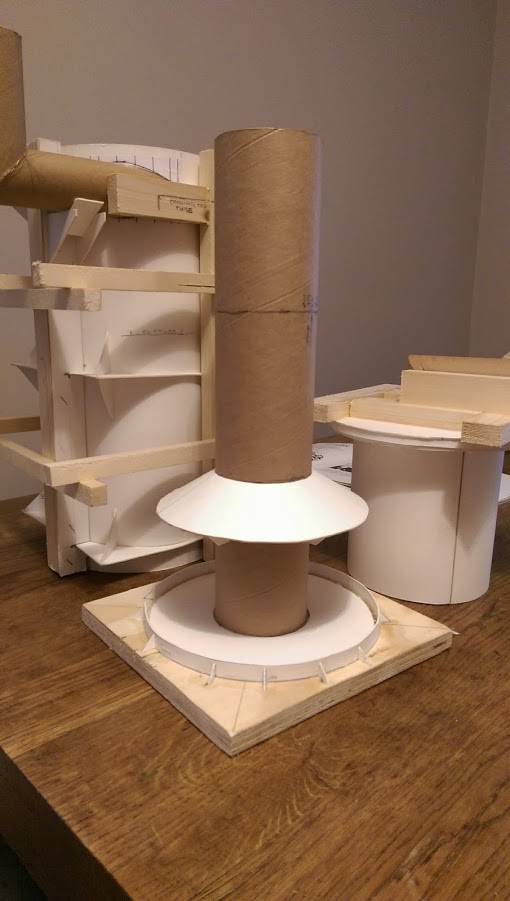
Next up I put in what approximates a Thien-baffle about 120mm from the bottom, and I get a repeat of about 10 particles making it through to the vacuum.
dmccallum attached the following images:
|
|
|
|
| dmccallum |
Posted on 09/28/2016 5:37 AM
|
|
1/4 Pounder  Posts: 93 Joined: November 24, 2015 |
Then I move the Thien-baffle up to 160mm from the bottom, and with 3 complete test sequences I get 100% separation on each run ? no bits of tissue pass to the vacuum. I?m amazed, and possibly getting ahead of myself. There?s a roaster not far from me who I?ll look to for a source of real chaff.
dmccallum attached the following images:
|
|
|
|
| dmccallum |
Posted on 09/28/2016 5:54 AM
|
|
1/4 Pounder  Posts: 93 Joined: November 24, 2015 |
Dyson damage
dmccallum attached the following images:
|
|
|
|
| dmccallum |
Posted on 10/06/2016 7:15 AM
|
|
1/4 Pounder  Posts: 93 Joined: November 24, 2015 |
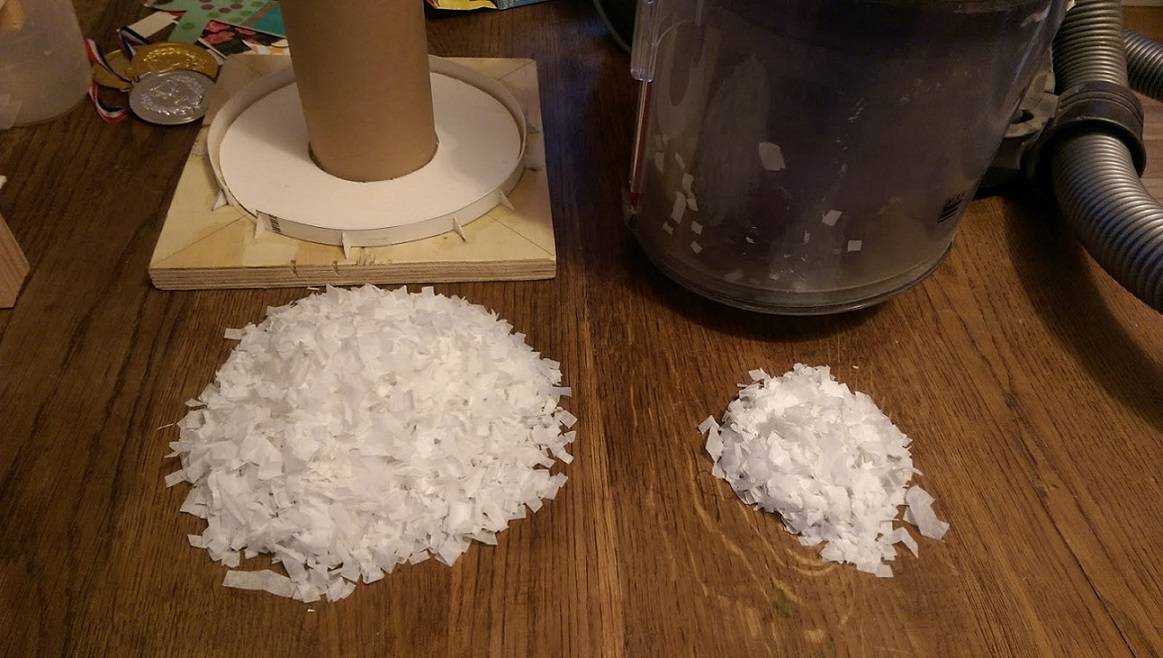
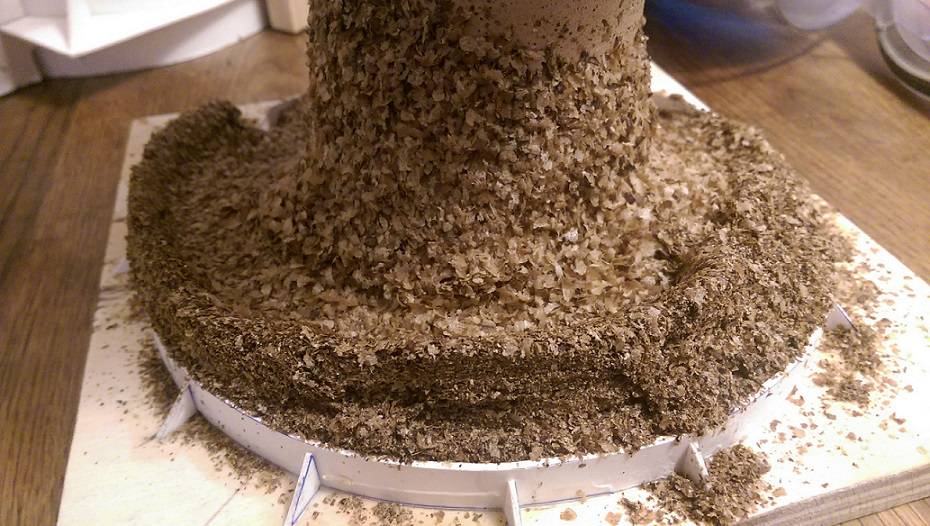
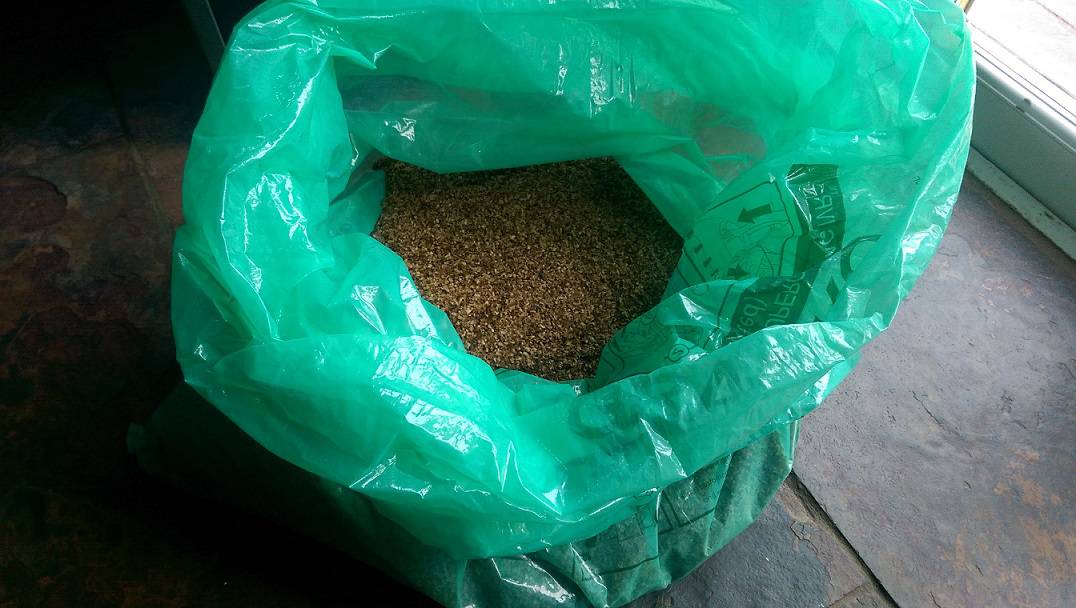
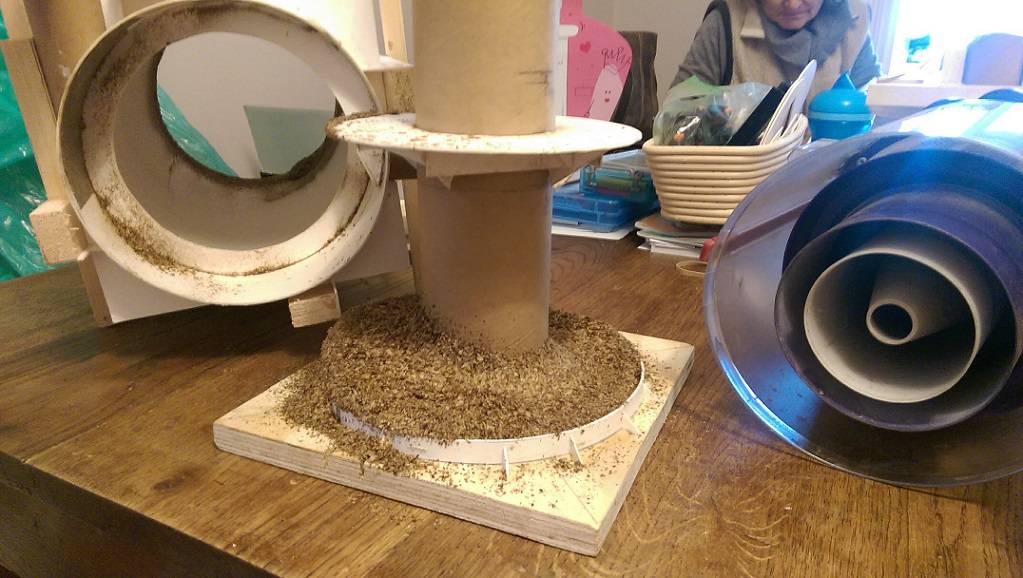
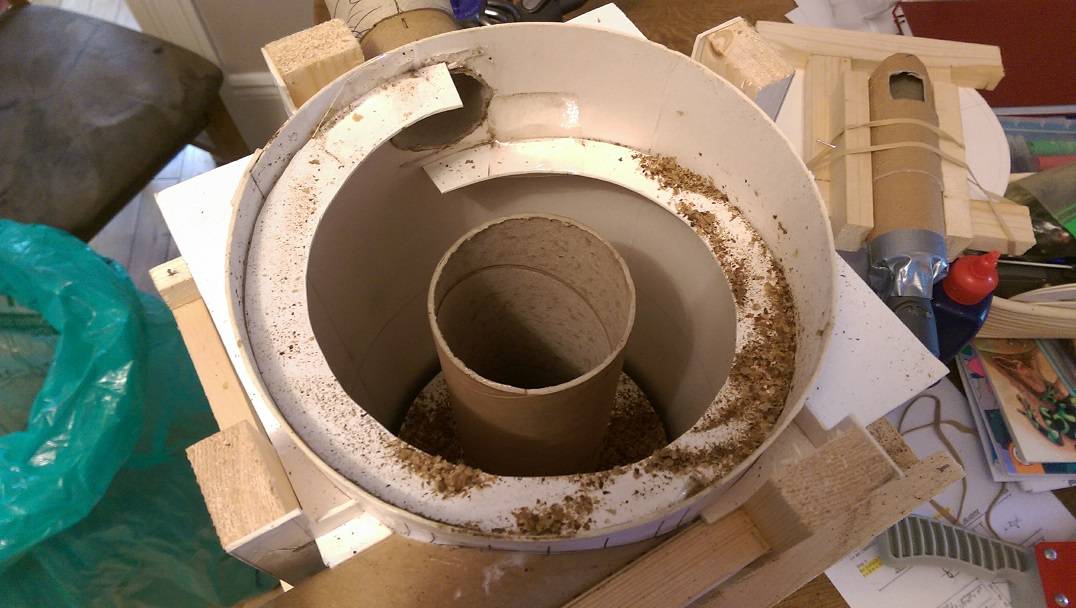
A South London roaster kindly provided me with the contents of his (much larger) cyclone from the mornings roasting. Obliged me also with a tour of his operation where he uses a 1950s Vittoria 30Kg roaster. So first test with the same Thien up-ended conical baffle at 160mm from the bottom and a 600ml jug of chaff, fed slowly over a couple of min and I'm amazed that nothing got through to the Dyson at all. Even the fine dust all went to the bottom of the cylinder where it mainly adhered itself to the sides. I'll do a flat Thien baffle over the next day or two and see how that goes - would be easier to fabricate. It's hard to imagine it's worth going to the trouble of doing a regular conical cyclone at this stage however there are a few variables which I haven't tested against yet, like lower air flow rates etc - up to this point I'm testing with the full Dyson suction. Does anyone have an idea as to how many Kg of beans you'd have to roast to produce 600ml of chaff?
dmccallum attached the following images:
Edited by dmccallum on 10/06/2016 7:25 AM |
|
|
|
| allenb |
Posted on 10/06/2016 8:27 PM
|
|
Administrator  Posts: 3869 Joined: February 23, 2010 |
Wow, you've taken the R&D on cyclones for roasting to the next level! This will be great information for others here to use as a jump start to get their own cyclone fabricated. It would be interesting to see how much of a reduction in complexity you could go and still pull all of the chaff and most of the fines out. I'm not sure where, if anywhere one would go to find out the answer to your question on chaff volume per kg. You might have to offer a free chaff removal from the Vitorria in return for getting chaff quantity data. Allen 1/2 lb and 1 lb drum, Siemens Sirocco fluidbed, presspot, chemex, cajun biggin brewer from the backwoods of Louisiana
|
|
|
|
| dmccallum |
Posted on 10/09/2016 11:24 AM
|
|
1/4 Pounder  Posts: 93 Joined: November 24, 2015 |
Another test, this time with a flat Thien-baffle. Results didn't really vary between having it 130, 160 or 190mm from the bottom, but still 100% separation with nothing perceptible going through. Will be much easier to make a flat baffle, I imagine with 4 tabs on the inside diameter that can be bent 90deg down for a jubilee clip to fix it place on the centre pipe. I also ran a test with the chaff and no baffle (just straight barrel) and it didn't take long for material to make it through to the Dyson. Everything to this point I've done with a Dyson on full draw. Next round and I'll try with some lower air-flow rates. Just roughly how much air is drawn from the drum during roasting? Just enough so as not to suck beans out? Imagine this might be a difficult one to describe. Anybody?
dmccallum attached the following images:
Edited by dmccallum on 10/09/2016 11:31 AM |
|
|
|
| btreichel |
Posted on 10/09/2016 1:06 PM
|
|
1/4 Pounder  Posts: 187 Joined: May 07, 2007 |
Don't know, maybe someone can measure it for you, I don't have the set up. However, air flow through the drum has a primary impact on roast quality and control. |
|
|
|
| simwilldig |
Posted on 10/12/2016 1:12 AM
|
|
Newbie  Posts: 11 Joined: November 26, 2014 |
Quote dmccallum wrote: Everything to this point I've done with a Dyson on full draw. Next round and I'll try with some lower air-flow rates. Just roughly how much air is drawn from the drum during roasting? Just enough so as not to suck beans out? Imagine this might be a difficult one to describe. Anybody? I don't have any specific numbers on airflow volumes for your drum size, but you might find this airflow explanation helpful. https://youtu.be/... The general starting point for airflow that I have heard is relatively low for drying stage, relatively medium for carmalization and then relatively high from first crack on for development. However, I don't have much experience on a drum roaster with controllable airflow myself. I'm finishing up a 5kg drum roaster build and I have found that towards then end of the roast as the beans become lighter I can't open up the airflow too much or it starts sucking beans out. By the way, thanks for sharing your design! Some day I hope to build a similar sized roaster and will definitely use this info. |
|
|
|
| dmccallum |
Posted on 10/15/2016 4:47 AM
|
|
1/4 Pounder  Posts: 93 Joined: November 24, 2015 |
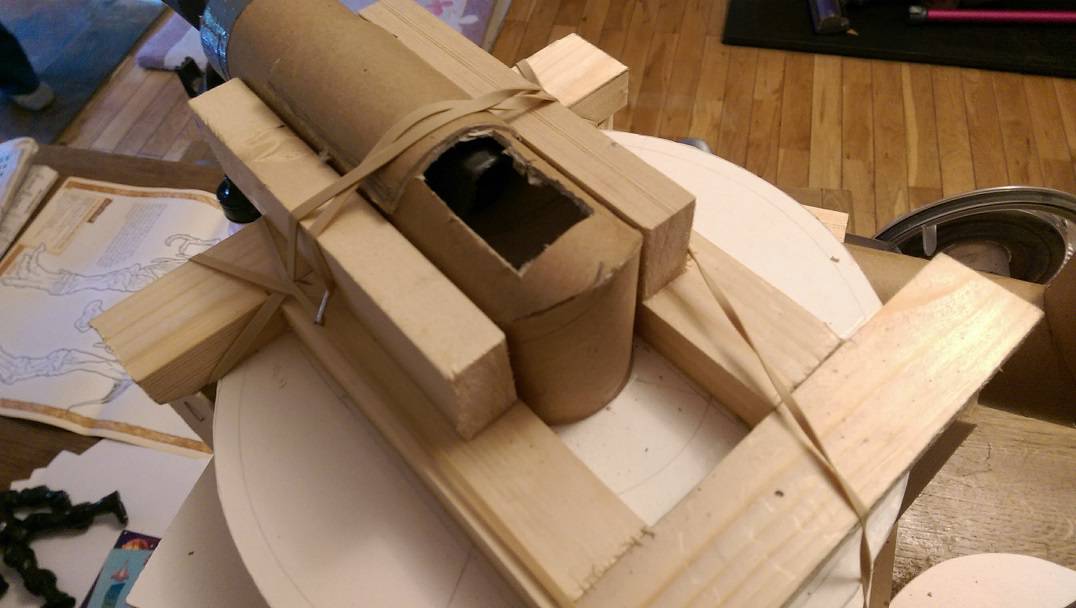
Another few tests. This time I've bypassed the air draw to the extent that the input flow is very reduced (I can't imagine a roaster typically works with anything less than this). Still get 100% separation. Have also simplified the input pipe making it flush with the cylinder wall. 100% separation.
dmccallum attached the following images:
|
|
|
|
| dmccallum |
Posted on 10/15/2016 4:57 AM
|
|
1/4 Pounder  Posts: 93 Joined: November 24, 2015 |
Thought I'd also try a straight entry configuration. San Fransiscan do this on the SF-1 with a baffle on side of the outlet pipe. I couldn't get this to work very well, the baffle appeared to disturb the air-flow and while still got near 100% separation, fines started to get through which I image would inevitably have to deal with downstream. I didn't pursue trying to improve on this.
dmccallum attached the following images:
|
|
|
|
| dmccallum |
Posted on 10/15/2016 5:01 AM
|
|
1/4 Pounder  Posts: 93 Joined: November 24, 2015 |
Another straight entry config this time with a baffle mounted against the exterior which did work much better, achieving 100% separation.
dmccallum attached the following images:
|
|
|
|
| dmccallum |
Posted on 10/15/2016 5:25 AM
|
|
1/4 Pounder  Posts: 93 Joined: November 24, 2015 |
I also experimented with an air-ramp. Not sure this added much and demonstrated that it'd need to be joined to both ext and int surfaces as material would collect on the upper surfaces. A straight entry config with no baffle only achieved about 60% separation, so that's not an option. The flush tangent entry with the Thien baffle at 130mm off the bottom appeared to work best. I'd run quite a few tests and didn't find any build up of fines in the Dyson at all. I guess there'd be some build up over time, but the exiting air-flow appeared very clean. You can get your tangent entry cut pattern by using a 3D design package to make a template that you can stick to your cylinder before getting your dremel or whathaveyou out.
dmccallum attached the following images:
|
|
|
|
| dmccallum |
Posted on 11/06/2016 6:16 AM
|
|
1/4 Pounder  Posts: 93 Joined: November 24, 2015 |
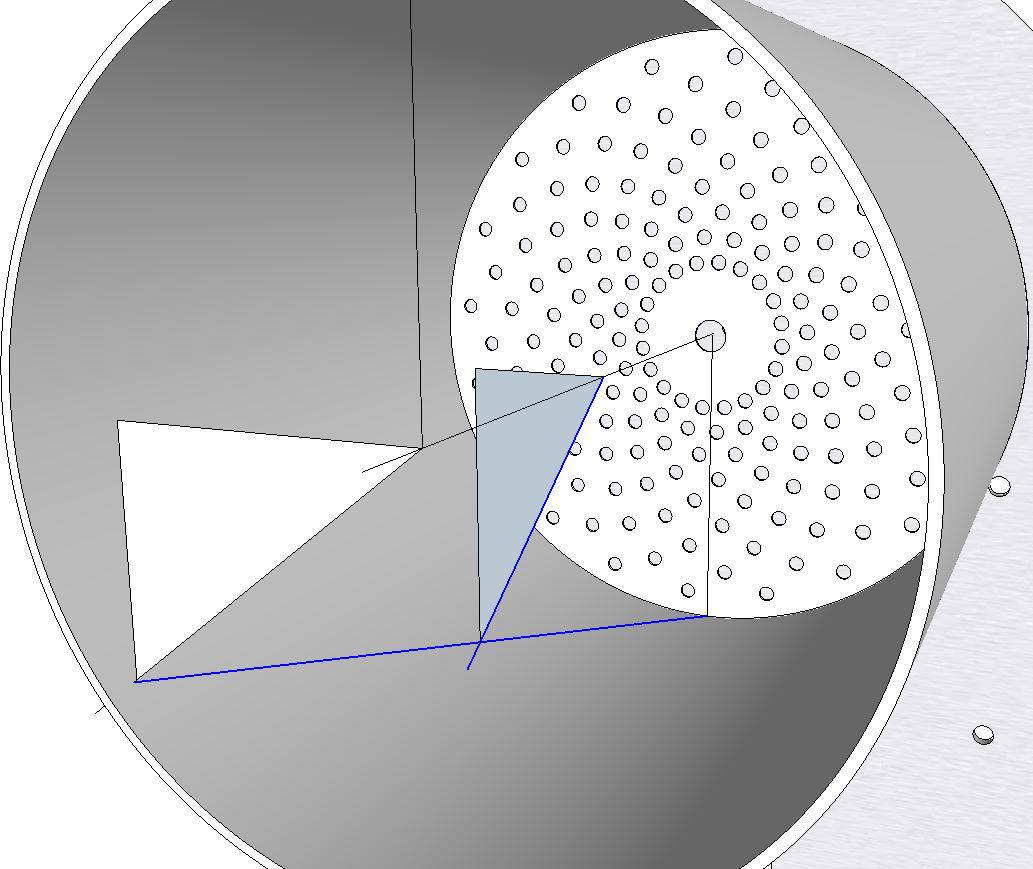
Had been trying to establish the handrail-radius for the drum vanes and wasn't sure I was getting accurate answers from the formulas I've seen here (http://www.homeroasters.org/php/forum/viewthread.php?thread_id=4482&rowstart=40) To get off on the right start you 'd have to establish an accurate input for P by following the line of your 25deg angled vane to the edge of the next quarter turn in circumfrence to get a quarter of the screws hieght. In my case 404.2 so total rise of 1616.8 for one complete turn. Drum Outer Vane Vars P=1616.8 D=240 d=220 h=20 Step 1 l = sqr ((pi*d)sq) + (Psq) l = sqr ((pi*220)sq) + (1616.8sq) l = sqr (477688 + 2614042) l = sqr (3091730) = 1758 Step 2 L= sqr ((pi*D)sq) + (Psq) L= sqr ((pi*240)sq) + (1616.8sq) L= sqr (568489 + 2614042) L= sqr (3182531) = 1783 Step 3 R= (Lxh)/(L-l) = (1783 x 20)/(1783 - 1758) = 35660/25 = 1426 r = R-h = 1426 - 20 = 1406 I don't quite get it, tried a number of different vars and have to wonder whether the method works well for what I'm trying to do - an R of 1426 is wide of the mark and I wasn't convinced with other results I'd got. There's also so the question of why I'd get a different answer for R when I repeat the formula for the inner vane set starting diameters of D=220 & d=200. R for the second result should be the same as r for the first ?! Someone do us a favor and point out where my method/math has gone wrong. So instead I've used Sketchup to do it for me. It's easy and you get a better feel for the result. 1. Draw a cylinder that represents the inside surface of your drum complete with a centre-line running through it, and then figure out your vanes start and stop points. Draw a straight line between them. 2. Find the middle point of the line and draw a line following the up-down (blue) axis to the cylinder centre line. The draw another line from the middle of the last line at a straight tangent (or in line with the one you just drew to the centre-line) to the surface of the cylinder. 3. Get the dimensions of the line between the vane stop/start points and the line to the cylinder surface and draw them out exactly. 4. Draw a 3 Point Arc starting from a Vane end point to the line that met the cylinder wall and terminating on the Vane end point. 5. Delete the small middle line connecting the straight line and arc. 6. Select the arc and refer to the Entity Info pane for the calculated radius. Does this work ? Refer to the photo of the mock up attached.
dmccallum attached the following images:
|
|
|
|
| dmccallum |
Posted on 11/07/2016 6:43 AM
|
|
1/4 Pounder  Posts: 93 Joined: November 24, 2015 |
What I figure my final vane cut patterns will be. Calculating the radius for the inside and outside edges of each of the interior and exterior vane sets is completely overkill. Simply using the drum facing calculated radius for the inner vane edges would have been adequate. But then it's simple enough with the method above.
dmccallum attached the following image:
Edited by dmccallum on 11/07/2016 6:51 AM |
|
|
|
| dmccallum |
Posted on 11/17/2016 9:36 AM
|
|
1/4 Pounder  Posts: 93 Joined: November 24, 2015 |
I've shared my initial 2D drawings at https://drive.goo...sp=sharing The zip contains SolidEdge 2D Drafting ST9 files for parts to be laser cut and those to be fabricated. I'll export to DWG some time soon but Solid Edge 2D is free. It's mostly there and I'll up date the zip as I finish it. Welcome any feedback. Edited by dmccallum on 11/04/2021 6:49 AM |
|
|
|
| dmccallum |
Posted on 11/17/2016 11:13 AM
|
|
1/4 Pounder  Posts: 93 Joined: November 24, 2015 |
Should mention that I've only included the roast chamber and cyclone at this stage as I'm having 2nd thoughts about the cooling tray. I'd originally thought a traditional round tray with agitator arms but I'm not convinced this is entirely necessary for a 0.5-2Kg machine. As nice as it'd look be quite a bit of additional fabrication. Any steer on this from anyone ?
dmccallum attached the following images:
|
|
|
|
| allenb |
Posted on 11/18/2016 9:07 PM
|
|
Administrator  Posts: 3869 Joined: February 23, 2010 |
As long as you're able to draw a proper volume of air across the total surface area of an adequately sized cooling tray, there's no need for stirring arms for a 2kg batch of coffee. Go round or square. Round will give a more traditional appearance. Allen 1/2 lb and 1 lb drum, Siemens Sirocco fluidbed, presspot, chemex, cajun biggin brewer from the backwoods of Louisiana
|
|
|
|
| AnthonyD |
Posted on 12/06/2016 6:30 AM
|
|
1/4 Pounder  Posts: 79 Joined: March 16, 2013 |
For my cooling tray I used a cheap stainless pot cut to height and holes drilled in the bottom. No agitator, I just stir with a wooden spoon. I'm using mini vac motor but it tends to overheat. |
|
|
|
| broeker |
Posted on 01/01/2017 5:38 AM
|
|
1/4 Pounder  Posts: 75 Joined: June 23, 2014 |
Some great work happening here 😊 |
|
|
|
| dmccallum |
Posted on 05/12/2017 3:52 AM
|
|
1/4 Pounder  Posts: 93 Joined: November 24, 2015 |
Moving things on slowly, I've had some of my parts cut. I'm always impressed with the accuracy. The hopper gate valve has come together just as I'd imagined. Next, I need to get to grips with my new TIG welder...
dmccallum attached the following images:
|
|
|
|
| Jump to Forum: |
Powered by PHP-Fusion Copyright © 2024 PHP-Fusion Inc
Released as free software without warranties under GNU Affero GPL v3
Designed with ♥ by NetriXHosted by skpacman


