
Login
Shoutbox
You must login to post a message.
renatoa
07/26/2024 3:49 PM
Bill grubbe and Jk, 

allenb
07/26/2024 5:15 AM
Spiderkw Welcome to HRO!


renatoa
07/24/2024 8:31 AM
ramiroflores and John123,

 ?
?

 ?
?renatoa
07/21/2024 1:18 AM
 , Luislobo
renatoa
07/19/2024 11:28 AM
Koepea, 

Forum Threads
Newest Threads
Skywalker roaster modsBackground Roast Iss...
Hello from Arkansas
TC4ESP
Green coffee reviews
Hottest Threads
| Skywalker roaster... | [375] |
| TC4ESP | [115] |
| War on Farmers by... | [47] |
| Adventures in flu... | [26] |
| Hello! (soon) Roa... | [17] |
Donations
Latest Donations
dmccallum - 10.00
JackH - 25.00
snwcmpr - 10.00
Anonymous - 2.00
Anonymous - 5.00
dmccallum - 10.00
JackH - 25.00
snwcmpr - 10.00
Anonymous - 2.00
Anonymous - 5.00
Users Online
Guests Online: 6
Members Online: 0
Total Members: 8,393
Newest Member: Bill grubbe
Members Online: 0
Total Members: 8,393
Newest Member: Bill grubbe
View Thread
Who is here? 1 guest(s)
|
P1 Group Build?
|
|
| walt_in_hawaii |
Posted on 09/01/2016 5:41 PM
|
|
1/4 Pounder  Posts: 133 Joined: August 24, 2016 |
I just started another thread, Where To Get P1 Chimney... I did that because I've noticed that what we all really need is the Bake A Round Duo pyrex chimney for our P1s, but they are difficult to find these days, too many people sniping them off the bay and I don't have the time to sit by the computer watching and waiting and hoping for a couple to pass my way. SO... the only other way is to just use the (still) commonly available regular Bake A Round cylinders, which are still plentiful and cheap. But there is a slight diameter difference... so I've gone ahead and ordered a couple of the lantern glass' off of Menards (and they haven't even come in yet! and I'm already planning something else). I figure I only want to make the parts once, and don't want to change the specs... so I can make the parts for the Menard chimney or I can make it for the Bake A Round, and probably the latter is the better way to go as its a taller chimney and straight sided. So saying, I'm putting out a little feeler; is there anyone else interested in making a P1 based roaster using the larger Bake A Round chimney? I think I'm going to shamelessly steal OldGearHead's design and make a roasting chamber similar to his, but a tad larger diameter as that's what I'm stuck with when using the standard Bake A Round. So I'll have to fabricate the bottom flange (aluminum) with a slight taper inside, use stainless uprights, and fabricate a top cover for the tube and uprights to go into. I'll elaborate in a bit and start designing the bottom and top flange and will post them here, soon as I can order a couple Bake A Rounds for myself. If anyone else wants to jump in, I will do the fabrication work for free, you only have to supply your own aluminum (look for 'aluminum round stock' on the bay, or else call a local supplier) as I don't have a lot of aluminum in this size lying around. I'm at work right now so can't give you specifics, but it will probably have to be near 4" or 5" OD. And, if you want me to make them for you it will only be this once as the real time consuming part in fabrication is setting up the machine to do the cuts, not so much the actual work.... so I can do a small batch of parts almost as easily as doing 1 part, which is why I'm posting this. But I need an approx. headcount to figure out what the actual workload will be.... also, if someone with an actual Bake A Round tube could post the measurements here for me? I need very accurate measurements; inside diameter, outside diameter, and length. For people who definitely want to jump in, please post here and I will start a list, also posted here. If there is more demand than I'm willing to set time aside for, then it will be first come first served basis, sorry. aloha, walt |
|
|
|
| snwcmpr |
Posted on 09/02/2016 7:31 AM
|
|
1 1/2 Pounder  Posts: 925 Joined: March 03, 2011 |
I've been following you. Question to make it a bit easier for me to follow. What is a "P1"? I assume a popper. That's how i got started. I am going to look up bake A Round Duo. I did not know there was a "DUO". I have a few of one size, and now I don't know what size that is. --------------
Backwoods Roaster "I wish I could taste as well as I wish I could roast." As Abraham Lincoln said "Do not trust everything you read on the internet". |
|
|
|
| walt_in_hawaii |
Posted on 09/02/2016 1:31 PM
|
|
1/4 Pounder  Posts: 133 Joined: August 24, 2016 |
snwcmpr, a P1 = Westbend Poppery I. http://forum.home...ead_id=270 the above link is to the first post under "Popcorn Popper roasting", which is this category of posts and shows the now standard modifications. The original Bake A round pyrex chimney is around 3.5" diameter and the Duo is 3" diameter. The P1 has an aluminum roast chamber that can perfectly fit a 3" cylinder but the 3" pyrex is difficult to find as its rare. So the adapter I am proposing to make will allow using a 3.5" pyrex cylinder on top of the roast chamber to extend it (and lose the bakelite, or black plastic chimney as it starts chipping with age and use). I've just ordered a couple of the Bake A Round cylinders off the bay, so can start construction and will be posting pics of the adapters in a few days. The thermocouples and a variac have just been ordered as well. I have 2 P1's, the one I plan to use and 1 backup, so have to fabricate 2 sets of these adapters for myself. I was going to go with a drum roaster, but a few months into this process realized I like smaller batches of around 110g or a little more (I think my ideal batch size will be a bit less than 250g), as it means I can have several different types of beans to mix when making a cup in the morning. Its been working out very well, each morning I get a slightly different cup but always satisfying, and the beans are almost always less than a week old. In fact, with the Ethiopians I find I prefer them very fresh as the single origin fruit and citrus is much stronger. edit to fix link Edited by ginny on 09/03/2016 2:07 PM |
|
|
|
| walt_in_hawaii |
Posted on 09/02/2016 1:39 PM
|
|
1/4 Pounder  Posts: 133 Joined: August 24, 2016 |
Ooops, does anyone know the actual increase in diameter in the Bake A Round pyrex cylinders as they heat up? ....also the increase in length... have to provide enough space for the expansion. |
|
|
|
| ChicagoJohn |
Posted on 09/02/2016 2:54 PM
|
|
Pounder  Posts: 513 Joined: June 15, 2015 |
Quote walt_in_hawaii wrote: Ooops, does anyone know the actual increase in diameter in the Bake A Round pyrex cylinders as they heat up? ....also the increase in length... have to provide enough space for the expansion. Pyrex CLTE is around 4 micrometers / meter C? or 0.04% per 100?C (180?F) change. So going from room temperature to a very high roast temperature, it should be a change of around 0.08% in length and diameter. So many beans; so little time.... |
|
|
|
| walt_in_hawaii |
Posted on 09/02/2016 4:04 PM
|
|
1/4 Pounder  Posts: 133 Joined: August 24, 2016 |
Thanks, John! .04% at 180F.... i'll use round numbers and say 500F is my terminal temp, therefore I get near .11% or .0011 ...so a 14" tube will elongate round 15 or 16 thousandths of an inch, this is a lot less than I thought. Since 1/16th of an inch is roughly 63 thousandths, it appears an adequate expansion space of 1/32" or about 30 thousands is going to be about double what I'd conceivably need.... I think I'll just do 50 thousandths clearance diametrically and about 100 thousands longitudinally just to be safe. Some space will need to be left for a soft packing material, I think, so I'll probably have to increase that space. I'd like to take the glass tube off for washing. Anyone know of a 3" rubber stepped coupling to seal off the ends? sort of an L cross section? |
|
|
|
| ChicagoJohn |
Posted on 09/02/2016 5:55 PM
|
|
Pounder  Posts: 513 Joined: June 15, 2015 |
The temperatures are deltas, Walt. In other words, if you start at ambient of 80?F and your roast terminates at 440?F (and the bean temperature is likely to be significantly hotter than your chimney will be due to heat loss in the air), then the delta would be 440-80 or 360?F increase. That would be 200?C increase which amounts to 0.08% of the original diameter and length. Note that circumference increases by the same percentage based upon it's initial value. Good luck on your build. I'll be interested to see what you come up with. Consider maybe a video on youtube with a link here. So many beans; so little time.... |
|
|
|
| snwcmpr |
Posted on 09/03/2016 8:52 AM
|
|
1 1/2 Pounder  Posts: 925 Joined: March 03, 2011 |
Thanks, that was what I thought, but I had not actually seen it called the P1. I posted something here when I purchased silicone high temp o-rings for the Bake A Round cylinder. I found them on Amazon. Maybe they will be useful to you. https://www.amazo...B000FN0Z98 And Walt, you can make your links linkable if you use the link icon in the toolbar. 
--------------
Backwoods Roaster "I wish I could taste as well as I wish I could roast." As Abraham Lincoln said "Do not trust everything you read on the internet". |
|
|
|
| JackH |
Posted on 09/03/2016 9:08 AM
|
|
Administrator  Posts: 1809 Joined: May 10, 2011 |
I thought the Poppery I's were getting hard to find. Especially since they work so well as coffee roasters.
---Jack
KKTO Roaster. |
|
|
|
| walt_in_hawaii |
Posted on 09/03/2016 11:03 AM
|
|
1/4 Pounder  Posts: 133 Joined: August 24, 2016 |
JackH, I think the P1's are getting harder to find... in 2nd hand thrift stores, these days. But I understand they are by far the most prolific model when compared to actual production numbers made, so I don't think we're in any danger of running out anytime soon, people will always post them on the bay and other auction areas knowing what they are worth since these types of stores don't bother asking what kind of popcorn popper they have. I acquired my 2 copies just in the past 2 weeks. I have been using a $7 PII copy (different name, same innards) which I found in a thrift store locally but wanted to try the PI after all I've read about it. I've done a few roasts now in the PI (manually, IR gun) and I must say, the results haven't been that great. Mostly going by sight and smell, which is fine, but the problem I have been having is, the vent holes on the bottom of the PI are too large. My beans keep getting stuck in the holes! So I always see beans which are too dark, or are 'tipped' ...just one part of it scorched because they were trapped in the vent too long. The reason is, I have not yet split out the fan control and am using a router speed control on the main a/c line so the heat and air and still controlled together, and I have to stir with a stick most of the roast. When I get the variac and split out the airflow, this problem will go away. For the meantime I will simply go back to my PII while I'm modding the PI. John, thanks for the clarification on delta rather than absolute. It's why I like to round up, then double  ! just in case. ! just in case. Snwcmpr, thanks for the tip. I checked out the O ring, but its way too big. I don't want the chimney to be floating on a big O ring, the joint will be too big and will trap too much debris. I'll have to find something smaller so it does not leave a large gap to attract silverskin and carbon bits. I was thinking of that silicon insulated tubing just slit lengthwise, but I have to buy a whole roll of it, they won't sell you just a foot :( Have to keep lookin' |
|
|
|
| walt_in_hawaii |
Posted on 09/03/2016 1:40 PM
|
|
1/4 Pounder  Posts: 133 Joined: August 24, 2016 |
Dove into the case this morning... wow, mine appears to have high hours on it! the commutator has a noticeable ledge from wear of the carbon brushes: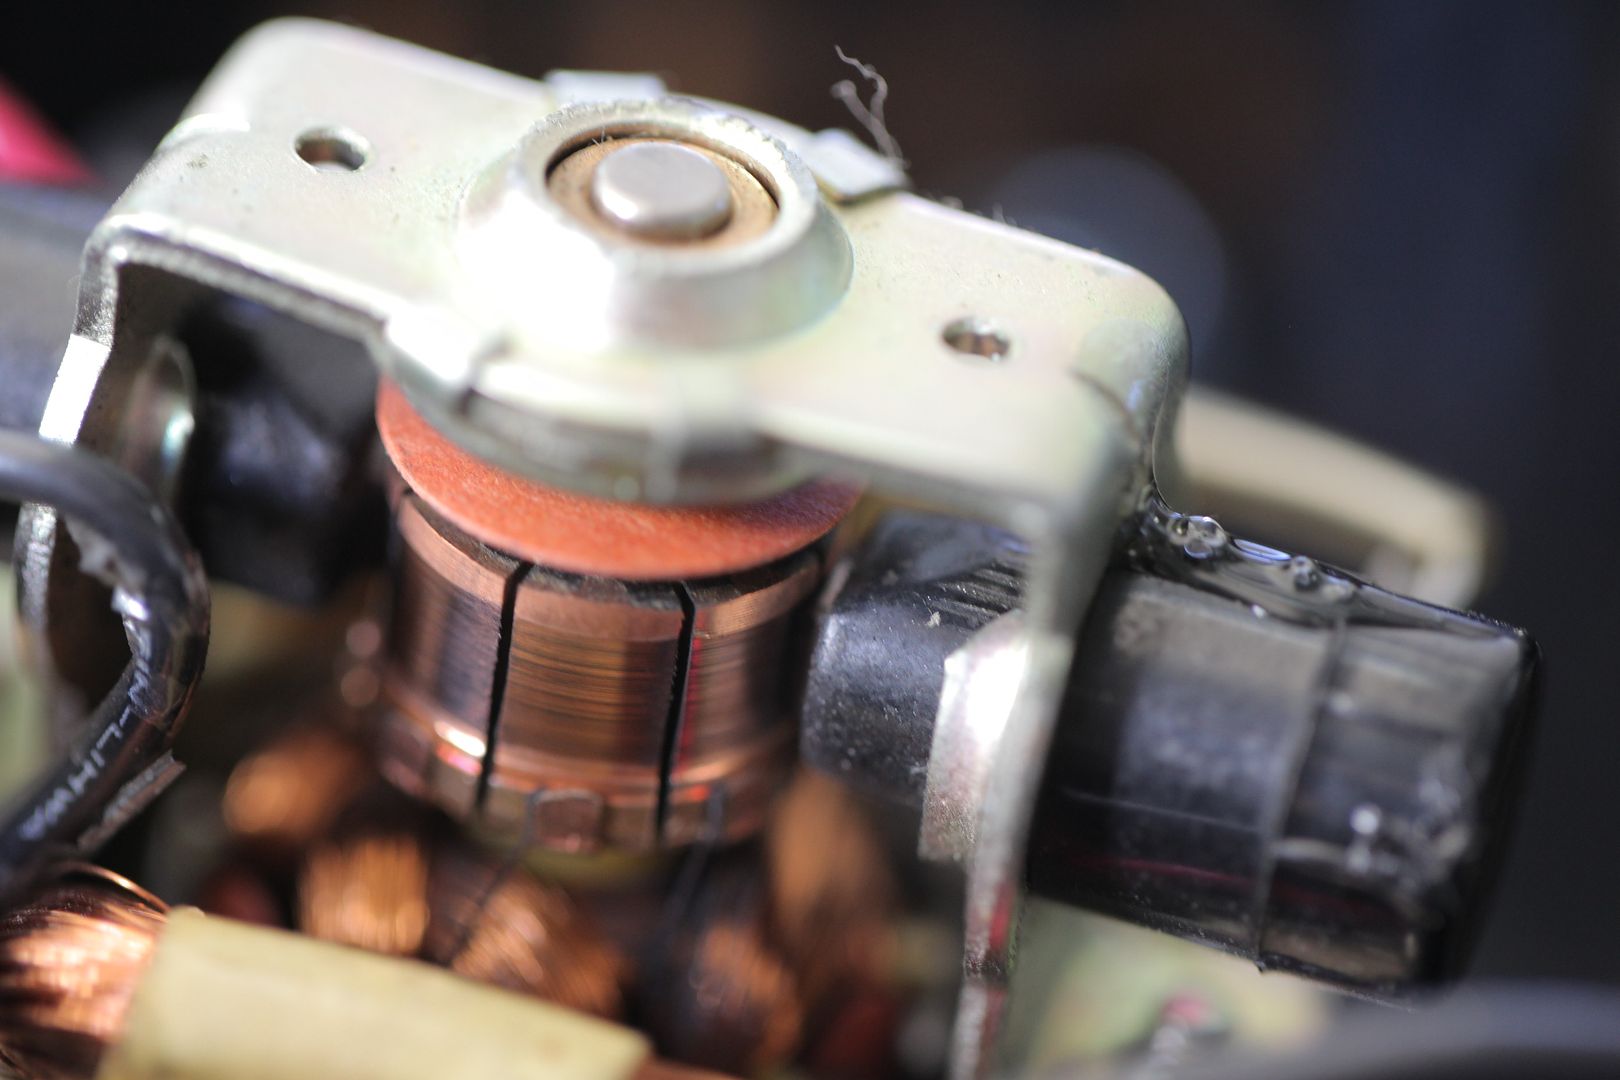 You know, I remember machining a few commutators back when. You'd machine this copper surface a very fine amount, just to get it back level, and then replace the carbon brushes. You might also have to replace the bearings the commutator spin on... I don't detect any shake in mine, despite the high hours, so it appears I'm ok for now. crossing my fingers and will just leave it as is. The vents along the side cast into the bakelite base are noticeably 2 different types... you can see them here: 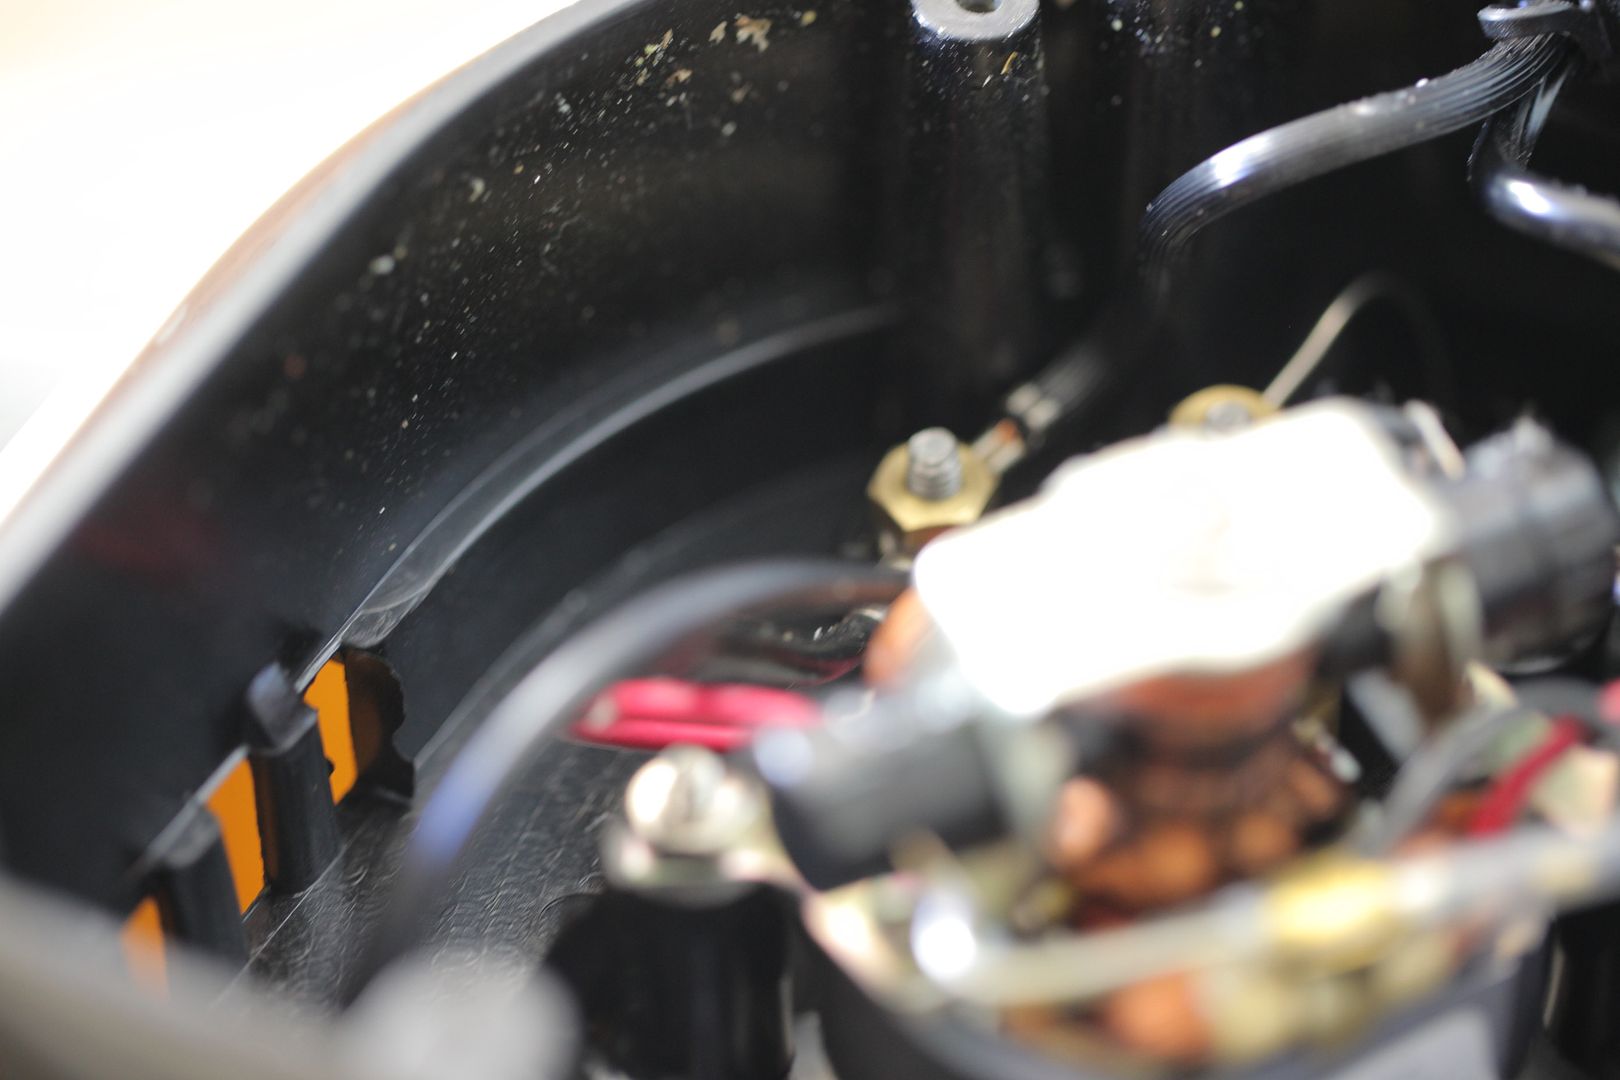 Some of the grates 'blend' into the housing and some are just sort of sitting there. I've decided to remove the ones just sitting there, and leave the heavier ones for support. Will post pic later. |
|
|
|
| ChicagoJohn |
Posted on 09/03/2016 1:48 PM
|
|
Pounder  Posts: 513 Joined: June 15, 2015 |
Quote When I get the variac and split out the airflow, this problem will go away' I have no idea as to the circuits in the Poppery models, Walt, but I know that other poppers I've seen utilize a second heating coil in series with the blower motor to drop its supply to around 20VAC, and the motor then has a full wave bridge that rectifies it to DC. Another, unrelated problem I had when using fully independent controls on the heating elements and blower motor was that of initiating heating without the blower running -- or running fast enough. Because the blower is moving heat out of the coil area into the roasting chamber, if it is not running when the coils are activated, there will be an almost instant meltdown. In my popper, there was a thermal fuse that goes at 250C. But that didn't stop the impeller blade from deforming due to the heat. I thought I'd learned my lesson the first time this happened, but on my new popper I did the same thing again. Since I designed a circuit to prevent the heating coils from being engaged without the blower motor operating at sufficient speed, I never had that problem again. Just something to keep in mind. So many beans; so little time.... |
|
|
|
| walt_in_hawaii |
Posted on 09/03/2016 2:07 PM
|
|
1/4 Pounder  Posts: 133 Joined: August 24, 2016 |
Thanks, John. I think the resistor-in-series thing is for the small DC only motors. The P1 is the standout because the motor is a/c, I don't see any rectification circuit in here. It doesn't look hard to disassemble, but I think I'm getting ahead of myself. I'll just cut the fan wires and rewire it to go into a separate cord so it'll go into a variac and leave the hole enlargement for another day. I decided to pull my old variac out of my garage... would you believe I've had it a couple decades and never read the dial on its face? Had no idea it read up to 140, I'd always assumed it went to 100. Learn something new everyday. Oh, and yeah, I thought of the problem with splitting the circuits... the heat source will fry itself without any airflow so its necessary to be sure the heat is 'off' until your fan circuit has enough flow on it. So, I'll have to be sure to energize the circuit only after airflow is on. You can build in an idiot circuit, but you can also just arrange your controls left to right and do LIFO (last in first out) only... work left to right when turning it on, then go right to left when turning if off. It helps with us coffee roasters as some of it is already built in to the roast algorithym... the cooldown stage requires high airflow, no heat. Edited by walt_in_hawaii on 09/03/2016 2:14 PM |
|
|
|
| ChicagoJohn |
Posted on 09/03/2016 2:31 PM
|
|
Pounder  Posts: 513 Joined: June 15, 2015 |
Quote Had no idea it read up to 140, I'd always assumed it went to 100. Learn something new everyday. Mine goes to 140 also. BTW, PWM units work quite well with heating coils and weigh and cost much less than a variac too; mine probably weighs a couple ounces and cost like $15 including shipping. My coil resistance is 9.5 ohms with the secondary coil in parallel, and the PWM has no problem handling 13 amps at 120VAC. SMAKN? AC 0-220V 20A Pulse Width Modulator PWM Electric Motor Speed Controller Max 4000W by SMAKN $16.66 Prime I'm looking forward to seeing your results. So many beans; so little time.... |
|
|
|
| walt_in_hawaii |
Posted on 09/03/2016 3:17 PM
|
|
1/4 Pounder  Posts: 133 Joined: August 24, 2016 |
Transferring some dimensions of the bakelight chimney...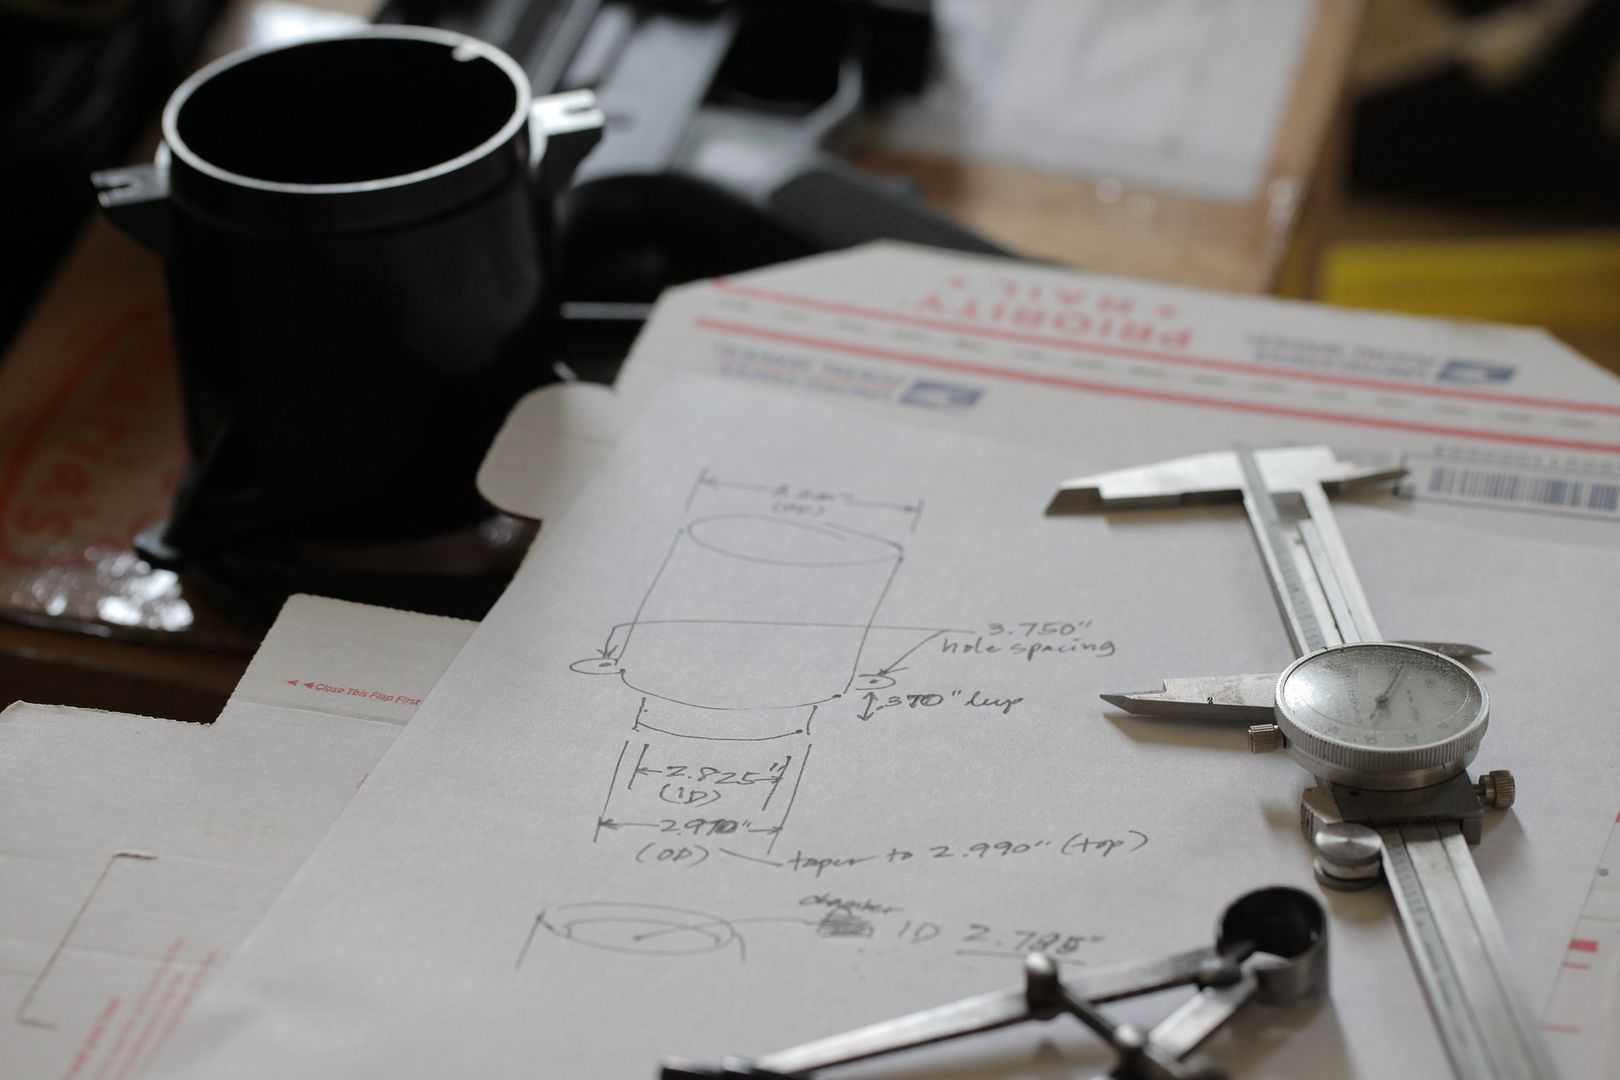 Is this about what you guys get?? The bakelite isn't very uniform, I find large variation in size and its not very round. All the critical dimensions have tapers to them (castings, not machined dimensions)... 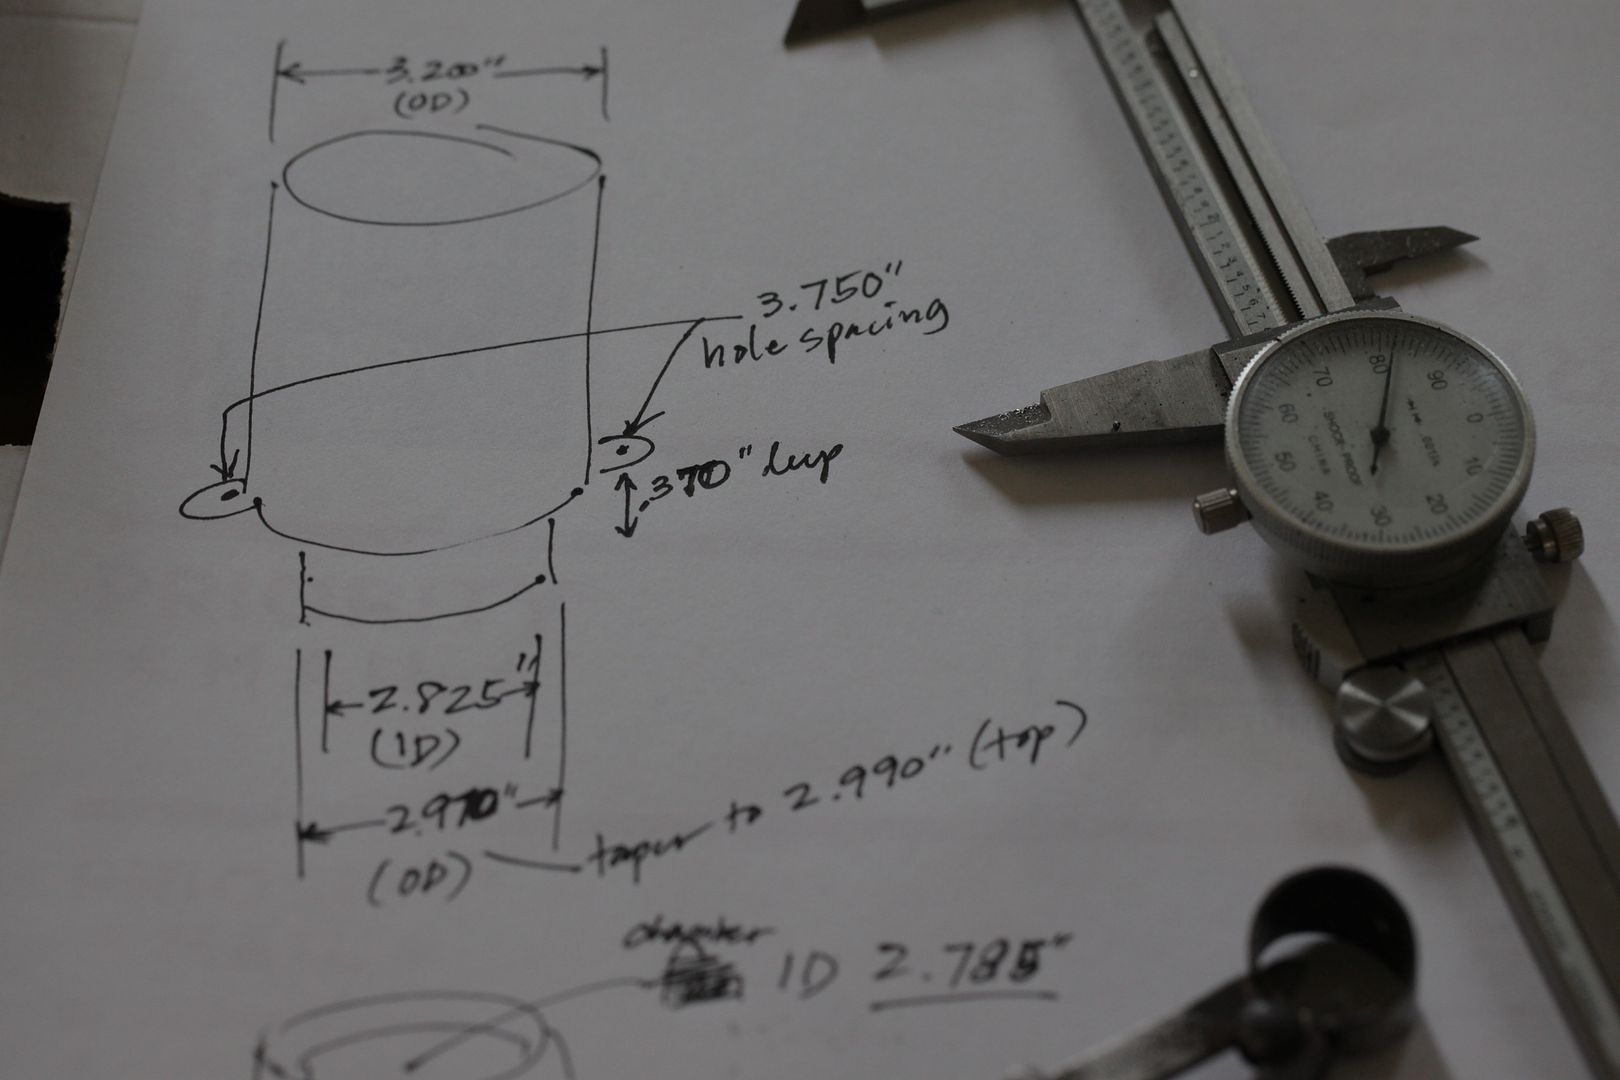 |
|
|
|
| btreichel |
Posted on 09/03/2016 6:07 PM
|
|
1/4 Pounder  Posts: 187 Joined: May 07, 2007 |
I get rid of the bakelite chamber and attach to the metal. If I remember right some of the electrical data is here. I wrote it about a dozen years ago.http://www.homero...ekmod.html
Edited by btreichel on 09/03/2016 6:13 PM |
|
|
|
| walt_in_hawaii |
Posted on 09/03/2016 10:06 PM
|
|
1/4 Pounder  Posts: 133 Joined: August 24, 2016 |
Btreichel, I plan on losing the bakelite but I have to wait until I get my pyrex tubes first and have a chance to do some machining of the adapter so it will fit onto the aluminum fan housing/roast chamber. OK, I have the fan on separate control and just did a first trial roast. Lots to learn! I'm using what looks to be around 10 degrees of tilt (1 rubber slipper under the back edge to tilt it forward, highly technical I know)... tried an espresso blend from SM as a throwaway, took it 10 seconds into 2C and it came out very even! no tipping. I notice it DID take longer to reach 1C though... maybe 11 minutes, whereas normallly I'm there near 9 minutes. Using only enough fan to keep the beans moving and not trying to toss them at all (no chimney yet). The variac on the air is interesting! I'm normally near 110% - 120% most of the time, it seems. Looks like I'll have to recalibrate my use of the router speed control (on the heat) to bring it up a tad faster, but I can't do that until I get the thermocouple in place to get a better idea of RoR. |
|
|
|
| btreichel |
Posted on 09/03/2016 10:26 PM
|
|
1/4 Pounder  Posts: 187 Joined: May 07, 2007 |
Sounds like a good start! |
|
|
|
| walt_in_hawaii |
Posted on 09/04/2016 1:57 AM
|
|
1/4 Pounder  Posts: 133 Joined: August 24, 2016 |
Variac setup: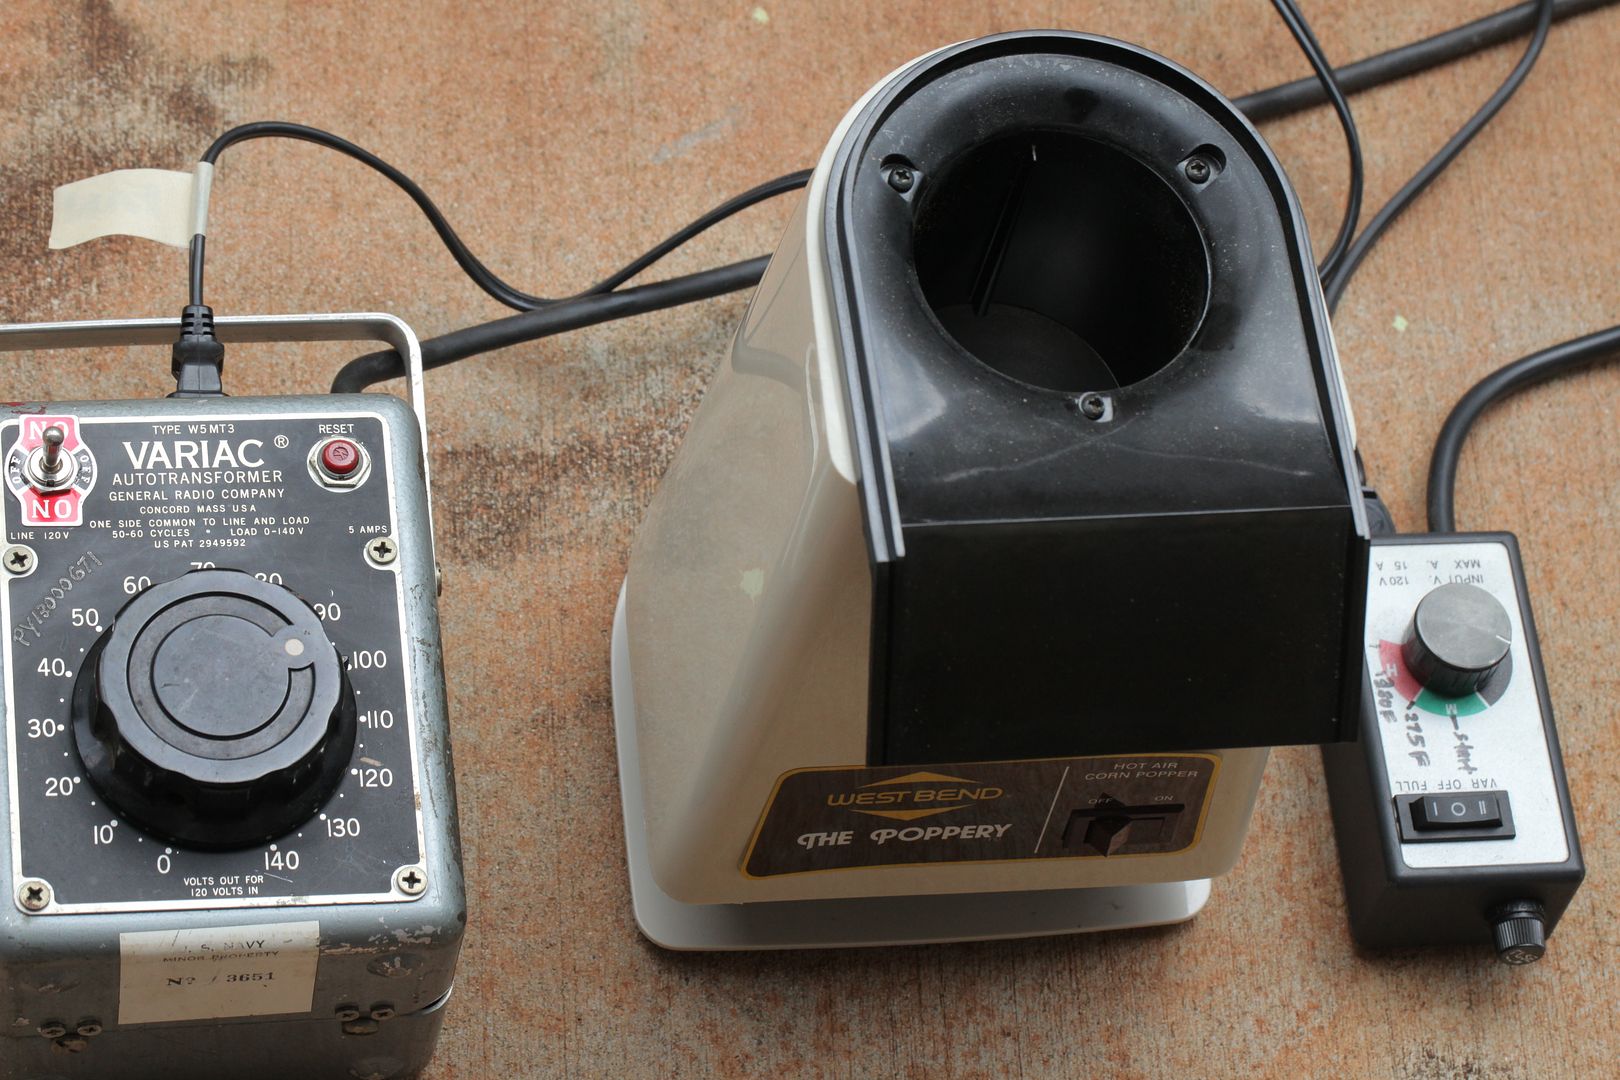 Espresso blend roasted perhaps 10 seconds into 2C (still looks a tad light): 
Edited by walt_in_hawaii on 09/04/2016 2:03 AM |
|
|
|
| walt_in_hawaii |
Posted on 09/10/2016 11:35 PM
|
|
1/4 Pounder  Posts: 133 Joined: August 24, 2016 |
My thermocouples came in...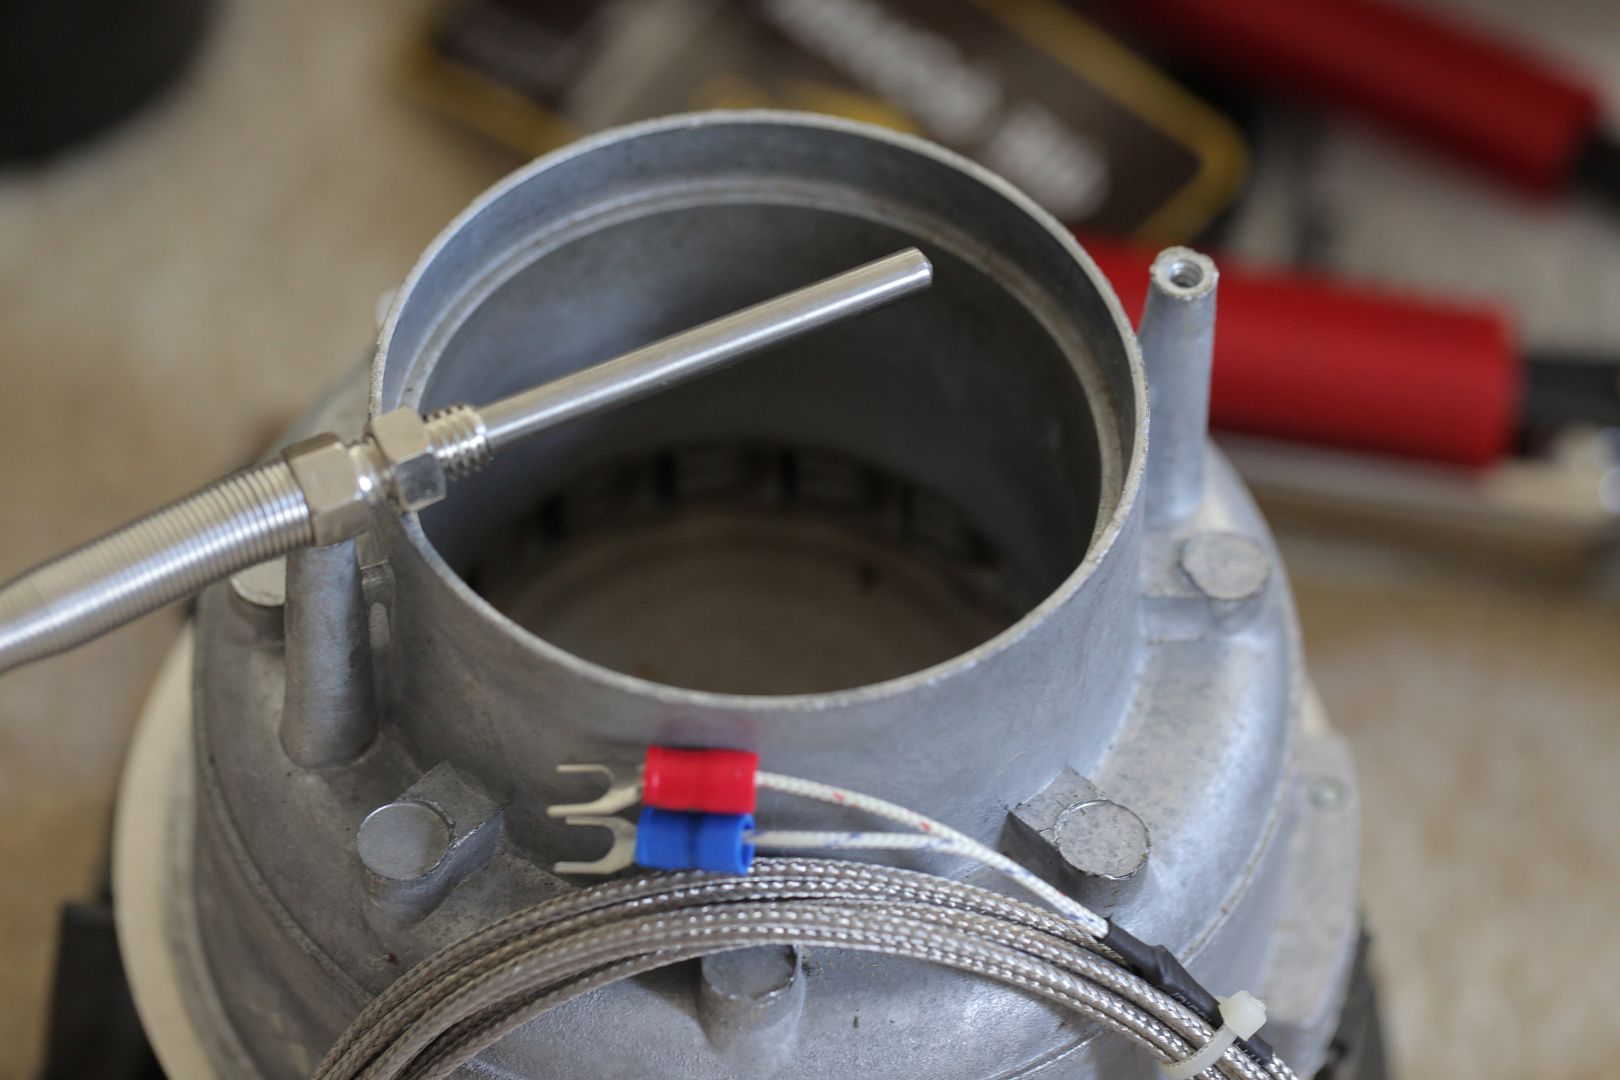 But they are a bit looongggg.... They register at the very tip, so the tip needs to be where you want the info to come from. From my other popper, I've found that moving the tip toward the center of the beans or out near the wall makes a VERY large difference in the reading. I've come to the general conclusion that measuring about 2/3 of the way in is about right... the very center of the spinning bean mass seems to indicate a tad cold and the outside, too hot... which makes sense, as the heat path is from the sides mostly. First things first, this is a die cast base, and there are rather large and very sharp aluminum ridges that can easily cut you, called 'flashing.' I ground off most of the flashing to make it easier to work with. 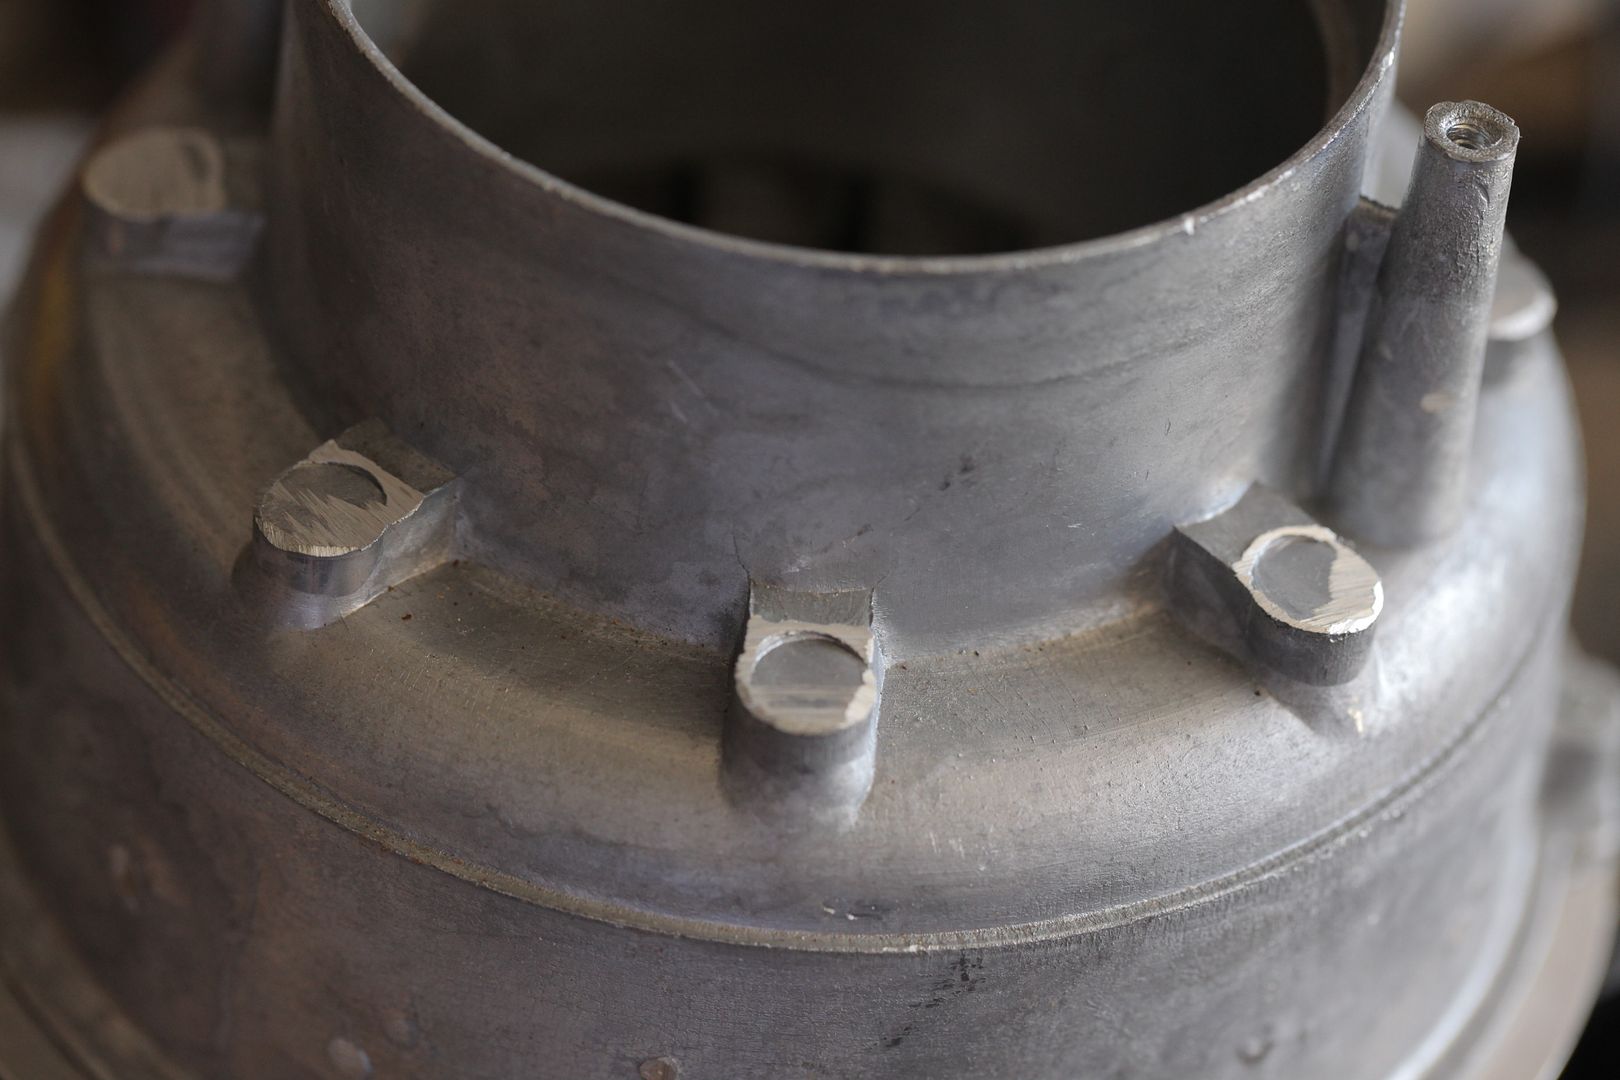 I needed something to hold the thermocouple at the right angle... this is actually a concrete stake (the ones used to hold the forming 2x4s when making a concrete pour, I have a ton of them leftover from my pour) that I cut a small piece off of: 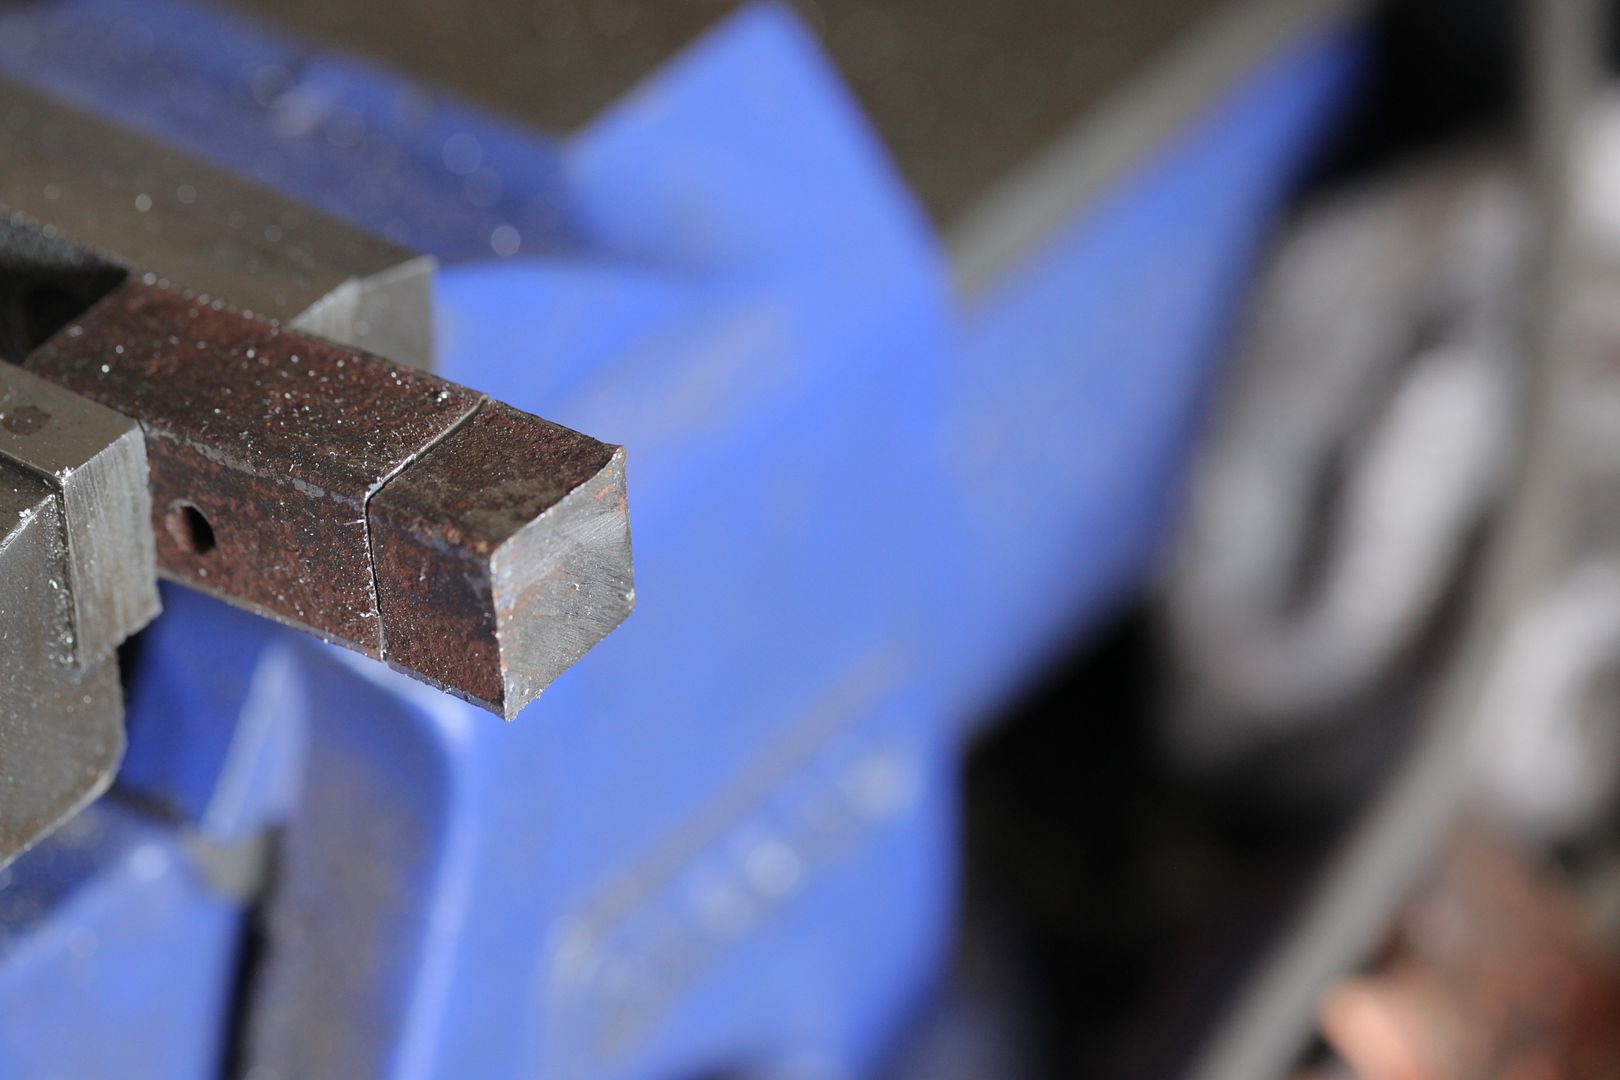 Its very rusty and ragged from the saw cut, so I have to clean off all 6 sides: 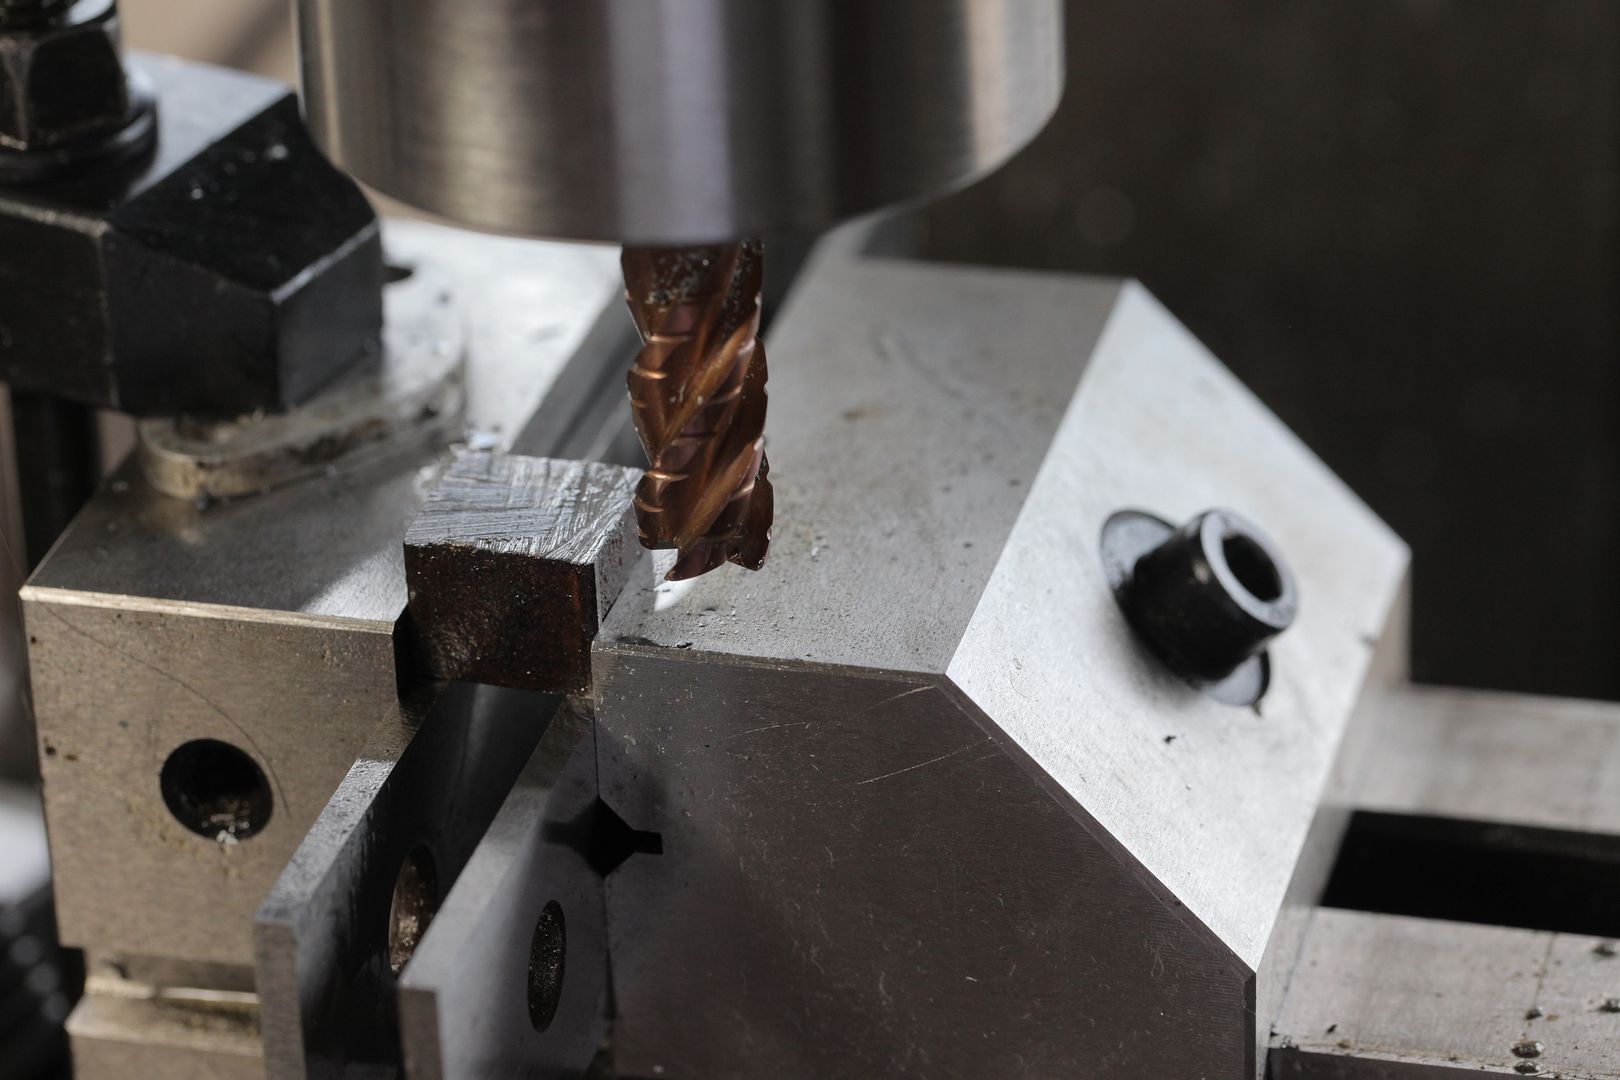 All done, but its so tiny the vise holding it wasn't able to grip it hard enough and the mill grabbed it and threw it... that's why the ugly scarring in one corner :( 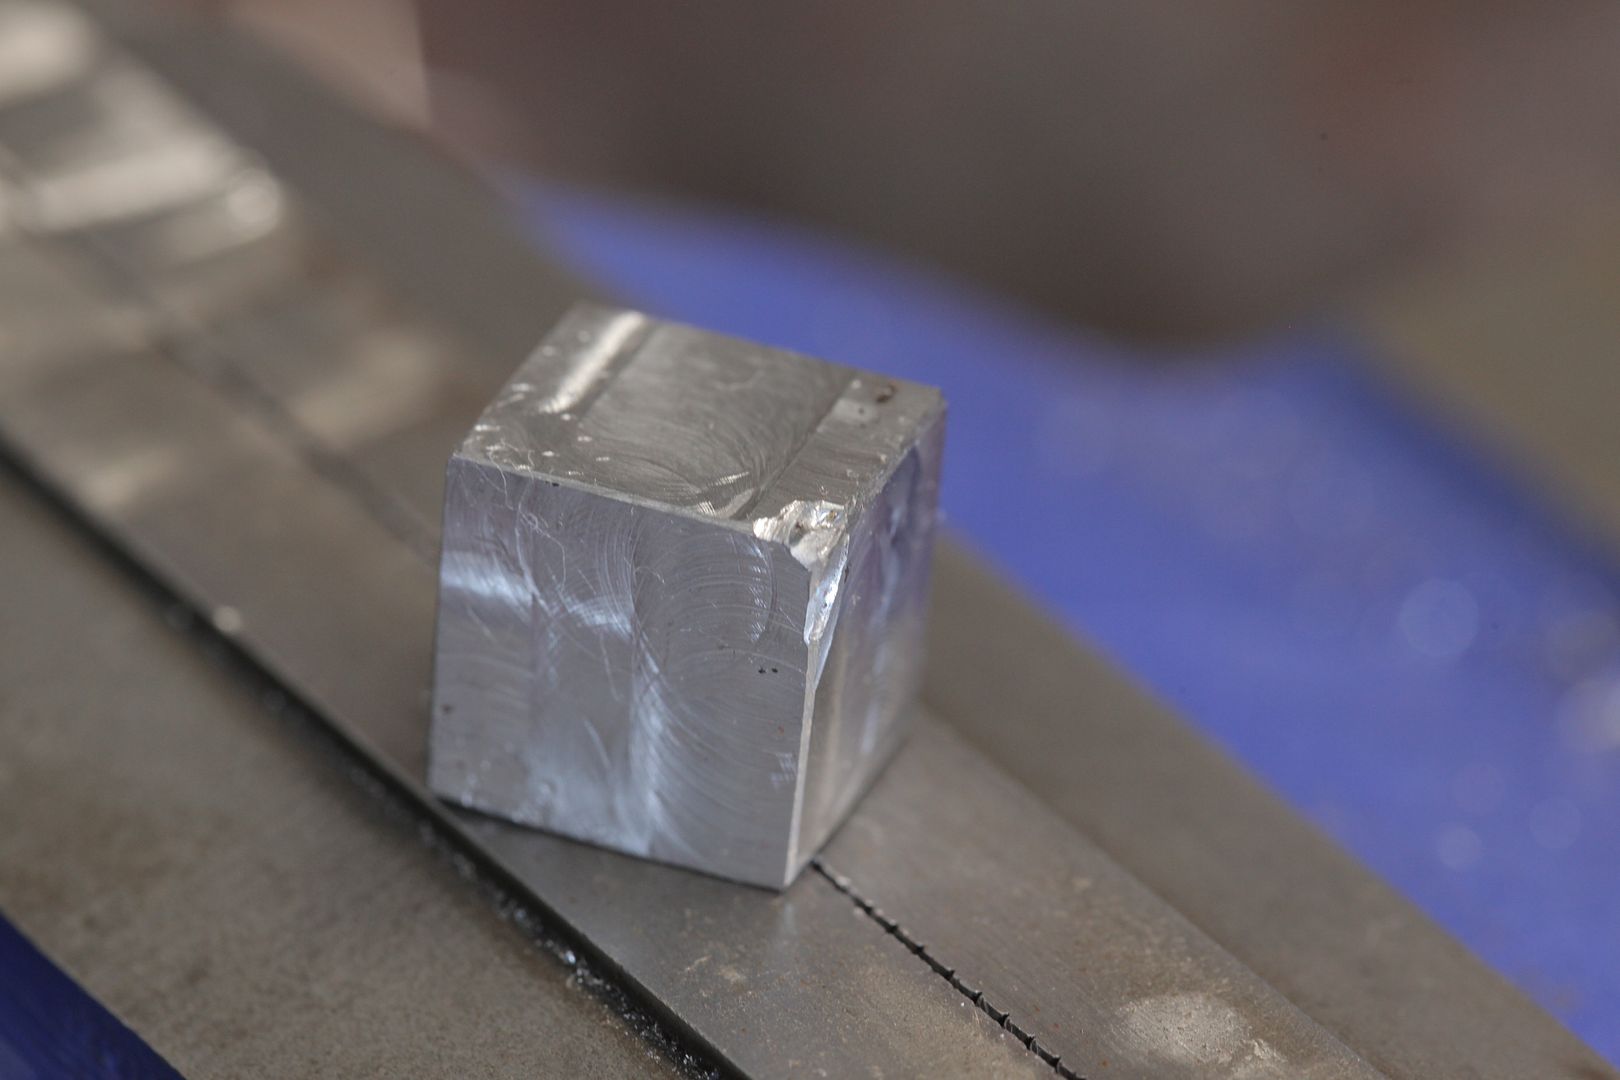 The TC probe is 0.197" diameter. I drilled it to the closest bit I had, which was 0.199" 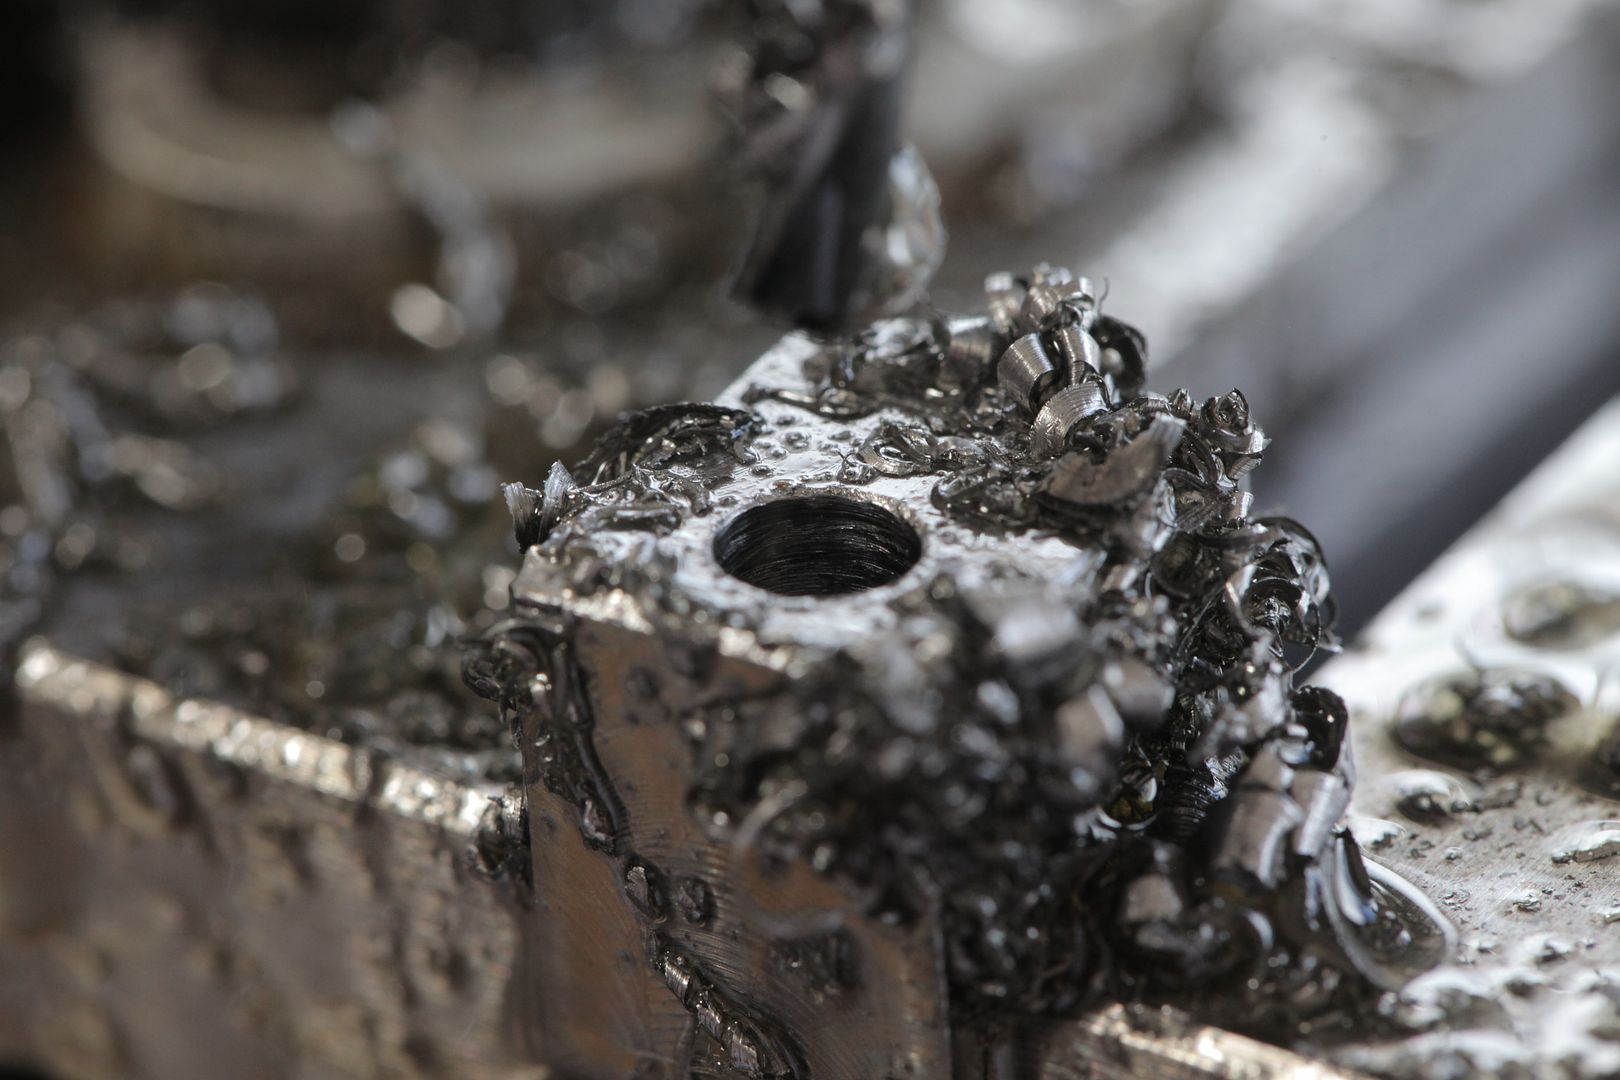 Then slit the side: 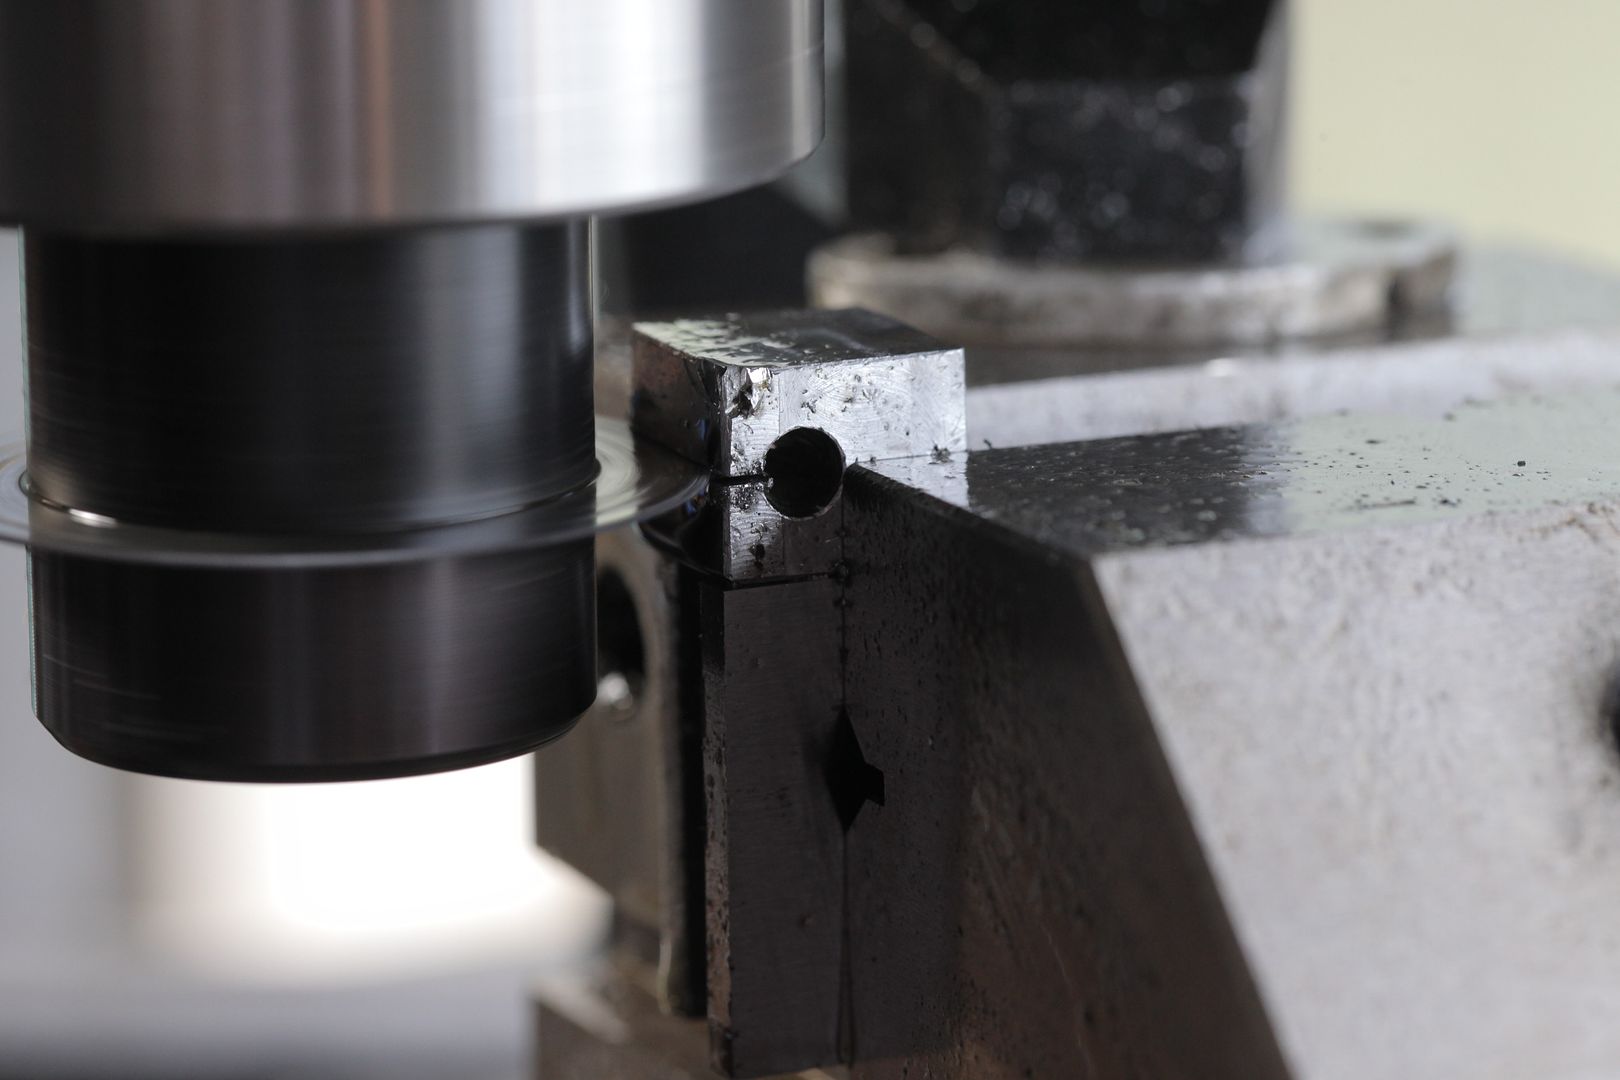 Cut is all the way through 1 wall... now it can be cinched down by... hmmm 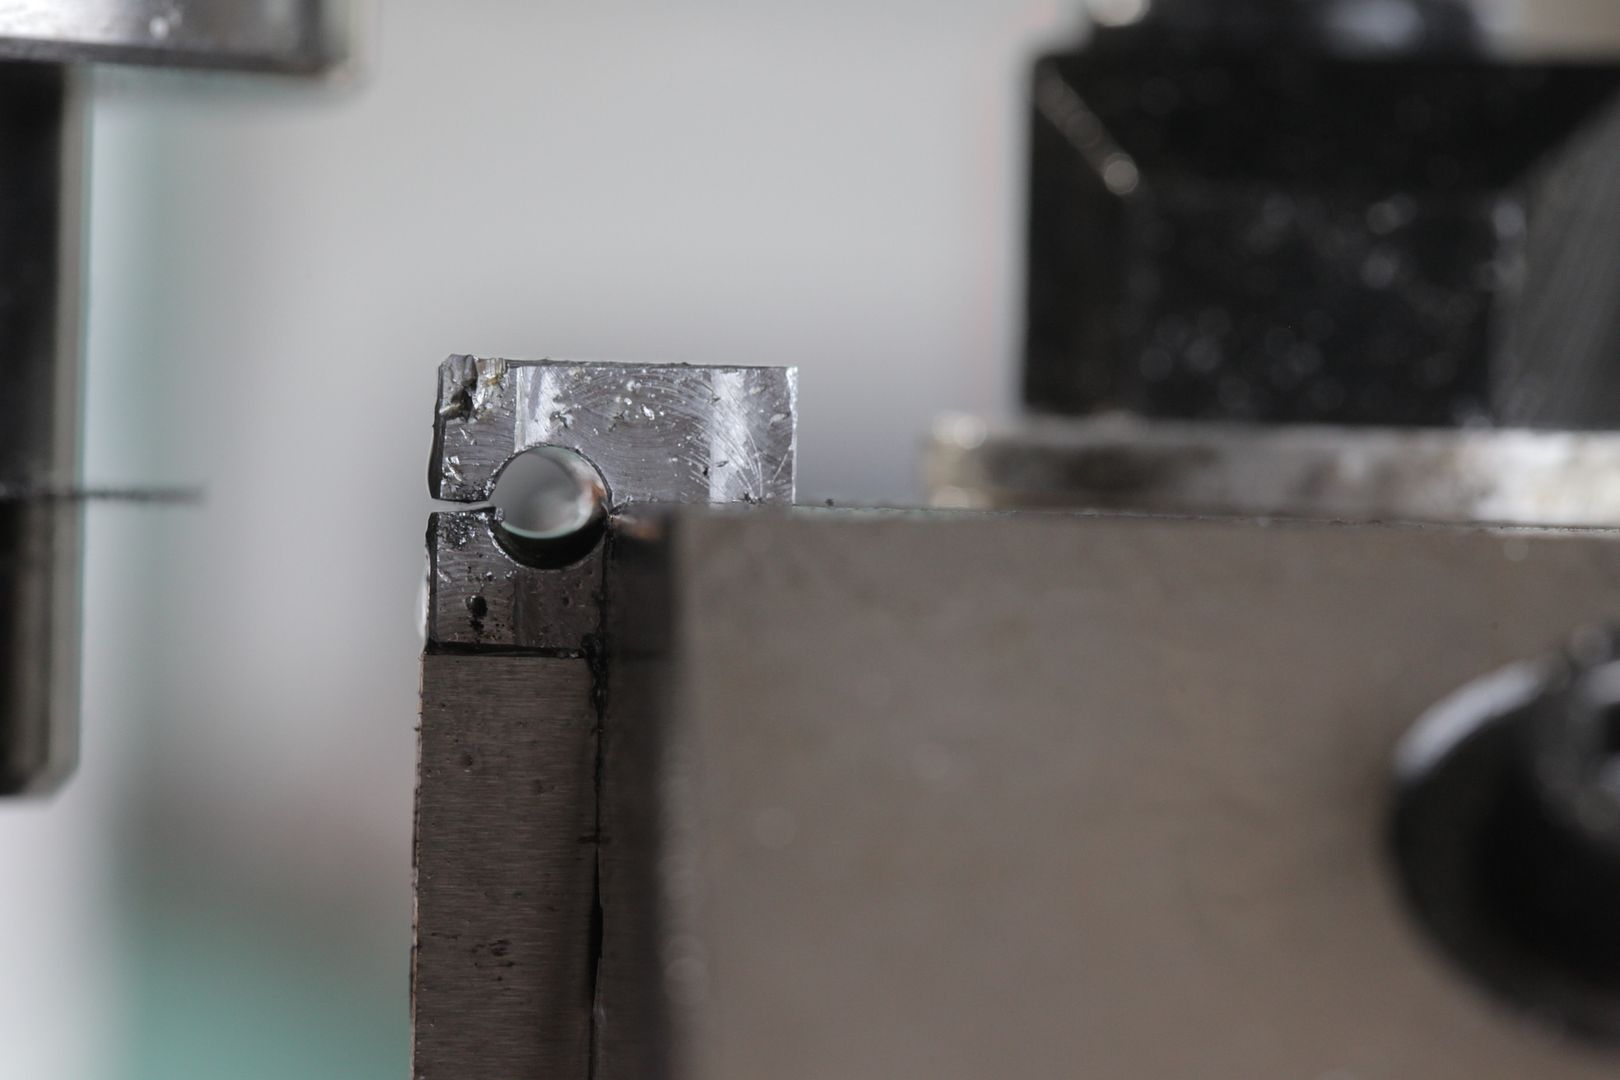 I was supposed to leave enough metal there near the slit so I could drill and tap a cross bolt hole to 'cinch' the 2 halves together around the TC probe. But I didn't plan well enough and there isn't enough meat there... 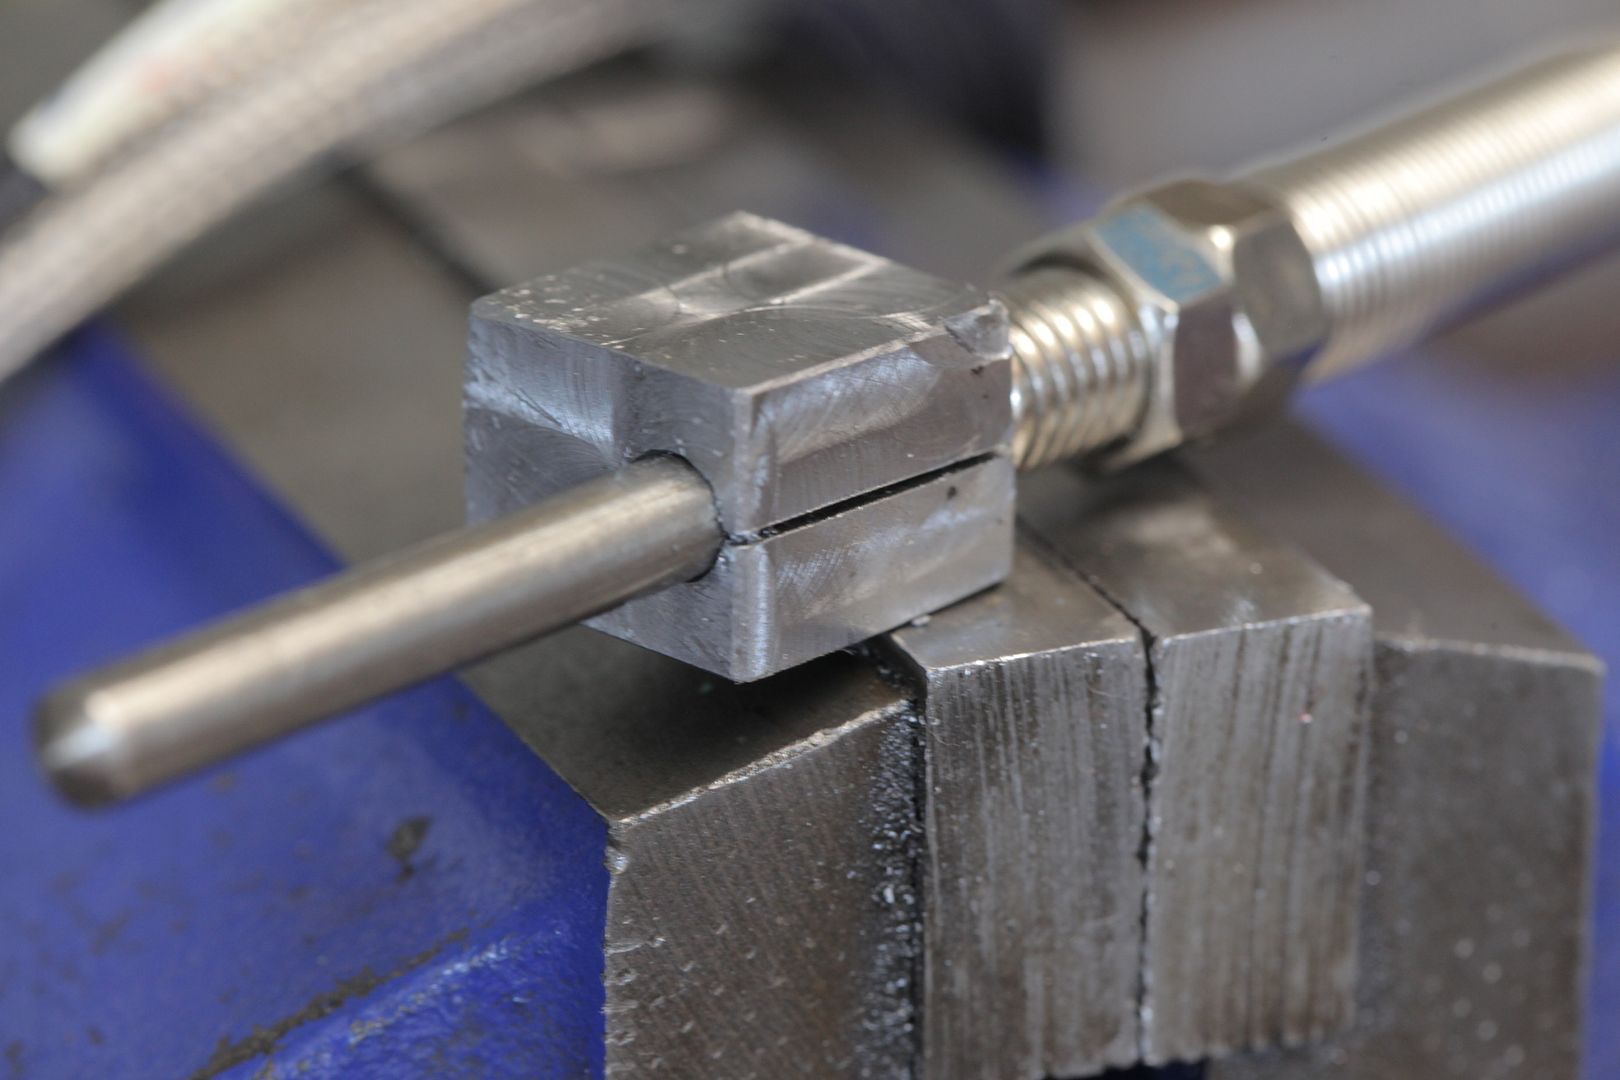 Oh well. OK, Its pretty strong, the steel doesn't really move even with the slit... so I just drilled in the middle and tapped it for a grub screw to hold the TC probe.... 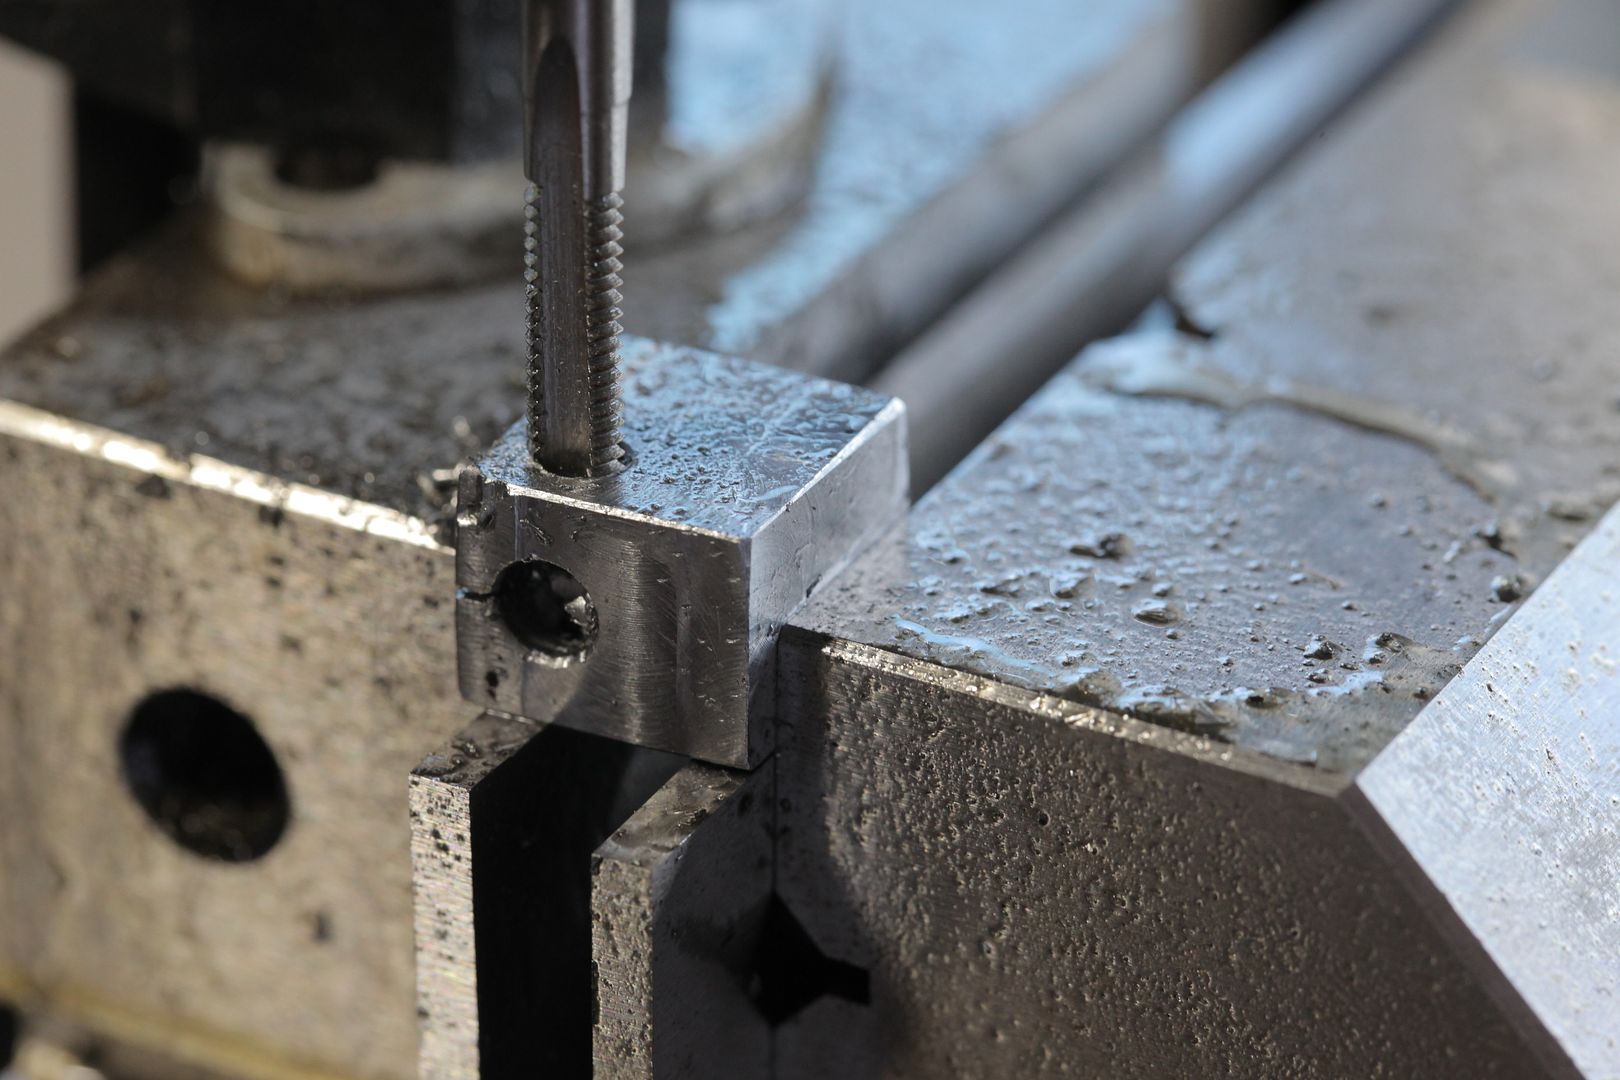 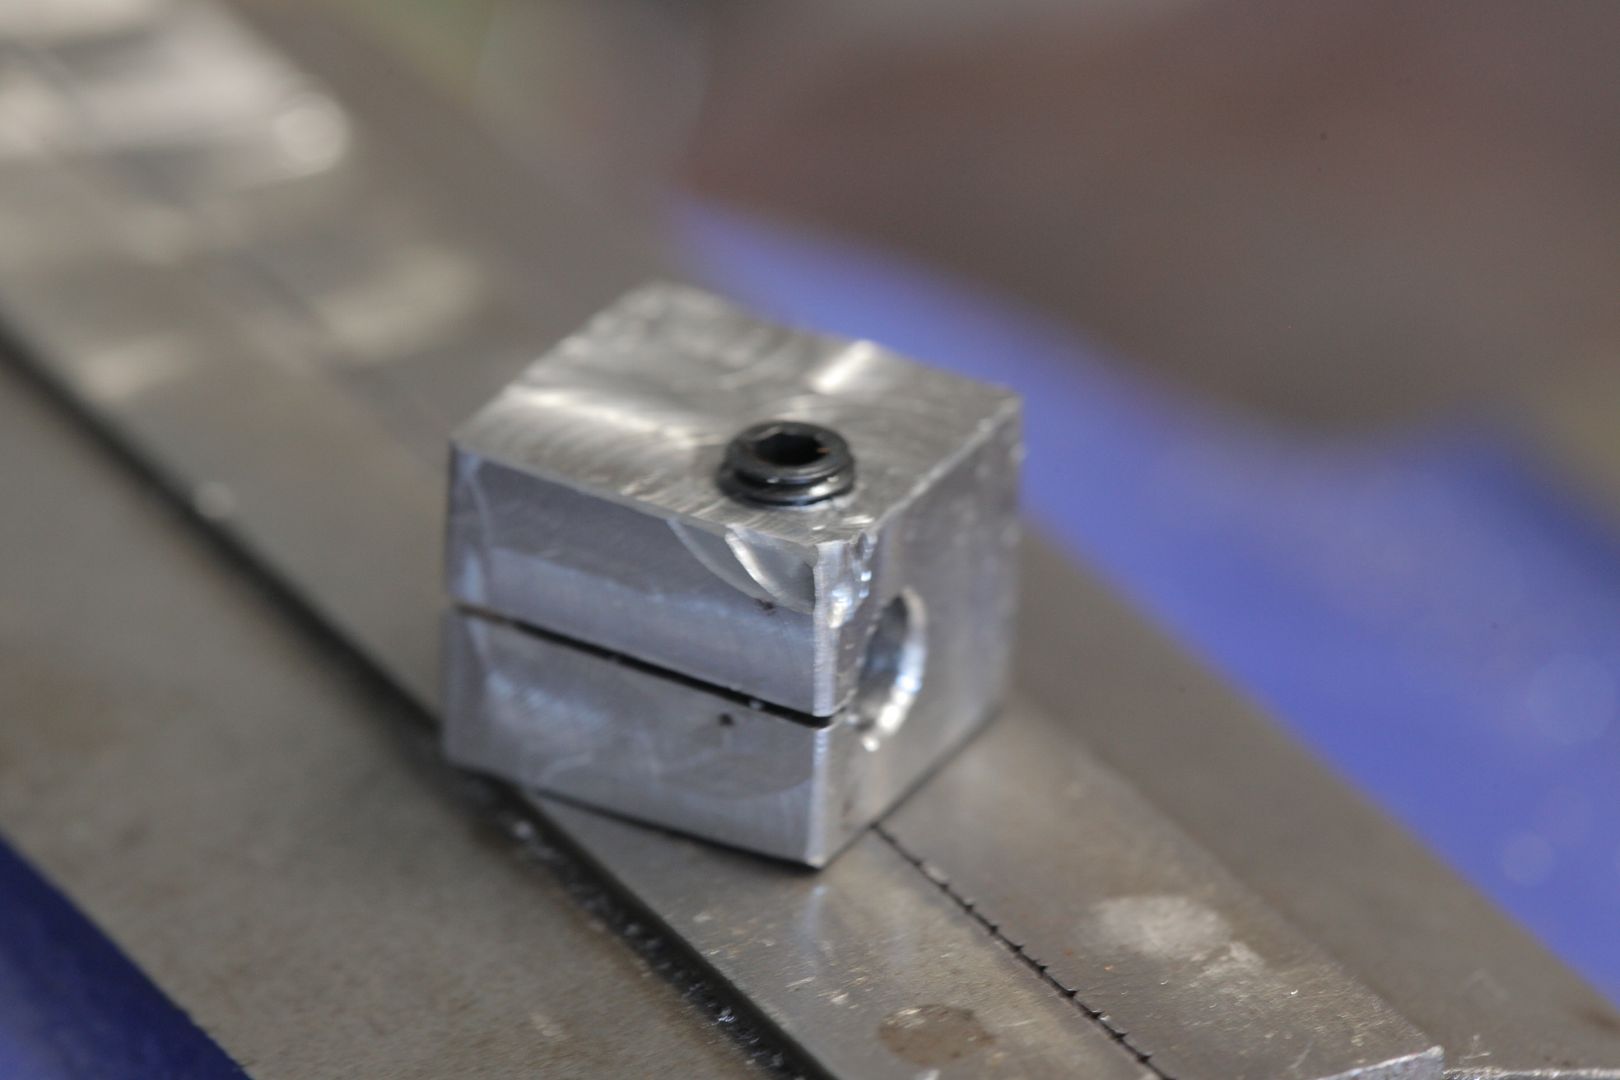 Now I need a hanger... cut a small piece out of an exhaust pipe: 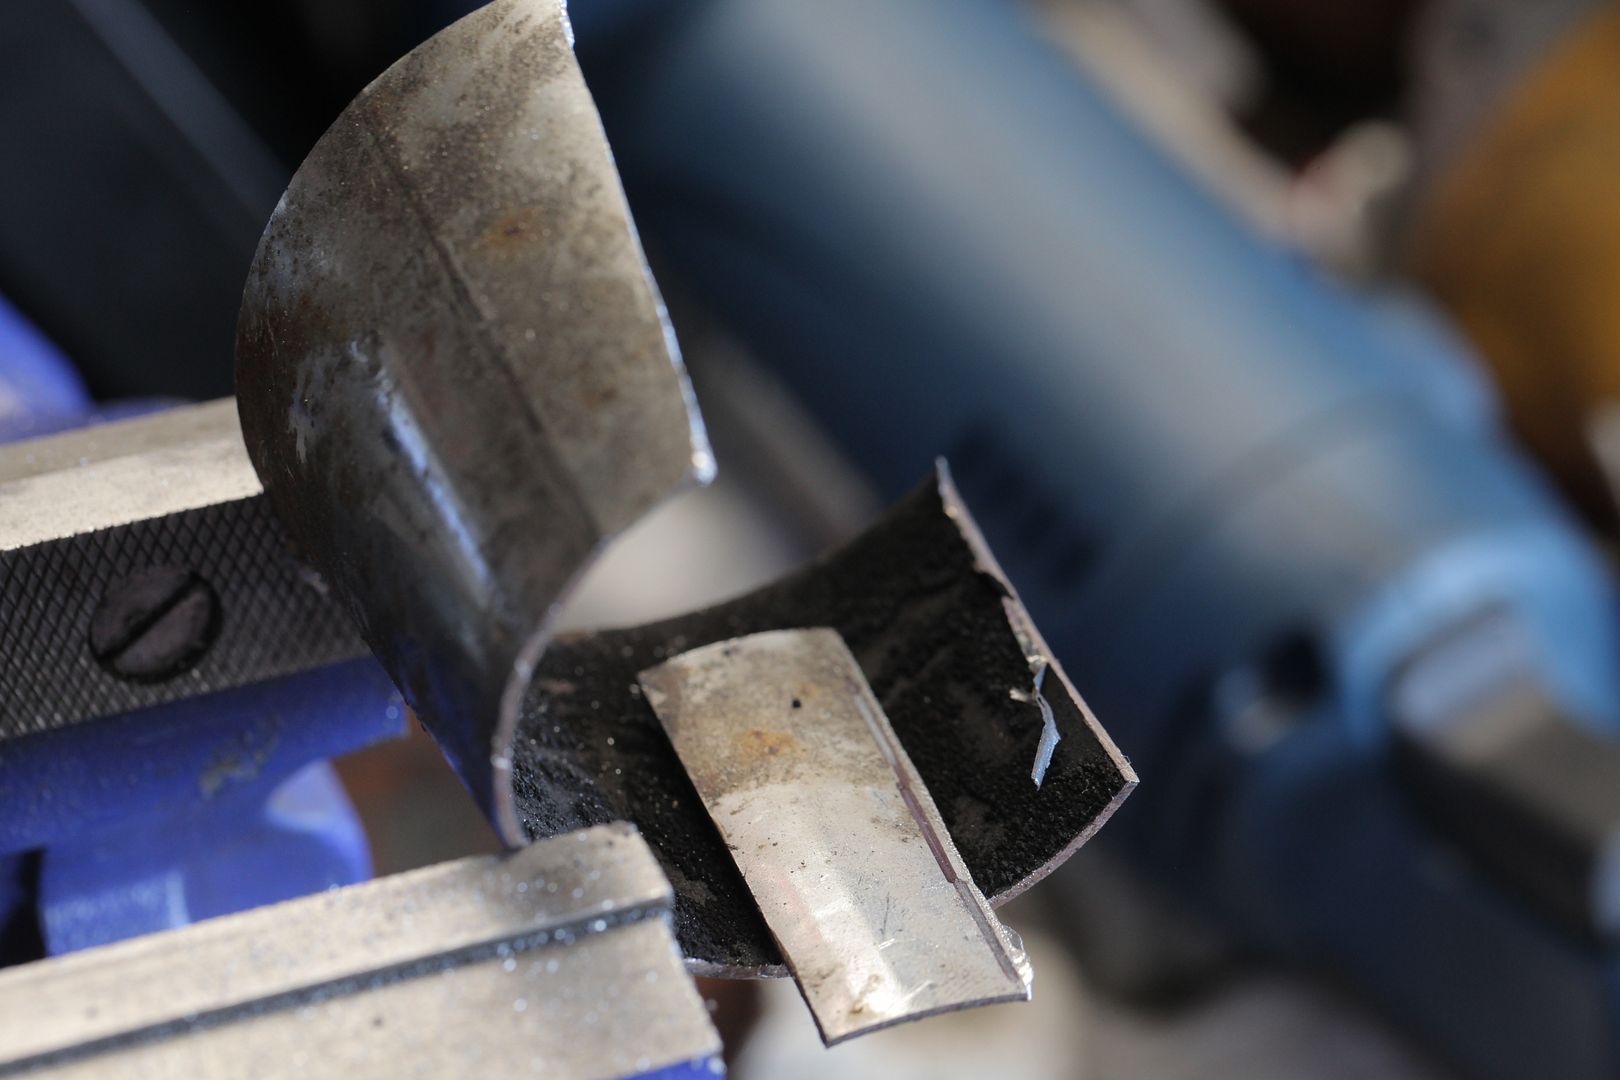 Should be bent around here I think... 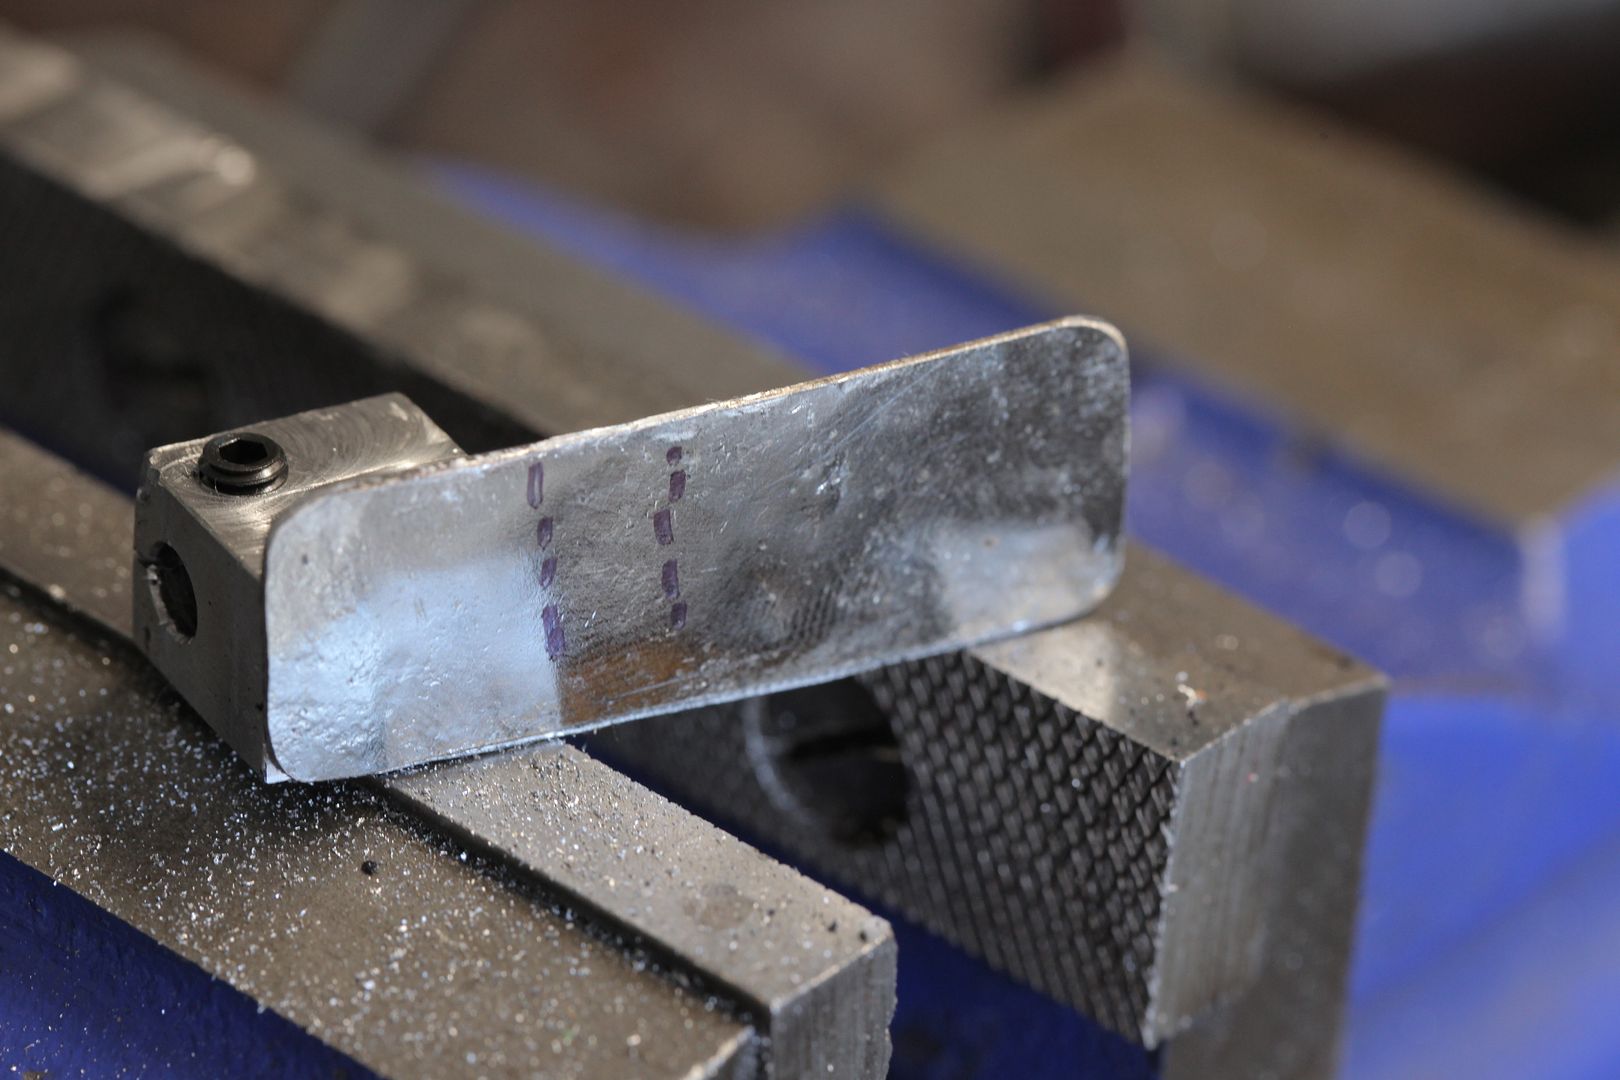 Fit it up against the roast chamber for trial fitting... 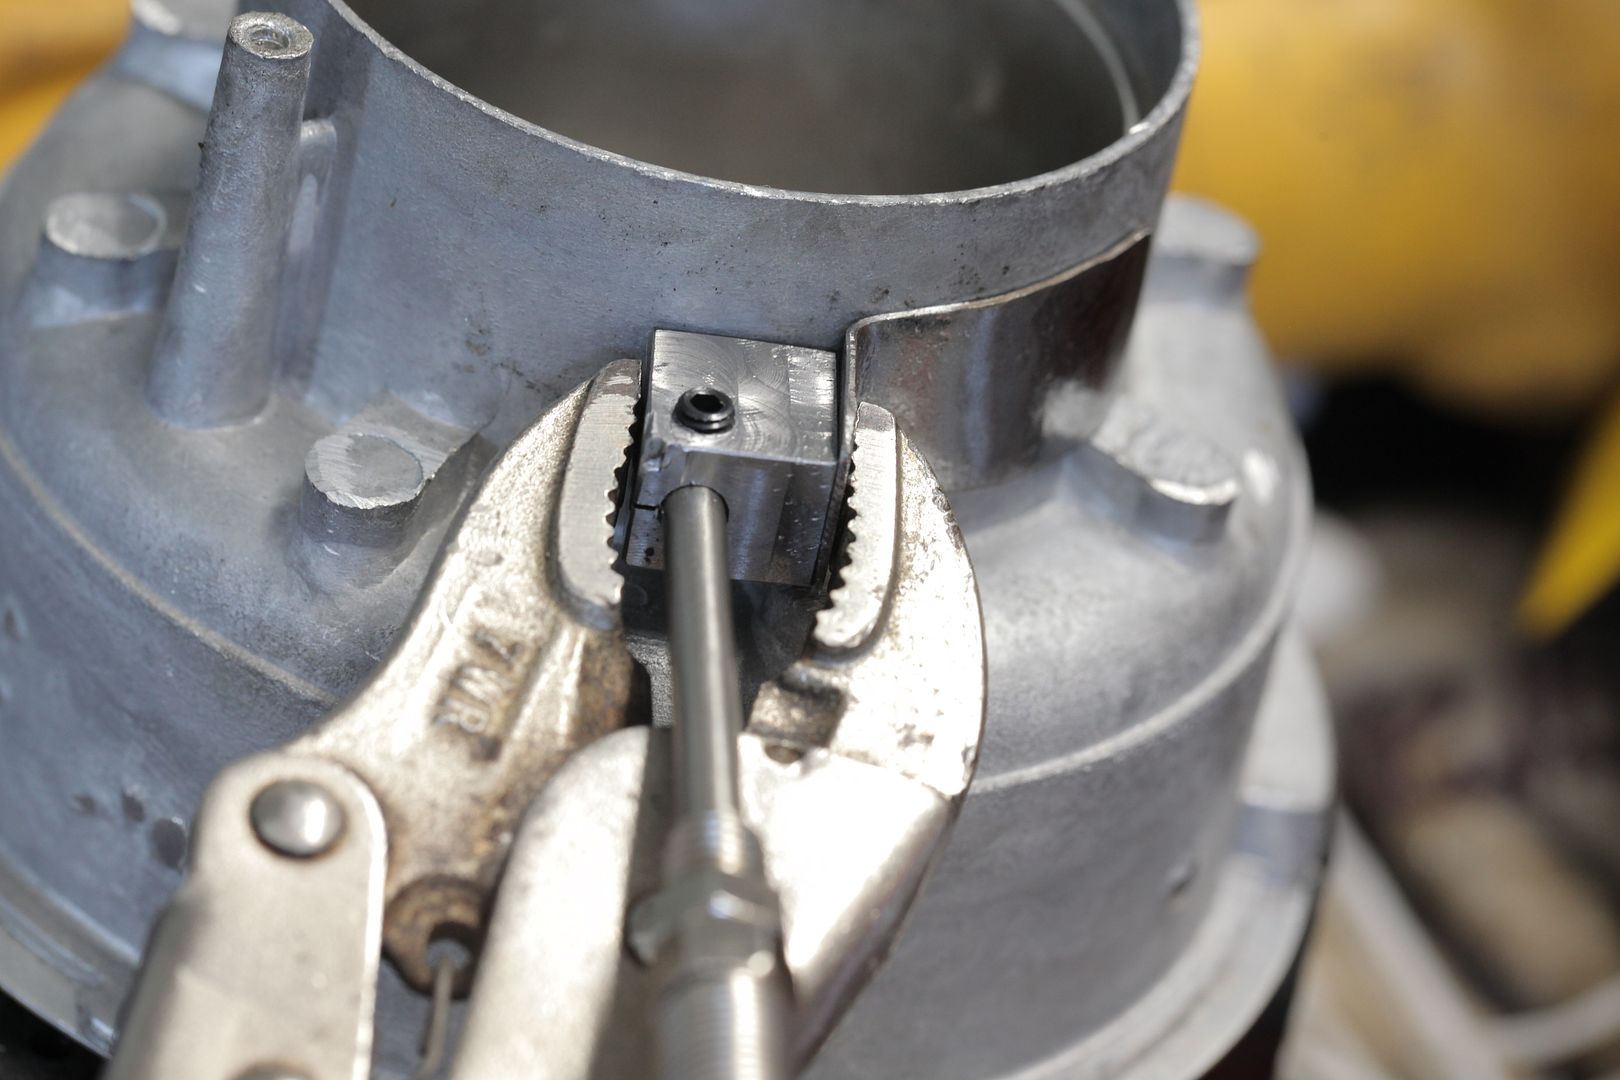 The TC sticks straight into the chamber. I don't really like that... i want a sort of downward tilt and maybe slightly tip-backward into the swirling beans (away from flow) to ease the resistance of the probe to the bean mass' motion... so ground a bit off the corner closest to the roast chamber: 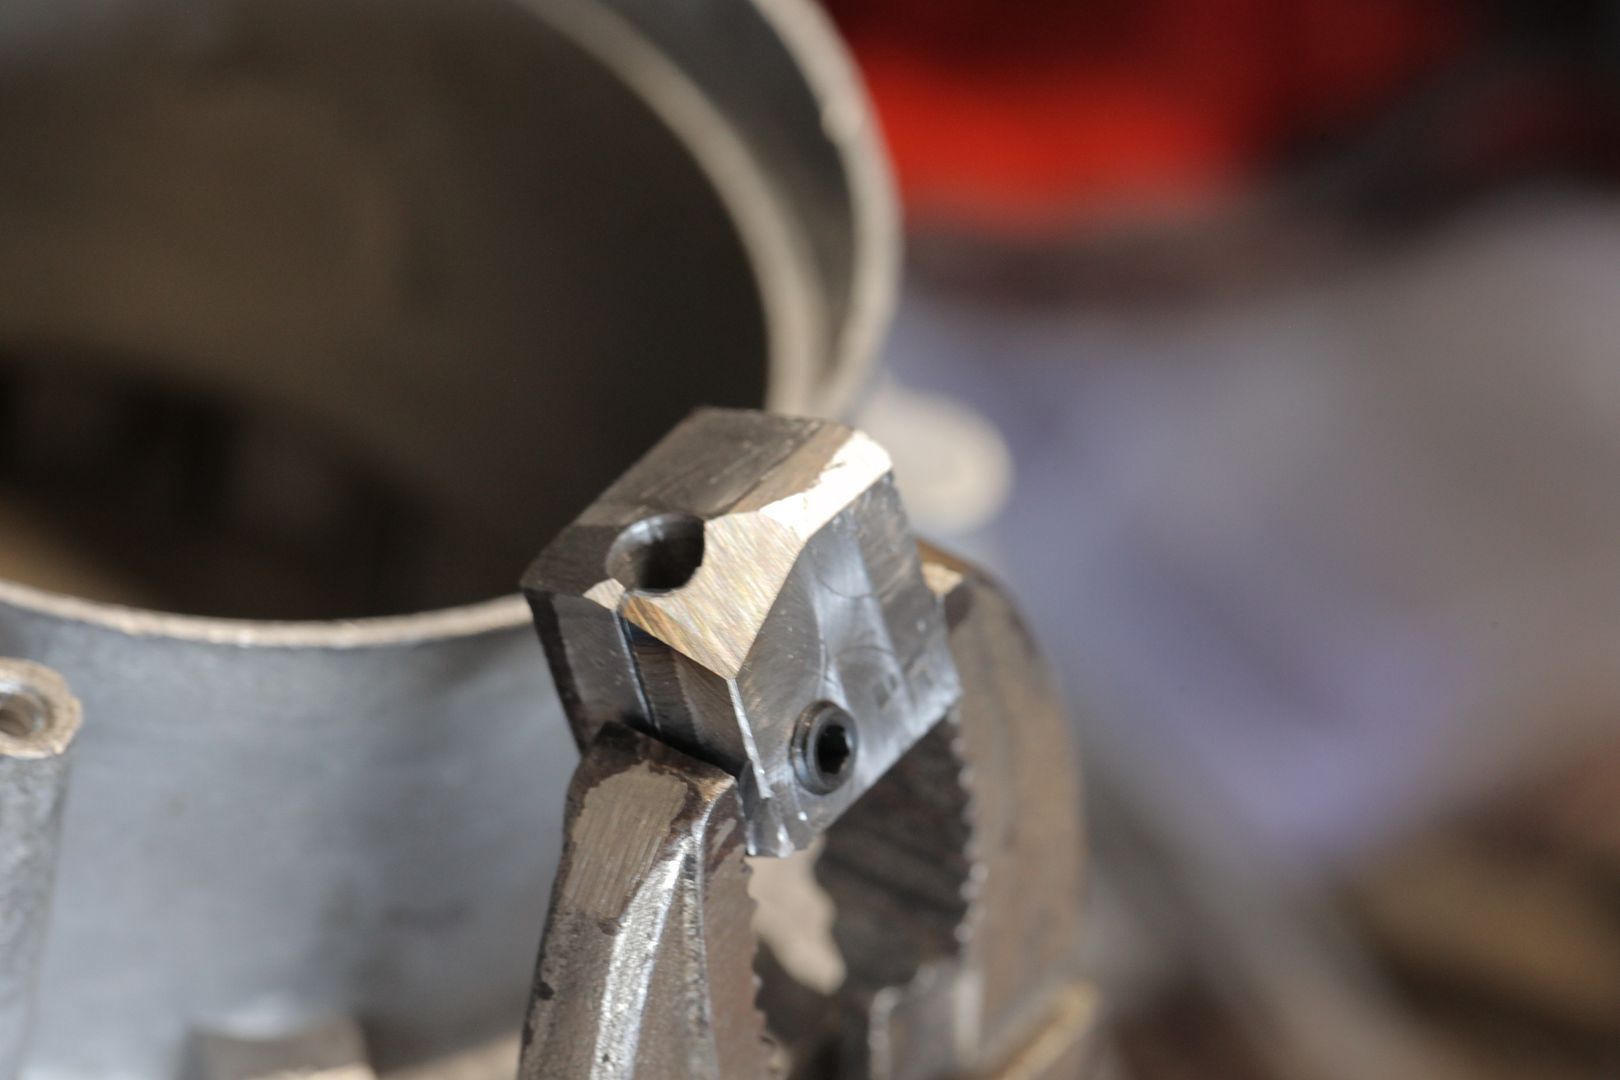 2nd trial fitting, note the definite downward angle: 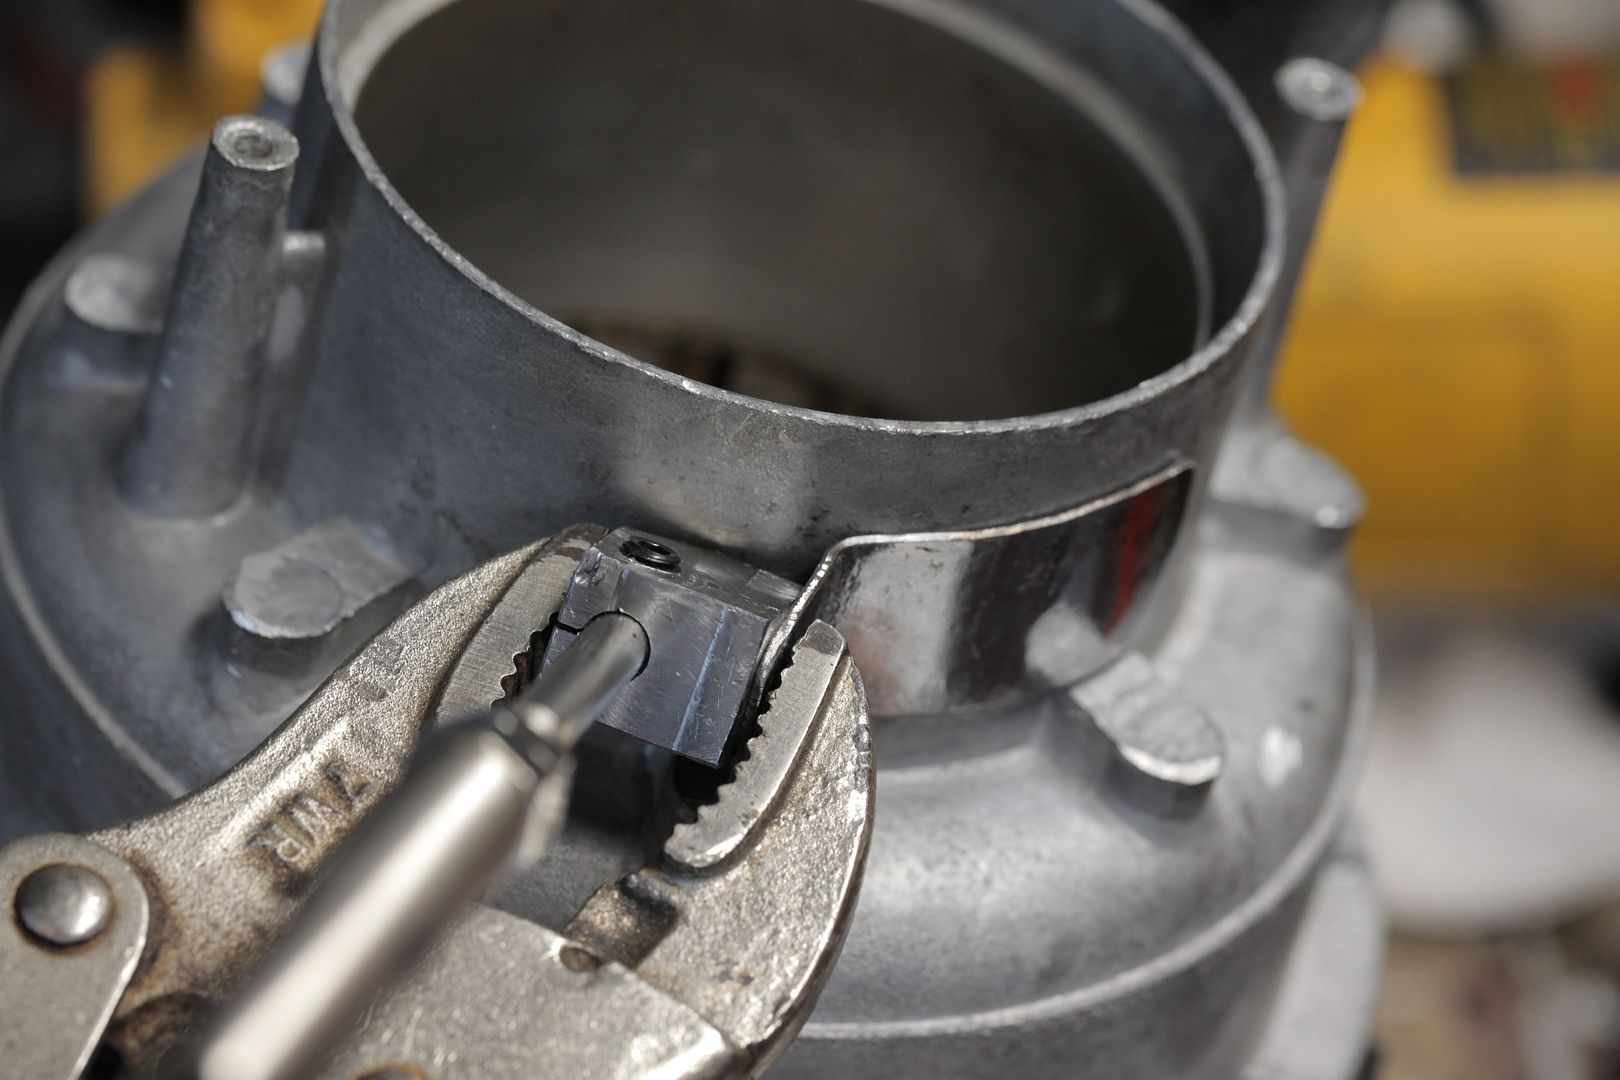 same thing, from the side so you can see the angle better: 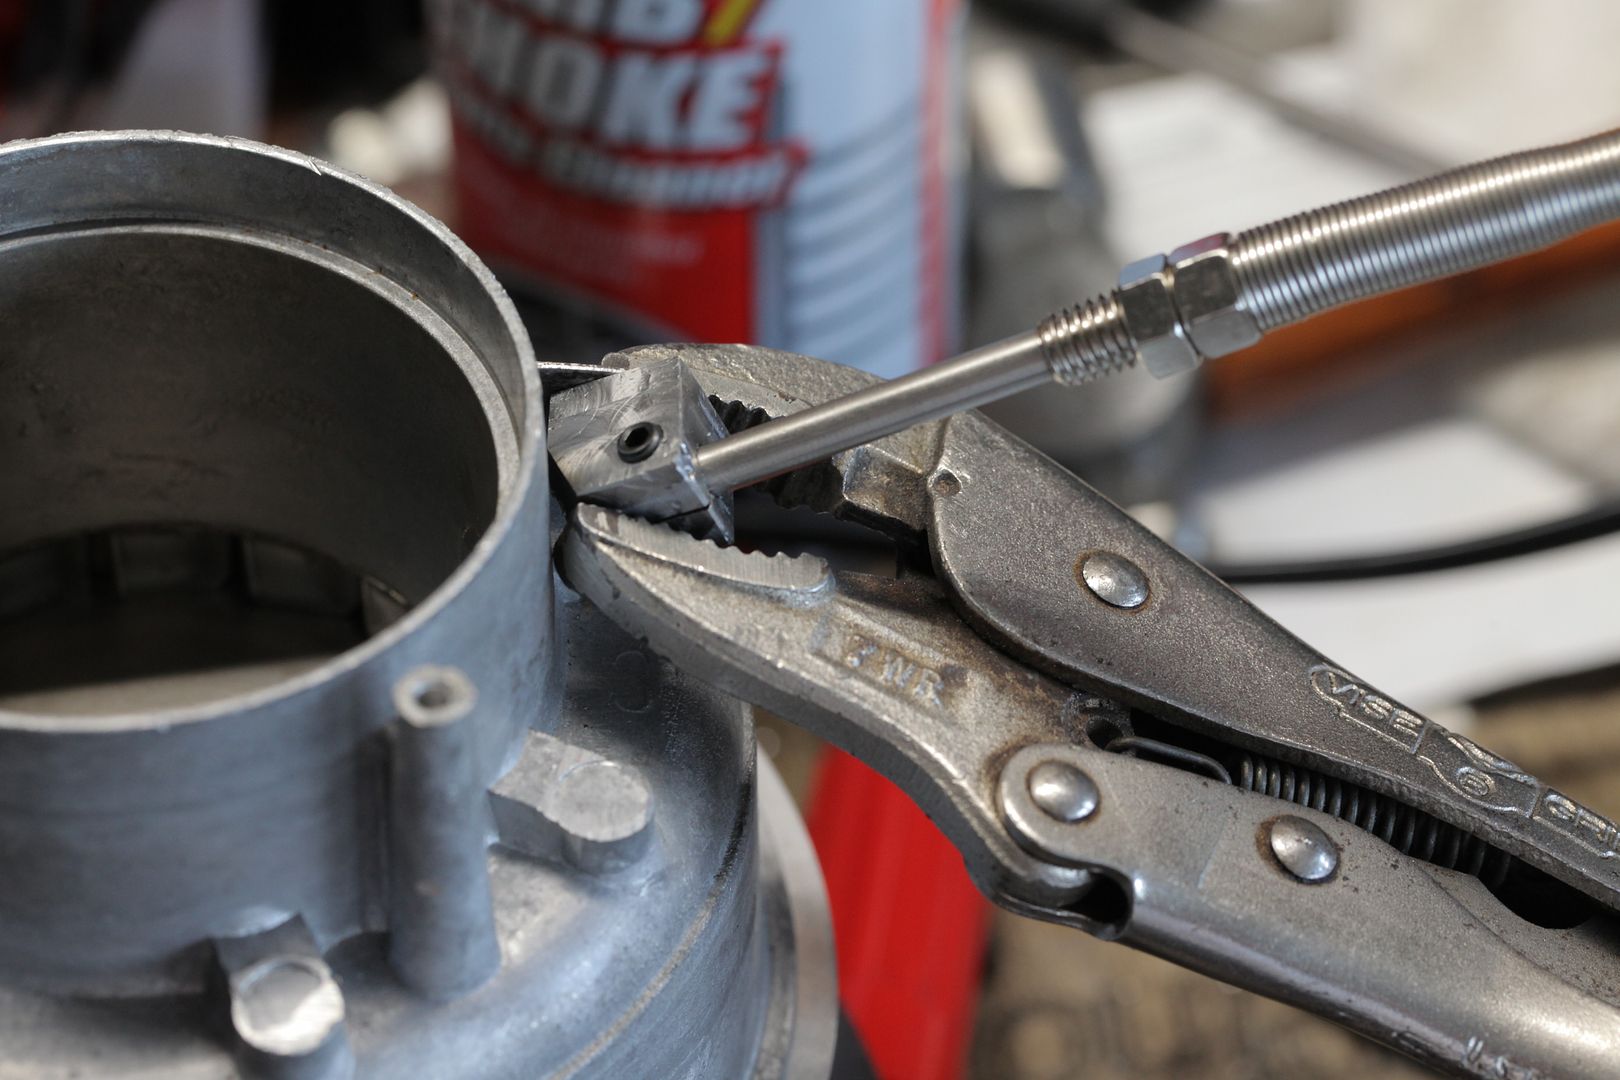 that's about as far as I got. I think I will keep this angle and spot weld it in place, but right now I'm taking a break for dinner. I'm hungry! |
|
|
|
| btreichel |
Posted on 09/11/2016 10:48 AM
|
|
1/4 Pounder  Posts: 187 Joined: May 07, 2007 |
Fancy work Walt. And, yep I agree with your probe placement. Also, sometimes you get lucky with those hurricane lamps (mfg variance) and the will fit right on the lip of the cast base. |
|
|
|
| walt_in_hawaii |
Posted on 09/11/2016 12:29 PM
|
|
1/4 Pounder  Posts: 133 Joined: August 24, 2016 |
Thanks btreichel! I have welded the TC holder block to the hanger and shot it with a quick coat of BBQ paint (high temp stuff) and waiting for it to dry. I'll post pics later. Next I will have to mount it on the roast chamber and drill a bunch of holes through the wall... one for the TC probe, and maybe 3 or 4 more holes which will be tapped for the mounting screws. I have 3 hurricane lamp glasses coming from Menard's but they have not yet arrived. I probably won't even use these, though... the design changed midstream before the order had even come in! I also just received a couple more items... my Bake-A-Round pyrex chimney, and the hunk of aluminum I will use for a base. Will post some pics later today... that's going to be the next phase of the build, and really the interesting part of this post and the reason I made this post in the first place. The TC placement/mounting and the fan splitting etc (stuff before this entry) is relatively straightforward and anyone can do it. Maybe your TC is simply mounted straight into the wall of the roast chamber and doesn't have much of an angle; but it'll still work, its just a matter of aesthetics. But the Bake-A-Round (the regular one, which is about 3-1/2 inches diameter) is a much more difficult proposition, and that kind of base can't be built by the average do-it-yourselfer. That's why I made this post, if anyone else wants these parts to make another unit like the one I'm putting together here, let me know. So far we have no takers, though... which is fine, if I didn't know what we were making I probably wouldn't sign on either  Pics to follow. Pics to follow.walt |
|
|
|
| btreichel |
Posted on 09/11/2016 12:44 PM
|
|
1/4 Pounder  Posts: 187 Joined: May 07, 2007 |
I haven't run mine in years. But I learned a lot from it. Got bored with it after I made it run computerized profiles. |
|
|
|
| walt_in_hawaii |
Posted on 09/12/2016 12:15 AM
|
|
1/4 Pounder  Posts: 133 Joined: August 24, 2016 |
Today was shopping and maintenance chores, so not much time to do anything... the block has been welded to the brace and painted, I was going to screw it to the roast chamber but decided instead to just rivet it, simpler and the rivets are blind aluminum (so hopefully will expand at the same rate as the chamber and won't loosen with time):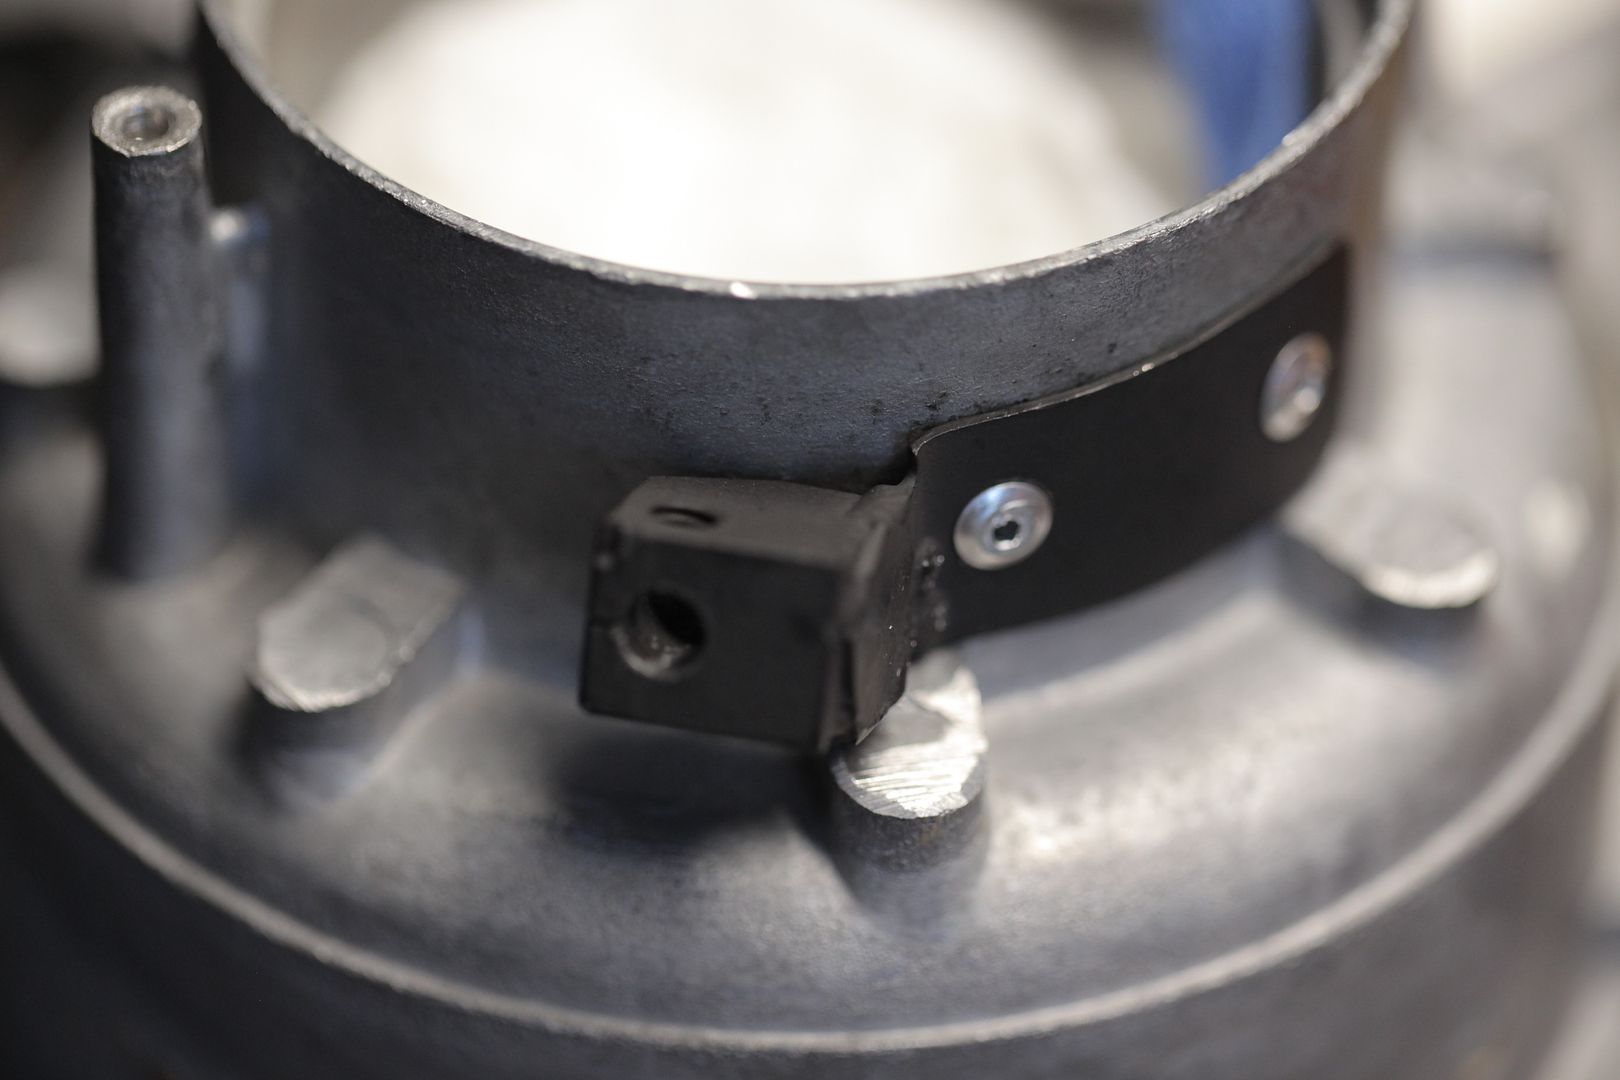 I was then able to use the mount as a drill guide to run the bit into the roast chamber, and just slide the TC into place and lock it with the grub screw... turns out the TC is gripped so tightly its hard to move it, so the grub screw is probably overkill. 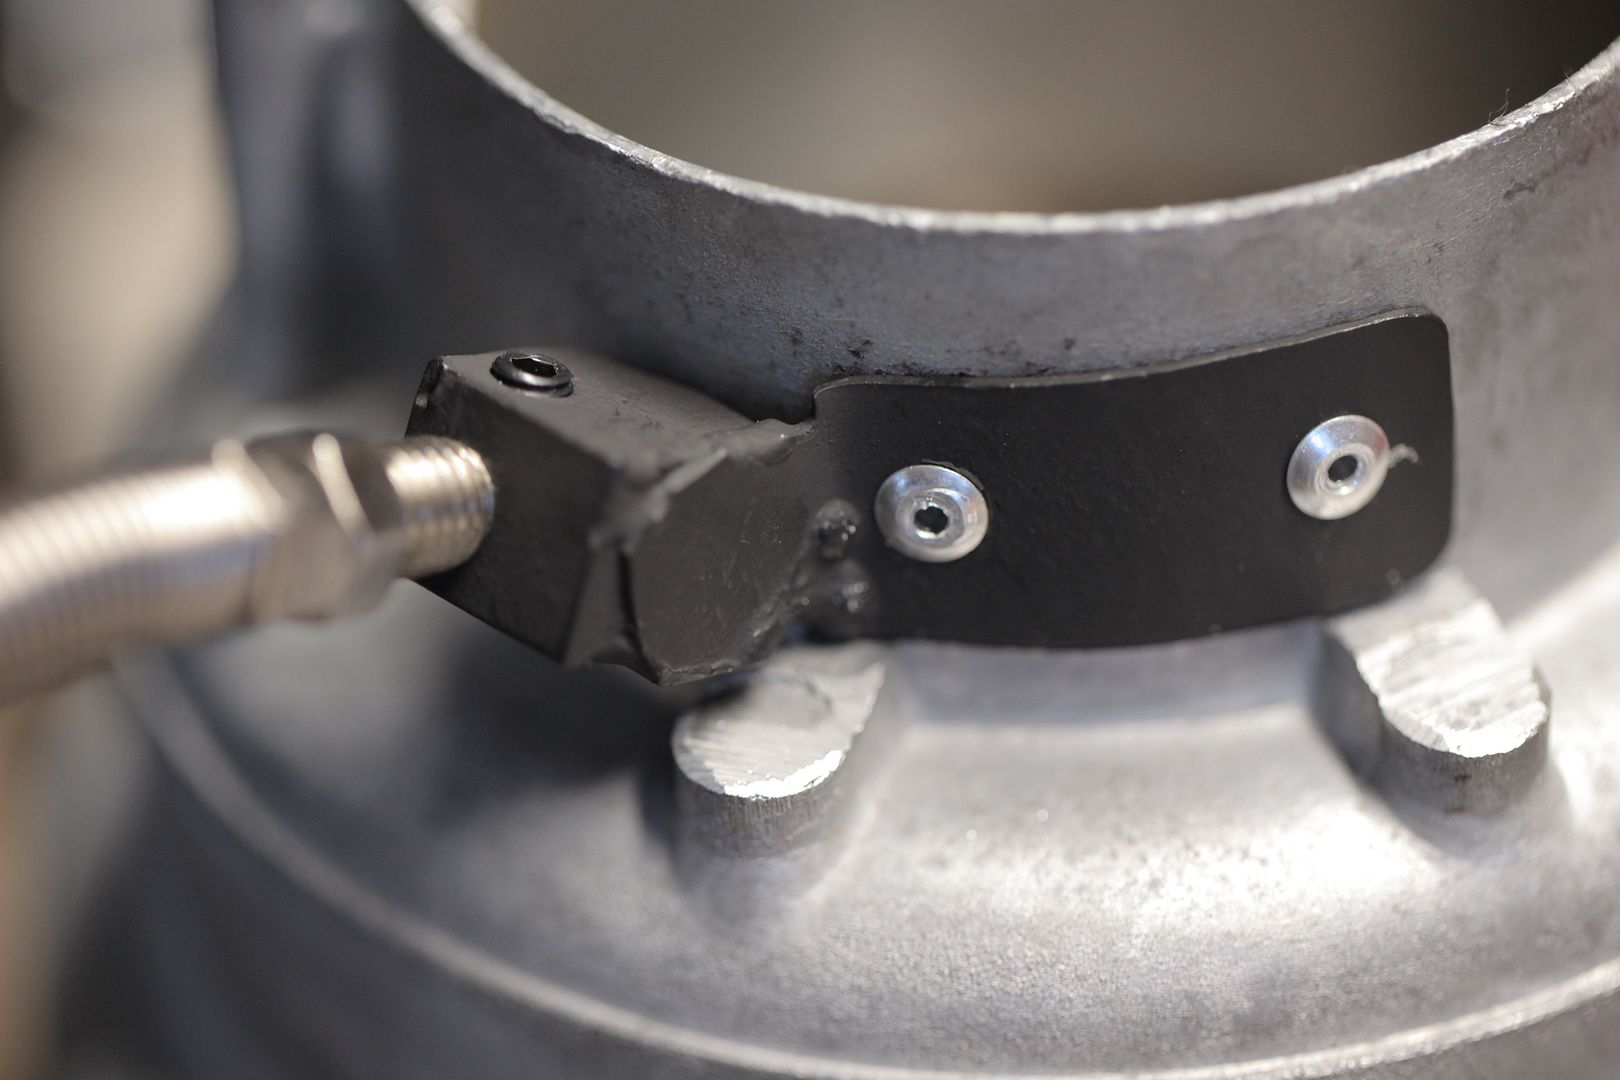 side view: 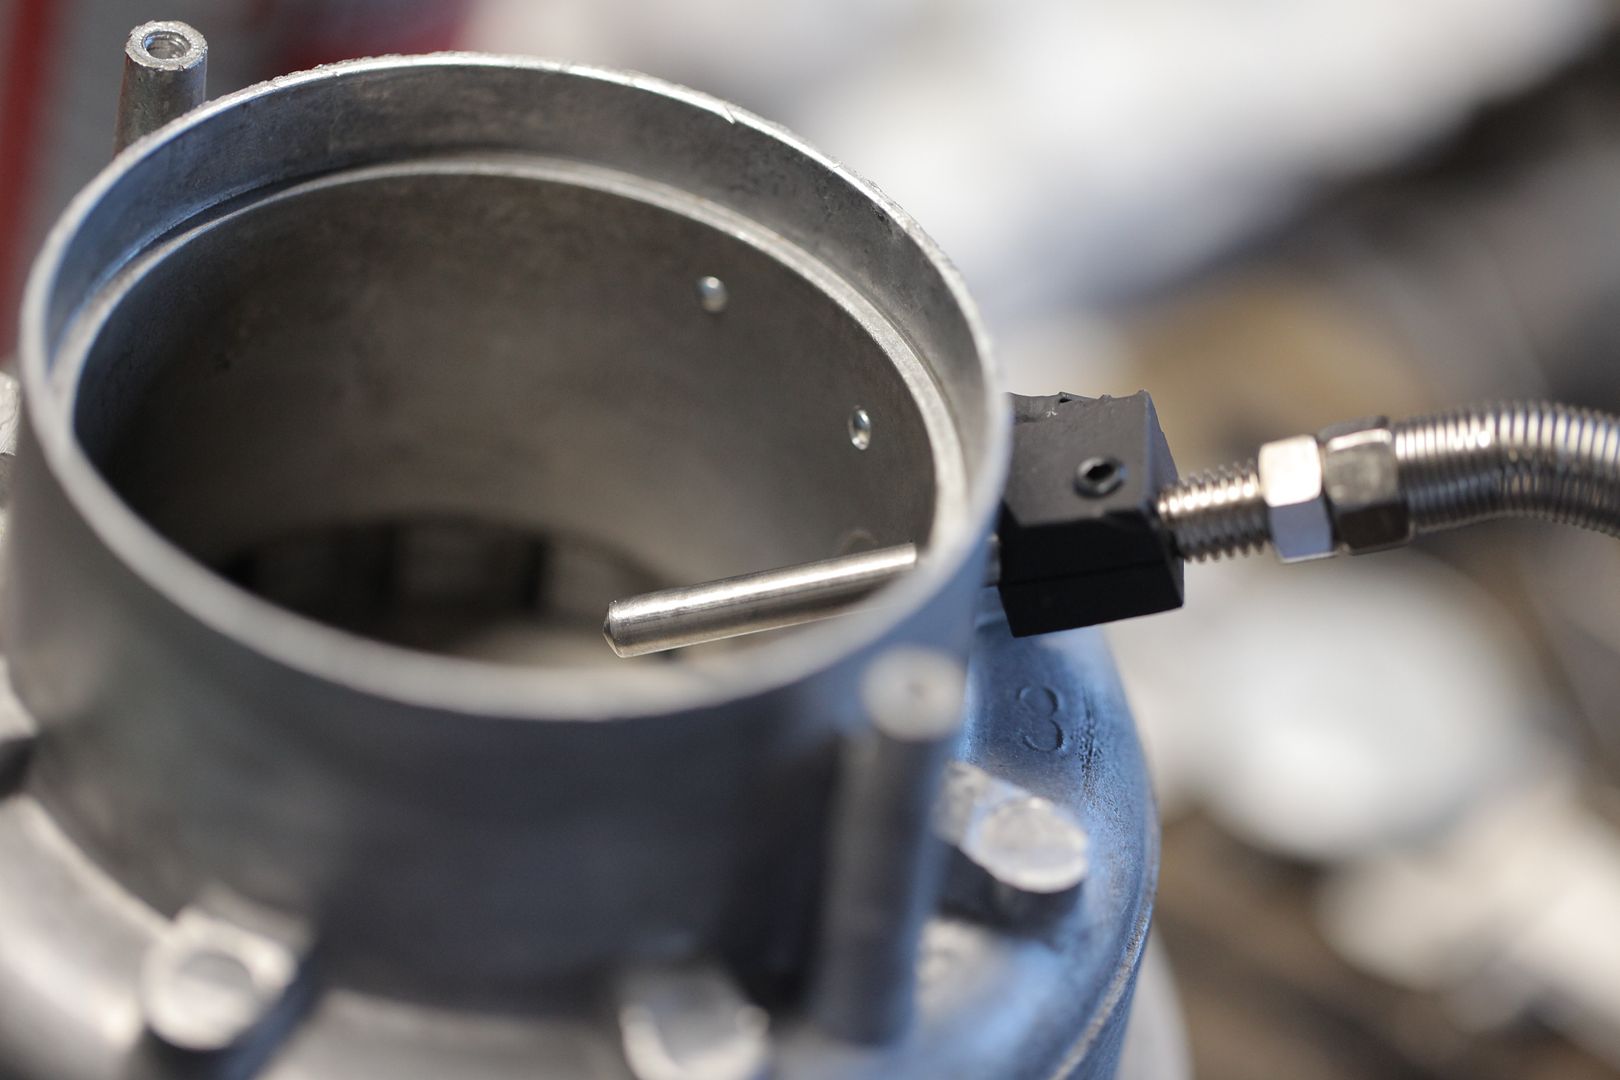 Thermocouple is in place! But the thermometer I ordered to read the TC hasn't come in yet. But these did: 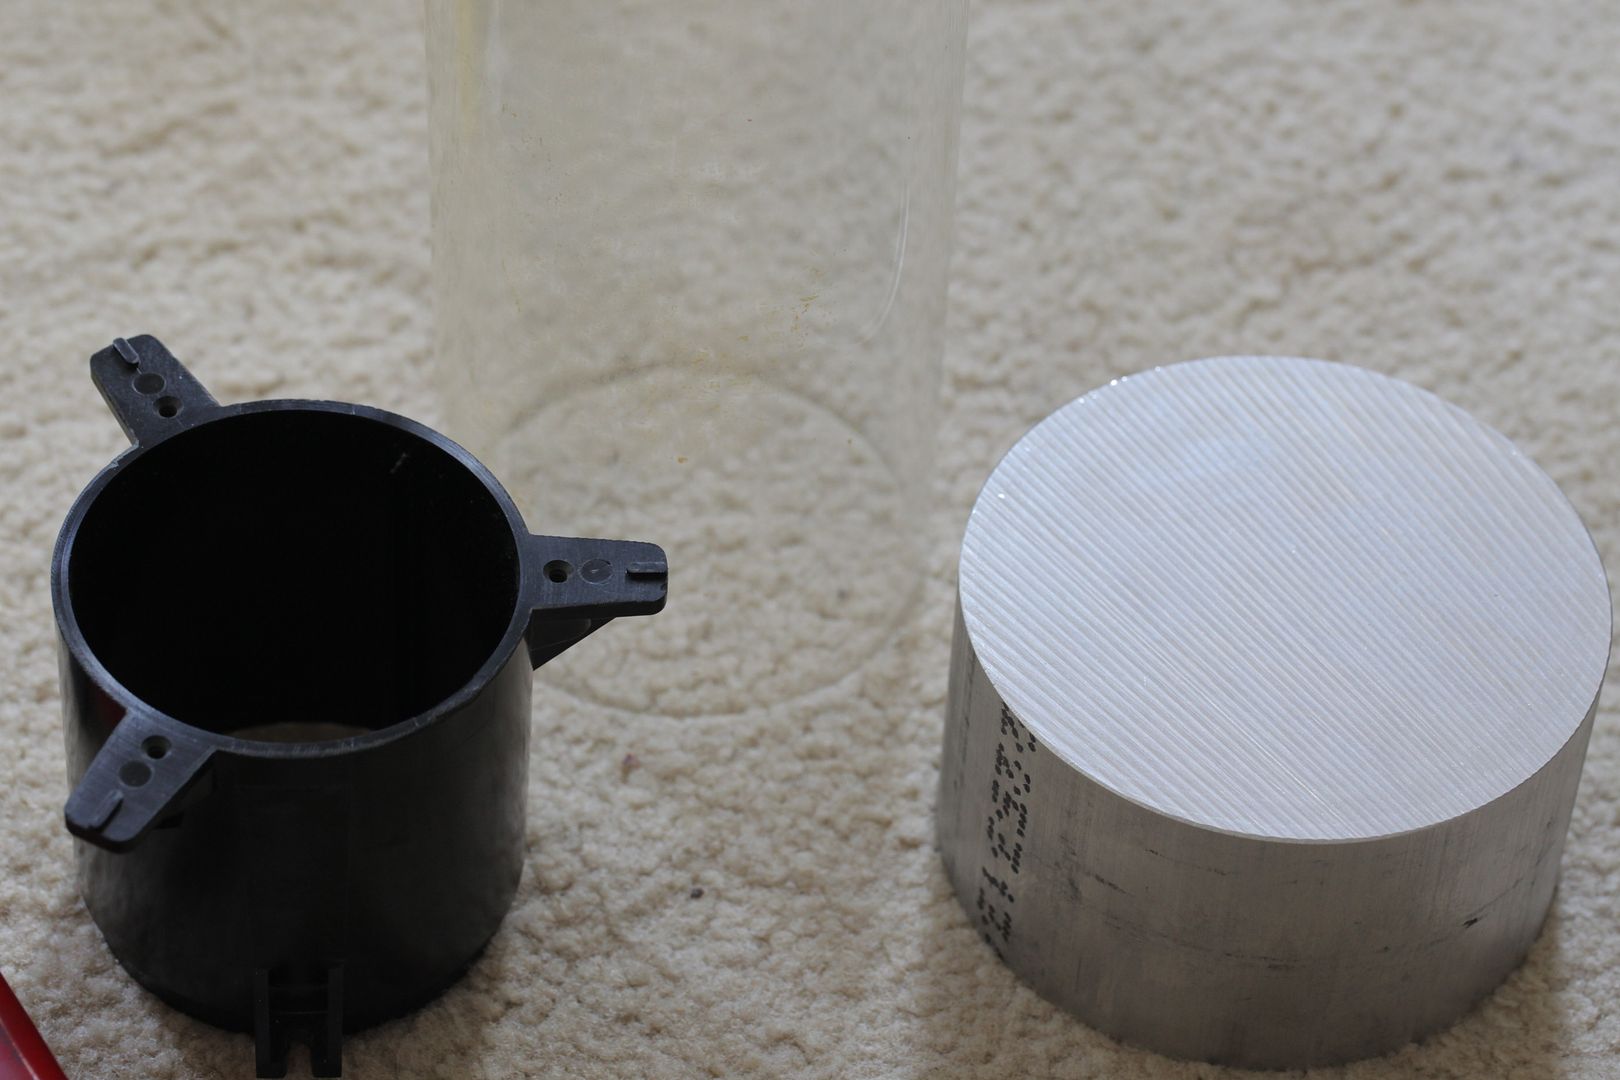 The pyrex is difficult to see, but that aluminum piece is 4-1/2 inches in diameter, its honking huge and really heavy. I was initially going with 4 long uprights and a base and cap, but that would be very heavy. Now I'm thinking I should just stick to the same design in the first post in this section, and use a clamp on the bottom that bolts into the roast chamber. So I've ordered a big clamp off amazon: https://www.amazon.com/HPS-SSTC-108-116-108mm-Stainless-T-Bolt/dp/B0058W7XYQ/ref=sr_1_1?ie=UTF8&qid=1473657304&sr=8-1&keywords=108-116mm+stainless+steel+T-bolt ...and have to wait until it comes in. |
|
|
|
| btreichel |
Posted on 09/12/2016 11:01 PM
|
|
1/4 Pounder  Posts: 187 Joined: May 07, 2007 |
Yep, that reminds me of how my probe set |
|
|
|
| Jump to Forum: |
Powered by PHP-Fusion Copyright © 2024 PHP-Fusion Inc
Released as free software without warranties under GNU Affero GPL v3
Designed with ♥ by NetriXHosted by skpacman


