
Login

Shoutbox
You must login to post a message.
renatoa
07/26/2024 3:49 PM
Bill grubbe and Jk, 
allenb
07/26/2024 5:15 AM
Spiderkw Welcome to HRO!

renatoa
07/24/2024 8:31 AM
ramiroflores and John123,

 ?
?
?renatoa
07/21/2024 1:18 AM
 , Luislobo
renatoa
07/19/2024 11:28 AM
Koepea,
Forum Threads
Newest Threads
Skywalker roaster modsBackground Roast Iss...
Hello from Arkansas
TC4ESP
Green coffee reviews
Hottest Threads
| Skywalker roaster... | [375] |
| TC4ESP | [115] |
| War on Farmers by... | [47] |
| Adventures in flu... | [26] |
| Hello! (soon) Roa... | [17] |
In Memory Of Ginny

Donations
Latest Donations
dmccallum - 10.00
JackH - 25.00
snwcmpr - 10.00
Anonymous - 2.00
Anonymous - 5.00
dmccallum - 10.00
JackH - 25.00
snwcmpr - 10.00
Anonymous - 2.00
Anonymous - 5.00
Users Online
Guests Online: 7
Members Online: 0
Total Members: 8,394
Newest Member: Bill grubbe
Members Online: 0
Total Members: 8,394
Newest Member: Bill grubbe
View Thread
Who is here? 1 guest(s)
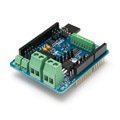
 TC4+ Arduino coffee roaster shield (TC4-compatible)
|
|
| renatoa |
Posted on 12/21/2019 9:02 AM
|
|
Administrator Posts: 3104 Joined: September 30, 2016 |
Why drum motor need to be controlled by software ? Are you changing speed in mid roast ? Why not power it completely separate, using a DC PWM box, like this: https://www.ebay....3288261278 If you know your power grid is problematic, with frequent brownouts, setup should be designed accordingly, with electronics powered on batteries, and having quick backup solution in place in case of a laptop or board reboot. |
|
|
|
| mg512 |
Posted on 12/22/2019 4:28 PM
|
 1/4 Pounder  Posts: 189 Joined: March 04, 2018 |
The freezes you have now, are they the same issue you had before with the onboard voltage regulator? Or is it the issue where Artisan says something about a serial exception? And is this now with the external MOSFET circuit you mentioned a few posts above, or with the on-board MOSFET? |
|
|
|
| ROSTARN |
Posted on 12/26/2019 5:42 AM
|
|
Newbie  Posts: 13 Joined: April 06, 2018 |
Quote Physically its approx. two feet away and the motor has a flyback diode. Quote renatoa wrote: Why drum motor need to be controlled by software ? Are you changing speed in mid roast ? Why not power it completely separate, using a DC PWM box, like this: https://www.ebay....3288261278 If you know your power grid is problematic, with frequent brownouts, setup should be designed accordingly, with electronics powered on batteries, and having quick backup solution in place in case of a laptop or board reboot. Yes I'm changing speed as roast progresses. My first controller (pre TC4) was analog and I had a similair circuit you linked. Hard to get consistent results if its not software controlled. I used roastlogger to read the thermocouples. But I say again, I've used the very same setup with a tc4 (not tc4+) and it was super stable for over a year until I shortened it by accident. My grid is very stable and almost never black outs. Quote mg512 wrote: The freezes you have now, are they the same issue you had before with the onboard voltage regulator? Or is it the issue where Artisan says something about a serial exception? And is this now with the external MOSFET circuit you mentioned a few posts above, or with the on-board MOSFET? Yes its the same freezes, arduino stops responding, clock on display stops counting and from Artisan I get this serial error message, its always been these symptoms combined. Right now Im using the onboard mosfet. Earlier I did manage to provoke the freeze by disconnecting and connecting thermocouples while running, so I'm guessing the ADC is quite sensitive and could cause the freezes. Hopefully the caps will help. Im giving another update when Ive soldered and tested them. It will take a while since it ships from Australia to Sweden |
|
|
|
| mg512 |
Posted on 12/26/2019 7:55 AM
|
|
1/4 Pounder Posts: 189 Joined: March 04, 2018 |
I have to admit, I don't know what's going on here. In general, the ADC is indeed the least robust component in the system. Of the handful of hardware failures I've seen with the TC4+, it's almost always been the ADC. BUT, I've never seen it fail like this. It always broke permanently, not intermittently, and it never took down the Arduino with it. Anyway, I am very curious to hear if the capacitors make any difference. I am also happy to send you another TC4+, if you want to try if that makes a difference. I suppose it's possible the ADC on yours is defective in an unusual way, trying a new shield would test for that. Email me your address if you'd like that. Just to check, I assume you tried a different Arduino, right? With disconnecting and connecting thermocouples, were you able to reproduce the error repeatedly, or did you try just once? Is there any correlation with how long the system has been running? You said a few posts up it happened a couple of times when it was running for an hour, is it always running that long when the problem happened? |
|
|
|
| shortyjacobs |
Posted on 01/04/2020 1:02 PM
|
|
Newbie Posts: 44 Joined: September 24, 2014 |
Hey - can I get a sanity check quick? I'm diving deep into this, and while I have plenty of experience with household wiring, and a decent amount of experience with line voltage controls wiring (espresso machine and electric brewery), this is a whole new ball of wax. I need to control a 240V 2KW heater and a 120V universal vacuum cleaner motor. I plan on using an Arduino Uno and a TC4+. I have plenty of experience with the cheapo FOTEK SSR units, and plan on using one for the heater. If I understand right, as a zero crossing SSR, it can only switch at 0V, so 120 times per second max. That means on at one crossing, and off at the next, right? For a heater, if I want ~1% control granularity, I need to then run it at a 1 second duty cycle, right? that gives me 120 zero crossings, 120 peaks or valleys of AC current, to turn on and off. It would give me 120 setpoints from 0-100%, or about 0.83% control granularity. If I wanted less granularity, but smoother heat, I'd run it at a 0.5 second duty cycle, giving me 60 setpoints from 0-100%, or about 1.7% control granularity. I see I can set duty cycle in the Arduino sketch for the TC4+ - what duty cycles do people normally run?? I'm thinking 0.5 sec (2 hz) is pretty good. I can use OT1 on the TC4 for this, with a 2 hz pwm frequency, and it should work, right??? OK, next, the motor. I can't use a zero crossing SSR because a 1 or 0.5sec duty cycle would lead to a lot of pulsation in my motor. So I want to be using phase angle control, for which I need a ZCD and a randomfire SSR (which can turn on/off at any time in the AC cycle). For that I'll buy or make a ZCD circuit, connect the output to IO3, and use that to trigger the SSR firing off of OT2 on the TC4+. This will allow me to run at either 60 or 120 hz, (I'm not quite clear on that), which is fast enough for the motor to run smoothly.Did I get that right? What's a good random-fire SSR to purchase? If I'm doing one Random Fire SSR for the motor, why not just run the ZCD signal for both motor and heater and run random-fires on both so I get smoother heat output too?? Thanks folks, still learning... -Keith
|
|
|
|
| greencardigan |
Posted on 01/04/2020 9:13 PM
|
 1 1/2 Pounder  Posts: 1185 Joined: November 21, 2010 |
I'd recommend a Crydom D2425-10 for the random fire SSR. When the TC4 sketches are in phase angle control mode for the motor, it also does integral cycle control (ICC) for the heater. Not quite as smooth as phase angle control, but you won't know it with the heater. ICC also doesn't require the more expensive random fire SSR. |
|
|
|
| shortyjacobs |
Posted on 01/04/2020 9:47 PM
|
|
Newbie Posts: 44 Joined: September 24, 2014 |
Awesome, thanks greencardigan!
-Keith
|
|
|
|
| mg512 |
Posted on 01/05/2020 4:27 AM
|
|
1/4 Pounder Posts: 189 Joined: March 04, 2018 |
I think the standard people use for the heater is 1s / 1Hz duty cycle. 0.5s / 2Hz should also work though. You're correct about how many steps of effective output resolution that gives you. For the motor with phase-angle-control, indeed 60Hz mains frequency will effectively give you 120Hz "PWM frequency" so to speak. A portion of each half-sine is "chopped off" to vary the motor speed. As an alternative to a ZCD & random-fire SSR you could also consider a PWM AC dimmer module such as this one: https://www.tindi...50hz-60hz/ With this, you basically leave the Arduino in PWM configuration, and the dimmer board translates the PWM signal into a dimmed AC waveform. IMHO that's a little easier to set up, though there are benefits and drawbacks to either approach and it's ultimately down to personal preference. |
|
|
|
| renatoa |
Posted on 01/05/2020 6:24 AM
|
|
Administrator Posts: 3104 Joined: September 30, 2016 |
If you are using a low inertia machine, like a FB or TO, i.e. not a drum, then 1% control resolution is at the limit of not enough. The ultimate gain of such machine is somewhere near 5 (C degrees per % of heat). You can find this value during autotune. Or simply experiment: set the heater % to a value, let stabilize, note the temperature, then push 1% and check the new stabilised temperature. Or, more useful, find the % of heater values needed for two reference temperatures of hot air, 200 and 270C, you will need these values as red lines in your roast. 200 is the maximum temperature for charge and 270 the maximum overall. Having heater % values for these temperature make easy to find the machine gain, as degrees per percent of heater control. A 5 C degrees jump in ET would make your BT RoR look awful, with an appearance of oscillating as a drunk fly. Following a profile with such control is a frustrating experience. The best approach to roast with such granularity of control is let the natural machine curve do its magic. Increase slowly the power to reach the peak of RoR at minute 3, about 15-20 C/min, then push another some %s during all the rest of dry, then Maillard phases, and decrease 2-3% before FC and during development. For example, the Eth Guji Ambela roasted yesterday, on my TO machine, the values of the process described above were: 40% during charge until TP, then ramp to 64% by minute 3, then +1% every minute up to 69% at minute 8, when started to lower, reaching 66% during development at minutes 10-11. Don't use as reference the gas value changes you see in the profiles done on drum machines, or use them, but with other units... the dynamics in hot air is completely different. 10% change in gas is 1% change in power on a hot air machine. 
Edited by renatoa on 01/05/2020 6:32 AM |
|
|
|
| shortyjacobs |
Posted on 01/06/2020 1:53 PM
|
|
Newbie Posts: 44 Joined: September 24, 2014 |
Quote mg512 wrote: As an alternative to a ZCD & random-fire SSR you could also consider a PWM AC dimmer module such as this one: https://www.tindi...50hz-60hz/ With this, you basically leave the Arduino in PWM configuration, and the dimmer board translates the PWM signal into a dimmed AC waveform. IMHO that's a little easier to set up, though there are benefits and drawbacks to either approach and it's ultimately down to personal preference. Thanks! I did look at that module, and it's way cheaper than the ZCD/RF SSR, but the 5A limit scared me. I've read vaguely that the limit can be raised with a larger heat sink, and I've also read vaguely that while that's true, the traces in the PCB are also a 5 amp limiting factor. I have no idea how much my motor draws, but it came off a vacuum with "12 amps of POWER" written on the front, (a big Hoover). Renatoa - thanks, that's really really helpful info. -Keith
|
|
|
|
| renatoa |
Posted on 01/07/2020 2:31 AM
|
|
Administrator Posts: 3104 Joined: September 30, 2016 |
As I see engraved on the PCB, you have there a 16 Amps triac, so heatsink is the real limit. Even current paths on the PCB aren't a real issue, if you double the PCB tracks with some AWG18 wire. If the traces are 3 mm width, they are good for 12 Amps. They will heat up though, but at the limits of skin touch, 50-60C. |
|
|
|
| mtbizzle |
Posted on 04/23/2020 10:27 PM
|
|
1/4 Pounder Posts: 101 Joined: April 22, 2020 |
Hey all Anyone used the TC4+ w/ a Nostalgia popper? I've been reading up, trying to decide on a plan for turning my Nostalgia popper into an Arduino/Artisan/PID controlled mini-roaster. As intended MG512's TC4+ seems very appealing to someone like me, with minimal experience soldering and coding. This may be my best shot at copying a winning recipe  Trying to settle on a plan, determine shopping list, and get everything ordered. If someone could 'audit' my shopping list, that would be greatly appreciated! W.I.P. Shopping List
HAVE: Soldering equip, drill, Nostalgia popper. Can get a Poppery 2 for <$35, if it would serve as a better popper to mod. Looks like that comes to roughly $150, or $185 if I use a Poppery 2. Some Questions Re. #1 - TC4+ & Uno - just requires through hole soldering, right? Re. #4 - the thermocouple - I assume 1mm diameter and length are fine. Probe appears flexible, wire appears shielded?  ... ... Or I can get same probe MG512 used for $16 - https://www.overs...duct.html?. If anyone has advice on thermocouples, I'm all ears! Re. #5 - IIC 20x4 LCD - Functionally equivalent to one used by MG512? Does not seem to have any wiring included. Is there some standard 4 pin connector that would allow wiring from this to the TC4+? Re. #6 - HC-05 Bluetooth transceiver - Functionally equivalent to one used by MG512 (his are OOS)? This is a no-solder connection to the TC4+, right? Re. #7 - spade terminal connectors - Are ring terminal connectors needed for the ground wires, or could I stick to only Spade terminal connectors? By the looks of things, this build would only require through hole soldering and terminal connectors like this -- is that right? Regarding fan & PSU. If anyone else has used MG512's setup paired with a Nostalgia popper, could you advise on how you handled the fan/PSU situation? A sticker seems to say '18v' (see attached image), so I'm assuming DC. Another user said the Nostalgia has a fan driven by a low voltage brush motor driven via a secondary heater coil.I have a 19v 7.1a laptop charger. MG512's guide suggests that slightly higher voltage could work. Obviously, not taking chances or guesses with these sorts of details. Could anyone advise? Also -- MG512 -- did you ever get around to integrating Wi-Fi? Saw you mention this. Wondering as I'd either need (a) Wi-Fi/Bluetooth connection to PC or Android, or (b) buy a laptop just for Artisan!  Thanks all, & esp. MG512 - this is a wonderful resource for humble poppers!
mtbizzle attached the following image:

Edited by mtbizzle on 04/25/2020 6:39 PM |
|
|
|
| mg512 |
Posted on 04/26/2020 6:37 PM
|
|
1/4 Pounder Posts: 189 Joined: March 04, 2018 |
Quote mtbizzle wrote: Hey all Anyone used the TC4+ w/ a Nostalgia popper? I've been reading up, trying to decide on a plan for turning my Nostalgia popper into an Arduino/Artisan/PID controlled mini-roaster. As intended MG512's TC4+ seems very appealing to someone like me, with minimal experience soldering and coding. This may be my best shot at copying a winning recipe Trying to settle on a plan, determine shopping list, and get everything ordered. If someone could 'audit' my shopping list, that would be greatly appreciated! W.I.P. Shopping List
HAVE: Soldering equip, drill, Nostalgia popper. Can get a Poppery 2 for <$35, if it would serve as a better popper to mod. Looks like that comes to roughly $150, or $185 if I use a Poppery 2. Some Questions Re. #1 - TC4+ & Uno - just requires through hole soldering, right? Re. #4 - the thermocouple - I assume 1mm diameter and length are fine. Probe appears flexible, wire appears shielded? ... Or I can get same probe MG512 used for $16 - https://www.overs...duct.html?. If anyone has advice on thermocouples, I'm all ears! Re. #5 - IIC 20x4 LCD - Functionally equivalent to one used by MG512? Does not seem to have any wiring included. Is there some standard 4 pin connector that would allow wiring from this to the TC4+? Re. #6 - HC-05 Bluetooth transceiver - Functionally equivalent to one used by MG512 (his are OOS)? This is a no-solder connection to the TC4+, right? Re. #7 - spade terminal connectors - Are ring terminal connectors needed for the ground wires, or could I stick to only Spade terminal connectors? By the looks of things, this build would only require through hole soldering and terminal connectors like this -- is that right? Regarding fan & PSU. If anyone else has used MG512's setup paired with a Nostalgia popper, could you advise on how you handled the fan/PSU situation? A sticker seems to say '18v' (see attached image), so I'm assuming DC. Another user said the Nostalgia has a fan driven by a low voltage brush motor driven via a secondary heater coil.I have a 19v 7.1a laptop charger. MG512's guide suggests that slightly higher voltage could work. Obviously, not taking chances or guesses with these sorts of details. Could anyone advise? Also -- MG512 -- did you ever get around to integrating Wi-Fi? Saw you mention this. Wondering as I'd either need (a) Wi-Fi/Bluetooth connection to PC or Android, or (b) buy a laptop just for Artisan! Thanks all, & esp. MG512 - this is a wonderful resource for humble poppers! 1: Yes, only through-hole! 4: Should be fine I imagine, admittedly I'm not an expert on thermocouples though. ;) 5: Looks like it should be compatible. For wiring, you want female-female Dupont cables, usually sold in strips of 20 or 40 wires that you can peel apart. (You need 4 for the display). 6: Yes, should be equivalent. Configuration can be a bit of a pain, as there are dozens of different firmware variants out there with slightly different default baud rates and command sets. 7: I used ring connectors for earth because they can't slip out, but that might be overly safety-conscious of me. (I'm not an electrician and don't know your local regulations, so check with someone qualified and certified to be sure.) Yes, mostly through-hole soldering, crimping connectors, and drilling a hole for the TC (! - you do need a drill!). Also some basic Arduino flashing, unless you get the pre-configured Arduino. I don't know the Nostalgia popper, and can't tell from the image. Are there diodes or a PCB anywhere in the roaster? For Wi-Fi I've once used a pair of NodeMCUs to create a Serial to WiFi to Serial bridge - not the most elegant solution, but requires no changes to either the roaster hard- and firmware, or the host computer. I never got around to publishing this, but I can email you the sketch I used if this is of interest. |
|
|
|
| mtbizzle |
Posted on 04/26/2020 8:42 PM
|
|
1/4 Pounder Posts: 101 Joined: April 22, 2020 |
Thanks for the reply, MG512 Trying to sort out as much as I can in advance, in hopes I can minimize delays later on. Only have a 10 day window where I can work a lot on this! Quote [bluetooth] configuration can be a bit of a pain, as there are dozens of different firmware variants out there with slightly different default baud rates and command sets. I'm reading that the default baud rate for the module I linked is 9600. Is there any other information I could look up that would help with configuring the bluetooth module - commands, firmware, baud, etc? (don't know what you don't know). Quote Are there diodes or a PCB anywhere in the roaster? Edit: image file upload wouldn't work -- see image link here -- https://i.imgur.c...rEDfdh.jpg Quote For Wi-Fi I've once used a pair of NodeMCUs OK, so some additional parts for WiFi. Somehow I'm just now realizing that there is no Artisan for android. I do not have a laptop so was hoping to connect via my android phone. Is there a way to connect this TC4+ setup to android that allows for PID control and functionality like Artisan?? I heard @greencardigan has some Android app, but I have not been able to find any details on this. What a bummer! Not sure if the plan will work without a laptop or an android app. Edited by mtbizzle on 04/27/2020 3:28 PM |
|
|
|
| renatoa |
Posted on 04/27/2020 4:25 AM
|
|
Administrator Posts: 3104 Joined: September 30, 2016 |
Also, don't forget there is BT and... the new BLE ! Beware to not buy a wrong adapter, i.e. BLE, which don't work with hardware older than 3-4 years. btw, greencardican app don't work with BLE ;) For some of the reasons you exposed above, and others, I forked and expanded TC4 using ESP instead Arduino, to levels that many can't even dream. I don't have onscreen graph, but I don't need it, it's only a fancy gimmick. I didn't used the graph to guide me even in the times when I experienced tethered roast with Artisan. Instead, I have the most useful feature of Artisan graph: the trending lines, i.e. real time prediction of roasting milestones: dry end and FC. Much more useful numbers to control the roast, instead a profile. Also, I am saving internally the whole roasting progress, and you can DUMP (yeah, a new command) the saved data, in Artisan csv file format, ready to import into Artisan and analyse later, or, just for the record. The need for a computer for me is now really gone. For these reasons, I don't get it why this insistence to keep using these dinosaur boards of Atmel family, with the memory limitations not allowing adding any new ideas and further improvement of TC4 software. An equivalent ESP board is 3x cheaper and 10 times more powerful, it is not the future, but the first choice of every new design for some years. Disclaimer: the rant above is not a bash against the boards subject of this thread, nor their author, but the platform they are mounted onto. |
|
|
|
| JackH |
Posted on 04/27/2020 7:36 AM
|
 Administrator Posts: 1809 Joined: May 10, 2011 |
Is BLE another acronym we must figure out?
---Jack
KKTO Roaster. |
|
|
|
| renatoa |
Posted on 04/27/2020 7:54 AM
|
|
Administrator Posts: 3104 Joined: September 30, 2016 |
https://en.wikipe...Low_Energy |
|
|
|
| mg512 |
Posted on 04/27/2020 10:22 AM
|
|
1/4 Pounder Posts: 189 Joined: March 04, 2018 |
Quote mtbizzle wrote: Thanks for the reply, MG512 Trying to sort out as much as I can in advance, in hopes I can minimize delays later on. Only have a 10 day window where I can work a lot on this! Quote [bluetooth] configuration can be a bit of a pain, as there are dozens of different firmware variants out there with slightly different default baud rates and command sets. I'm reading that the default baud rate for the module I linked is 9600. Is there any other information I could look up that would help with configuring the bluetooth module - commands, firmware, baud, etc? (don't know what you don't know). Quote Are there diodes or a PCB anywhere in the roaster? Quote For Wi-Fi I've once used a pair of NodeMCUs OK, so some additional parts for WiFi. Somehow I'm just now realizing that there is no Artisan for android. I do not have a laptop so was hoping to connect via my android phone. Is there a way to connect this TC4+ setup to android that allows for PID control and functionality like Artisan?? I heard @greencardigan has some Android app, but I have not been able to find any details on this. What a bummer! Not sure if the plan will work without a laptop or an android app. Some modules have a separate "configuration mode", which is often using a different baud rate than normal operation. I've seen 38400 with no newline, for instance. On those modules you also often have to hold down one of the buttons on the module as you power it up, to enter that mode. Other modules I've seen don't have that. Once you're in AT / configuration mode, the commands are usually similar, but not always exactly the same, e.g. sometimes it's "AT+PIN1234", sometimes "AT+PSWD1234", etc. Just takes some trial and error. I do offer preconfigured bluetooth modules if you don't want to have to deal with this. But it is usually easy to figure out. Sometimes the modules come with a manual, too, but not always. I can't see a picture attached to your last post. On the previous one I couldn't see any diodes. As renatoa mentions, there is or at one point was an Android app, but I've never used it myself, and I don't know how well maintained it is these days. Artisan is definitely the more common setup. Do you not have a PC at all? Quote Bluetooth Low Energy is another name for Bluetooth 4.0. Contrary to what its name suggest it is not very compatible with previous Bluetooth. In particular, it doesn't have a simple Serial protocol. There are modules for it in a similar form factor, I think HC-08. I've played around with one once, but it was not worth the effort. HC-05 should always be regular (non-BLE) Bluetooth though, so should always work. |
|
|
|
| mtbizzle |
Posted on 04/27/2020 3:58 PM
|
|
1/4 Pounder Posts: 101 Joined: April 22, 2020 |
MG512 -- Quote I can't see a picture attached... I couldn't see any diodes. Sorry about that - img wouldn't upload. Here you go -- https://i.imgur.c...rEDfdh.jpg I think the biggest "?" for me now is the fan electronics. Not sure what I need to do re. the 'flyback diode' mentioned in Instructable. When it comes to PSU for the popper's fan, of course have to get the details right. Instructable says 'aim for at least twice the rated power' of the fan. So the steps would be(?): 1. measure fan w/ voltmeter while has been running a bit. 2. PSU should match voltage, or +1 voltage, and should approx. double amperage? (Sound right?) There is an '18v' sticker near the fan. Another user with the same popper told me: "I found some measurements I made: 12v slow, 16v fast, 325mA at slow speed: So 18v is right, power supply should be approx 20v at 500mA - 1 amp capacity." I have a laptop charger, 19v 7.1a. Too much power?? Quote Artisan is definitely the more common setup. Do you not have a PC at all? (Edit  Just tried out an adroid app called Chome remote desktop. Seems to work very well - casts screen and allows clicks etc pretty seamlessly. I figure I could do BT -> PC, artisan on PC -> phone via chrome remote desktop. Open to any ideas here. Just tried out an adroid app called Chome remote desktop. Seems to work very well - casts screen and allows clicks etc pretty seamlessly. I figure I could do BT -> PC, artisan on PC -> phone via chrome remote desktop. Open to any ideas here. Quote Just takes some trial and error. I do offer preconfigured bluetooth modules if you don't want to have to deal with this. But it is usually easy to figure out Sounds good. If there are only a few known places where issues tend to arise, I think I'll give configuring it a shot -- just trying to cut costs. Should be an opportunity to learn a bit. From the HC05 module documentation -- Quote 8. After pairing succeeds, can be used as full duplex serial port. No need to understand any Bluetooth protocol, but only support 8-bit data bits, 1-bit stop bits, no parity communication format. This is also the most commonly used communication format, does not support other formats! 9. Press the key and then power up the Bluetooth module to enter at mode, set parameters and query information 10. Can switch host and machine mode from at command The bold bit doesn't pose any problem does it? If I successfully complete this, I'll be sure to take lots of notes and pictures to share for anyone else that ends up in my position! Edited by mtbizzle on 04/29/2020 12:48 PM |
|
|
|
| JackH |
Posted on 04/27/2020 4:01 PM
|
|
Administrator Posts: 1809 Joined: May 10, 2011 |
Thanks mg512! Never heard of it. Just trying to make it easier for other members to understand. Not all of us are engineering types. I have always disliked acronyms. ---Jack
KKTO Roaster. |
|
|
|
| mtbizzle |
Posted on 04/27/2020 4:31 PM
|
|
1/4 Pounder Posts: 101 Joined: April 22, 2020 |
Hey Renatoa, I'm personally leaning towards MG512's TC4+ setup because it seems to me to be the way to get to PID/temp monitoring/temp control, with the least room for error, as a someone inexperienced with pretty much all areas of this project draws on. E.g. soldering/electrical, issues related to getting bad chips or chips that work slightly differently than the original design, any software issues. I see it as a way of getting as close as I can to a fully compatible hardware/software bundle with less room for error / need for troubleshooting by someone experienced (ie, not me!). Even guides/schematics can be difficult to interpret/understand for someone who doesn't have any background in this and doesn't know the vast majority of the lingo. Quote Also, I am saving internally the whole roasting progress, and you can DUMP (yeah, a new command) the saved data, in Artisan csv file format, ready to import into Artisan and analyse later, or, just for the record. The need for a computer for me is now really gone. The cost issue and the lack of need for a computer are certainly attractive features for me. So, with your setup, do you load a profile to the board somehow, monitor values on the LCD, and then export the saved data later (if desired)? I don't entirely grasp how it all works. For example, how do you start a roast, choose a profile, etc? Also, your github mentions connection to android via wifi with a HT-06. What app is that -- greencardian's? (Still trying to get a clear picture of how it all works, from the user's end!) Would you disagree about my judgment about ease of configuration/minimizing room for error/problems? Appreciate everyone's help and thoughts -- you all are my guides here! Quote For these reasons, I don't get it why this insistence to keep using these dinosaur boards No need to word it like that! Just trying to find the best way to this destination for me. I'm sure if I had a lot of experience, I would've already done something different by now. Edited by mtbizzle on 04/28/2020 1:41 AM |
|
|
|
| renatoa |
Posted on 04/28/2020 1:43 AM
|
|
Administrator Posts: 3104 Joined: September 30, 2016 |
Please, keep my wording with all the salt you need to make it sweeter I am not an English speaker, and also a latin-slavic combination, known for the passion of what they believe. Regarding this part of your post: Quote it seems to me to be the way to get to PID/temp monitoring/temp control, with the least room for error ... please do understand that my solution can run exactly the same 100% TC4 code, if desired, but would be a shame to limit it that way. The reason I developed it is because I found the original not good enough for my pickiness, especially PID and reading errors part. I am pretty sure that many parts of my development could replace TC4 code and make it better, but the limited memory of Arduino board don't allow this. Quote as a someone inexperienced with pretty much all areas of this project draws on. ... this is the part where you have right sadly... maybe is time to polish my experimental project into a more streamlined concept. Edited by renatoa on 04/28/2020 3:54 AM |
|
|
|
| mtbizzle |
Posted on 04/28/2020 2:00 AM
|
|
1/4 Pounder Posts: 101 Joined: April 22, 2020 |
Quote with the least room for error I should have clarified - I meant the project that has less room for error, in setup, when trying to assemble, configure, troubleshoot. Maybe I am overthinking this, but my guess is that there are a lot of small ways this sort of project can run into problems during setup/assembly/configuration. If the issue was not obvious, I would probably have difficulty trying to troubleshoot. So, I guess you could say, I'm seeking a build that balances features, cost, and ease of setup. |
|
|
|
| mtbizzle |
Posted on 04/30/2020 2:44 PM
|
|
1/4 Pounder Posts: 101 Joined: April 22, 2020 |
Small update One of the issues I was trying to reason through was access to Artisan or similar, without a PC right next to me. I mentioned that chrome remote desktop (cast and control PC from phone) seemed to work well. Did a little test run (not my roast) --  Looks great! My phone screen is 6.2in x 3in, the details are visible enough. Only potential issue, I think, would be hitting the buttons. Thankfully, it seems Artisan allows adjustment of buttons size - large should make that easier. Seems like a very easy option if anyone faces a similar problem in the future. Switching gears -- I want to go ahead and purchase parts so I can get started here soon. First, could someone help me determine the appropriate PSU for the fan? (Have multimeter). Second, I know I will have questions when I try to assemble & configure. Given the whole coronavirus scheduling, there is a nice window of a few days where I can devote a lot of time to this, but after that window passes, not so much. This is a funny "?" to ask -- do you all think I could get technical help with relatively quick turnaround for troubleshooting assembly/configuration by posting here? Hope that isn't taken the wrong way! Just trying to get a sense of whether I could complete this in the timeframe I have! Roast: Kaldi wide, SR800 + projects
Grind: Lab sweet, Bentwood, giota w/ MP burrs, Commandante Pull: Decent, La Pavoni, Elektra Microcasa a Leva, Faemina anno 60, Kim Express |
|
|
|
| mg512 |
Posted on 04/30/2020 5:56 PM
|
|
1/4 Pounder Posts: 189 Joined: March 04, 2018 |
PSU voltage should match the fan's rated voltage, or maybe a little bit higher (at your own risk). Amperage I would try to exceed the fan's rated amperage by a good margin, as startup current is often a lot higher than steady-state current. For my own setup, I use somewhere between 2 and 3 times the steady-state current. Hm, I suppose you have seen how quickly people tend to reply on here? Also, many questions have already been answered somewhere on here, or elsewhere on the internet, or at least you might be able to piece together the answer from information available online. (And often that's half the fun!) Generally, best case, you can probably do this in a day. Worst case, something breaks and you need to wait until you get a replacement, or you spend a day trying to figure out why something isn't working. If you just want to (or worse, need to) be able to roast coffee, and it's very time critical, there is a risk. On the other hand, if you're here (also) because you enjoy tinkering with technology, you will definitely be able to spend a few days doing fun stuff with this. |
|
|
|

| Jump to Forum: |
Powered by PHP-Fusion Copyright © 2024 PHP-Fusion Inc
Released as free software without warranties under GNU Affero GPL v3
Designed with ♥ by NetriXHosted by skpacman