
Login

Shoutbox
You must login to post a message.
renatoa
07/26/2024 3:49 PM
Bill grubbe and Jk, 
allenb
07/26/2024 5:15 AM
Spiderkw Welcome to HRO!

renatoa
07/24/2024 8:31 AM
ramiroflores and John123,

 ?
?
?renatoa
07/21/2024 1:18 AM
 , Luislobo
renatoa
07/19/2024 11:28 AM
Koepea,
Forum Threads
Newest Threads
Skywalker roaster modsBackground Roast Iss...
Hello from Arkansas
TC4ESP
Green coffee reviews
Hottest Threads
| Skywalker roaster... | [375] |
| TC4ESP | [115] |
| War on Farmers by... | [47] |
| Adventures in flu... | [26] |
| Hello! (soon) Roa... | [17] |
In Memory Of Ginny

Donations
Latest Donations
dmccallum - 10.00
JackH - 25.00
snwcmpr - 10.00
Anonymous - 2.00
Anonymous - 5.00
dmccallum - 10.00
JackH - 25.00
snwcmpr - 10.00
Anonymous - 2.00
Anonymous - 5.00
Users Online
Guests Online: 8
Members Online: 0
Total Members: 8,393
Newest Member: Bill grubbe
Members Online: 0
Total Members: 8,393
Newest Member: Bill grubbe
View Thread
Who is here? 1 guest(s)
Page 1 of 2: 12
|
 Fluidbed roaster build... questions...
|
|
| elkayem |
Posted on 05/03/2018 11:48 PM
|
|
Newbie  Posts: 43 Joined: March 09, 2018 |
Well, question (singular) really. I am anticipating that I will have more questions in the future, so will leave this thread open. Earlier this year, I built my own automated popcorn popper roaster (https://forum.hom...ad_id=5509). I am still learning about the nuances of home roasting, but have been very satisfied (so far) with the quality of the beans that have come out of this little roaster. The problem is that I can only roast 3 oz at a time, which is not fast enough for my appetite. I am now embarking on a larger fluid bed roaster. I think a 1/2 lb (227g) is probably enough for me, since that will last about a week. Let's round that up to 300g. I have studied the threads in the Fluidbed subject, and have decided to copy parts of oldgearhead's design. I have procured a 3.5" diameter bake-a-round, cocktail shaker, 1700 Watt HAS-043K element, and 1.5"x12" pipe based on his design. I do not plan on doing any heat reclaiming, at least for now. Also, I intend to use a DC motor since I will be automating the motor speed via PWM and have no intention of messing around with automating a triac. Which brings me to my question... I notice that OGH has used a 1.5 HP fan for his blower. That's a lot of power! I also notice that there are some folks on this forum using 12V 75W air pumps, the kind used to inflate air mattresses and water toys. That is about a 10X difference in power. Can someone clue me in to what I actually need for my roaster? I would like to keep things cheap, because that's the type of guy I am. These 12V 75W blowers are less than $15 on eBay which looks great to me, though I'll be out $15 if it is less than I need. I also notice < 20V coordless leaf blowers and vacuum cleaners for less that $50 that pull over 200 - 300W. Those seem much more capable, but if I can get away with spending less than $50 I will. I know many folks on this forum talk in terms of pressure and CFM, but these metrics are rarely mentioned on the pages of eBay when looking at old coordless vacuums. Hopefully Watts is a good proxy. Can anyone set me straight? What is the minimum I need to roast 300g of beans in my future roaster? Will 75W cut it? Larry |
|
|
|
| renatoa |
Posted on 05/04/2018 12:35 AM
|
|
Administrator Posts: 3104 Joined: September 30, 2016 |
The main question wasn't asked: why fluid bed ?!  Me too started with a popper, but didn't followed this way. There are more than 50% chances that a newcomer be persuaded to approach a fluid bed build instead any of the other roasting methods, that make me wondering why...  |
|
|
|
| JSA Coffee |
Posted on 05/04/2018 7:36 AM
|
|
1/4 Pounder  Posts: 90 Joined: June 11, 2016 |
Fluid beds are easier than drums. There are more off the shelf parts available, and they easier to roast on because you can see the been the entire roast. I don't have any answers regarding the motor. I am using the same blower as OGH. |
|
|
|
| JackH |
Posted on 05/04/2018 3:56 PM
|
 Administrator Posts: 1809 Joined: May 10, 2011 |
Quote Because this is the Fluid bed forum. And what JSA Coffee said. ---Jack
KKTO Roaster. |
|
|
|
| elkayem |
Posted on 05/04/2018 4:25 PM
|
|
Newbie Posts: 43 Joined: March 09, 2018 |
Perhaps my best option is just to pick something up and see if it works! I have been eyeing this unit: https://www.airhe...-pump.html. It is a 12V, 145W pump and has some spec values: 380 liters/minute (13.4 CFM) and 0.71 psi (19.7" H2O). And for $21, I'm not broke if it doesn't work out. My popcorn popper's fan draws 40W and is definitely overpowered for the 3 oz beans I am currently roasting. I have to believe that the 1.5 HP (1120W) fans used in OGH's design (and many others from what I can see) is overpowered even when roasting a pound. |
|
|
|
| elkayem |
Posted on 05/04/2018 5:11 PM
|
|
Newbie Posts: 43 Joined: March 09, 2018 |
Alternatively: https://www.airhe...-pump.html. Who doesn't like an air pump shaped like a pig? Plus, 260 Watts off a 12V DC supply. I'll probably spring for something by the end of today... Alternative suggestions still welcome. I will definitely report back on success/failure. |
|
|
|
| JSA Coffee |
Posted on 05/05/2018 11:53 AM
|
|
1/4 Pounder Posts: 90 Joined: June 11, 2016 |
I can say beyond any doubt that OGH's blower is wayyyy overpowered. But, it never failed. That one of the reasons I went with it, that and it allows for future growth. |
|
|
|
| CharcoalRoaster |
Posted on 05/07/2018 7:46 AM
|
 1 1/2 Pounder  Posts: 640 Joined: April 13, 2012 |
+1 on the ease of finding items to use in a build that don't require specialized skills like welding and fabrication. I tried multiple times to piece together a drum roaster but found that it would've required more time, money, and skill that I had available. However, I roast 1kg batches on my FB Roaster and give it to friends who roast professionally and they don't ever ask if it was on a FB or Drum so I think the roasts are comparable in a sense. |
|
|
|
| renatoa |
Posted on 05/07/2018 9:34 AM
|
|
Administrator Posts: 3104 Joined: September 30, 2016 |
There are another machine designs beyond drum, simpler to build, simpler to control and monitor, less power hungry and quiet than FB. Maybe this deserve a separate thread. |
|
|
|
| elkayem |
Posted on 05/07/2018 10:39 AM
|
|
Newbie Posts: 43 Joined: March 09, 2018 |
I decided to spring for the Airhead "Air Pig", a 12V inflatable air mattress blower advertised at 260W. My initial test running the blower through the cocktail shaker and pyrex tube loaded with 300g of beams left me unimpressed. There was plenty of bean agitation, but I did not see the central "spout" or very much bean recirculation. The blower itself seems to produce a very steady forceful stream of air, but I have nothing to compare it to. I have seen others on this forum claim to run a similar configuration with similar 12V, 75W blowers, so am wondering what might be different about my configuration. As far as I can tell, I have the same tube and shaker as OGH, just a much less powerful blower. I am also looking at this build: http://kostverlor...-tije.html. These guys look like they are using one of these 12V 75W blowers (at least that's what it looks like when I click on the eBay link in their BOM), but it is possible they have one running off of 220V AC. Their YouTube video shows the kind of flow I am looking for, a nice central spout and decent bean recirculation. I do notice they have a mesh screen in the bottom of their funnel. I wish I knew how to spot weld (and had the equipment)! Maybe that provides them a wider cross-section. I'll take some measurements this weekend and see exactly what kind of current draw and CFM I am getting, and will post results. It is also possible I am losing pressure somewhere in my hastily built test, so will see if I can improve results. I might also redesign the packaging for the blower with my 3D printer. I can't say the air flow through a pig shaped design is optimal. Of course I am also open to any tips from those who have successfully troubleshooted their way to successful designs. |
|
|
|
| elkayem |
Posted on 05/12/2018 1:48 PM
|
|
Newbie Posts: 43 Joined: March 09, 2018 |
More adventures with the AirPig! In an effort to figure out what I have (and why I can't get the bean recirculation that I want), I've taken some data. Using a car battery, this little blower draws 14.4A (173W) without a load, and 15.2A (182W) when blowing through 300g of beans. That is certainly more than the 75W, 12V air pumps that I see some other folks using. I also measured a 24 CFM airflow, using an anenometer and some clever use of construction paper and duct tape. (Anemometer measurement was 4 m/s with a 65mm diam opening and 24mm diam central obscuration, if anyone wants to check my math.) When the air flowed through 300g of beans, the air flow was at least 15 CFM, though that is likely an underestimate because I wasn't as careful sealing the gaps around the anemometer for that test. I don't know what pressure I'm getting, but the product specs state 1 psi (28" H20). I am looking for a bean recirculation that looks like the one posted at: https://youtu.be/...AM?t=1m30s. This was posted by a user named cyberelectronics. His setup is very similar to mine with the glass tube, cocktail shaker, and 12V blower. I would think the recirculation here is fast enough to ensure an even roast, and he claims to accomplish this with a 12V, 75W inflatable raft air pump. Mine does not look like this. I see a little bit of recirculation, but the motion of the beans on the outside down is much much slower and likely not adequate for roasting. I also notice that cyberelectronics has modified the opening at the bottom of his shaker, increasing the cross section. See: http://www.cybere...248336.jpg. Could this be the difference? There hasn't been any response to my questions (yet), so I read this to mean that others on this forum don't have as much experience with these 12V DC air pumps. I'll keep posting my experiences though, which may ultimately be useful to someone else reading this thread. |
|
|
|
| CharcoalRoaster |
Posted on 05/13/2018 6:38 AM
|
|
1 1/2 Pounder Posts: 640 Joined: April 13, 2012 |
One thing I'd be careful of after watching that video is that some of the beans on the periphery never actually moved with the rest of the fluidbed. I'm not sure if that's the pump, the load being too large, or the RC being too small with a load too large for it to allow proper recirculation. |
|
|
|
| Brewin_Bruin |
Posted on 05/22/2018 3:51 PM
|
 Newbie Posts: 23 Joined: March 05, 2018 |
I agree that a two-stage 8A /1000W Ametek vacuum blower similar to OGH's is more than needed in this context, but I didn't find anything smaller that I was confident would work. I use this with a Bake-a-round setup similar to what you describe, up to 500 g with a single 1700W heat gun element using air recirculation. I never run the blower above ~1/3 of max power, using a DC speed controller (these Ameteks have universal motors, they run AC or DC). Since it only cost about $60 (however the speed controller was another ~$100) I didn't worry about finding a smaller motor. I didn't see an obvious cheap solution to supplying/controlling DC in these current ranges. Consequently, a little extra for an oversized blower seemed better than struggling with an undersized one, since much of the cost was in the control. Characterizing the airflow will also end up costing you a bit, but maybe it's fun enough for its own sake. |
|
|
|
| elkayem |
Posted on 05/27/2018 12:53 PM
|
|
Newbie Posts: 43 Joined: March 09, 2018 |
Thanks Brewin Bruin! What I can tell, most folks opt for an overpowered air pump than taking a chance on something that might not be capable. Makes sense, why mess with success. Just as an update on my build with the "Air Pig", I ended up removing the fan and motor from the pig shaped case, and repackaging it in my own streamlined, 3D printed enclosure. The result was extremely successful. With 300g, I am getting a huge geyser of beans with very rapid recirculation, even with the heat coil in the path. I didn't try, but have no doubt it could handle way more beans. I will test it with 500g at my next opportunity. I don't have any firm evidence on why the original setup didn't work, but my suspicion is that the corrugated hose that came with the the air pump was slowing down some of the air flow. In any case, I can now say with high confidence that this 12V fan has plenty of juice for this roaster. |
|
|
|
| elkayem |
Posted on 05/27/2018 1:04 PM
|
|
Newbie Posts: 43 Joined: March 09, 2018 |
Next question... for these OGH-derived fluidbed roaster designs, what is the preferred method to connect the 1.5" manifold to the 1.5" cocktail shaker lid? The diameter of the cocktail shaker is slightly larger, so it does slide nicely over the 1.5" manifold. But as I see it, I need to accomplish two things: 1) make sure it is removable, so I can dump the roasted beans at the end of the roast, and 2) make sure I maintain a good seal so I don't have air leaking out the side and lose valuable air pressure. How are people addressing this? |
|
|
|
| CharcoalRoaster |
Posted on 05/27/2018 1:43 PM
|
|
1 1/2 Pounder Posts: 640 Joined: April 13, 2012 |
I laid a bead of high temp silicone caulk inside my funnel (found a copper funnel instead of a cocktail shaker) then slid my bakearound down. It keeps the glass from sliding and so far, after abour 50+ roasts hasn't broken down at all. It at least maintains the portability of the RC. I clamp it to my cyclone chaff collector using sanitary clamps. |
|
|
|
| elkayem |
Posted on 05/27/2018 5:50 PM
|
|
Newbie Posts: 43 Joined: March 09, 2018 |
Thank you CharcoalRoaster, very useful info! I assume you need to remove your copper funnel and bakearound RC to pour out the beans after roasting. If so, how do you attach it to the heater manifold to maintain a sealed connection while maintain the ability to remove it? Do you use high temperature silicone caulk for this too? |
|
|
|
| CharcoalRoaster |
Posted on 05/27/2018 7:05 PM
|
|
1 1/2 Pounder Posts: 640 Joined: April 13, 2012 |
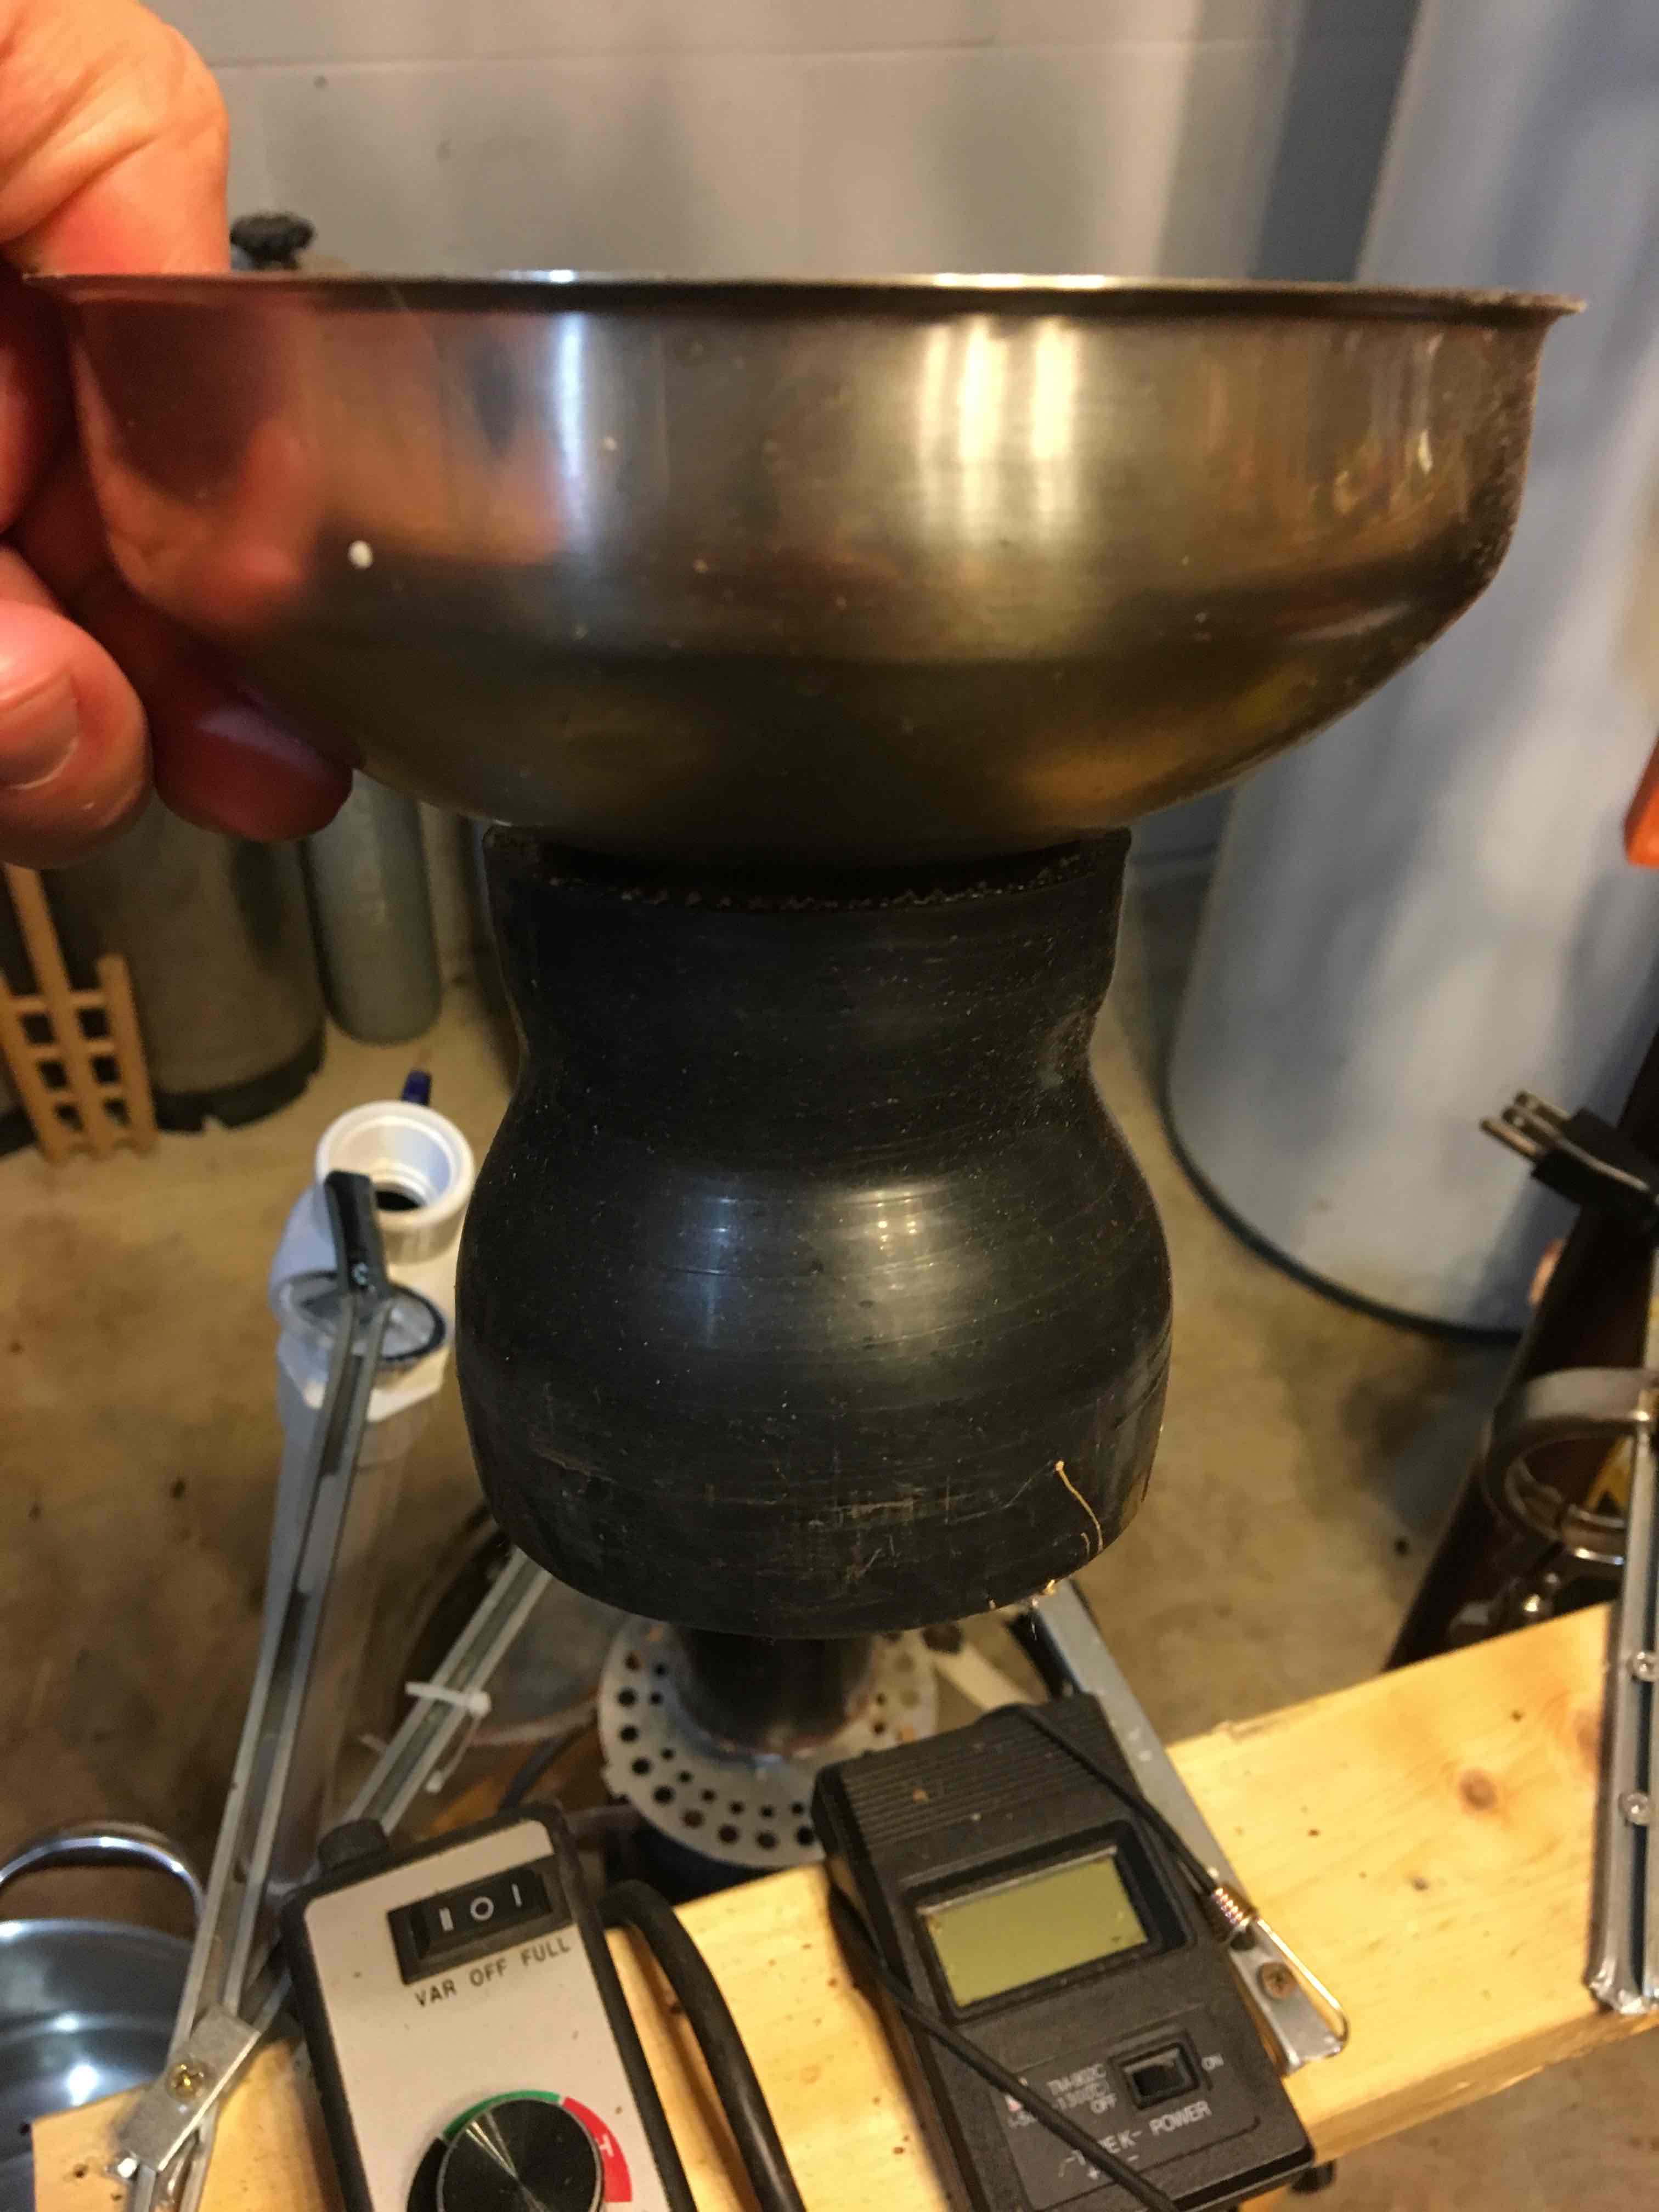
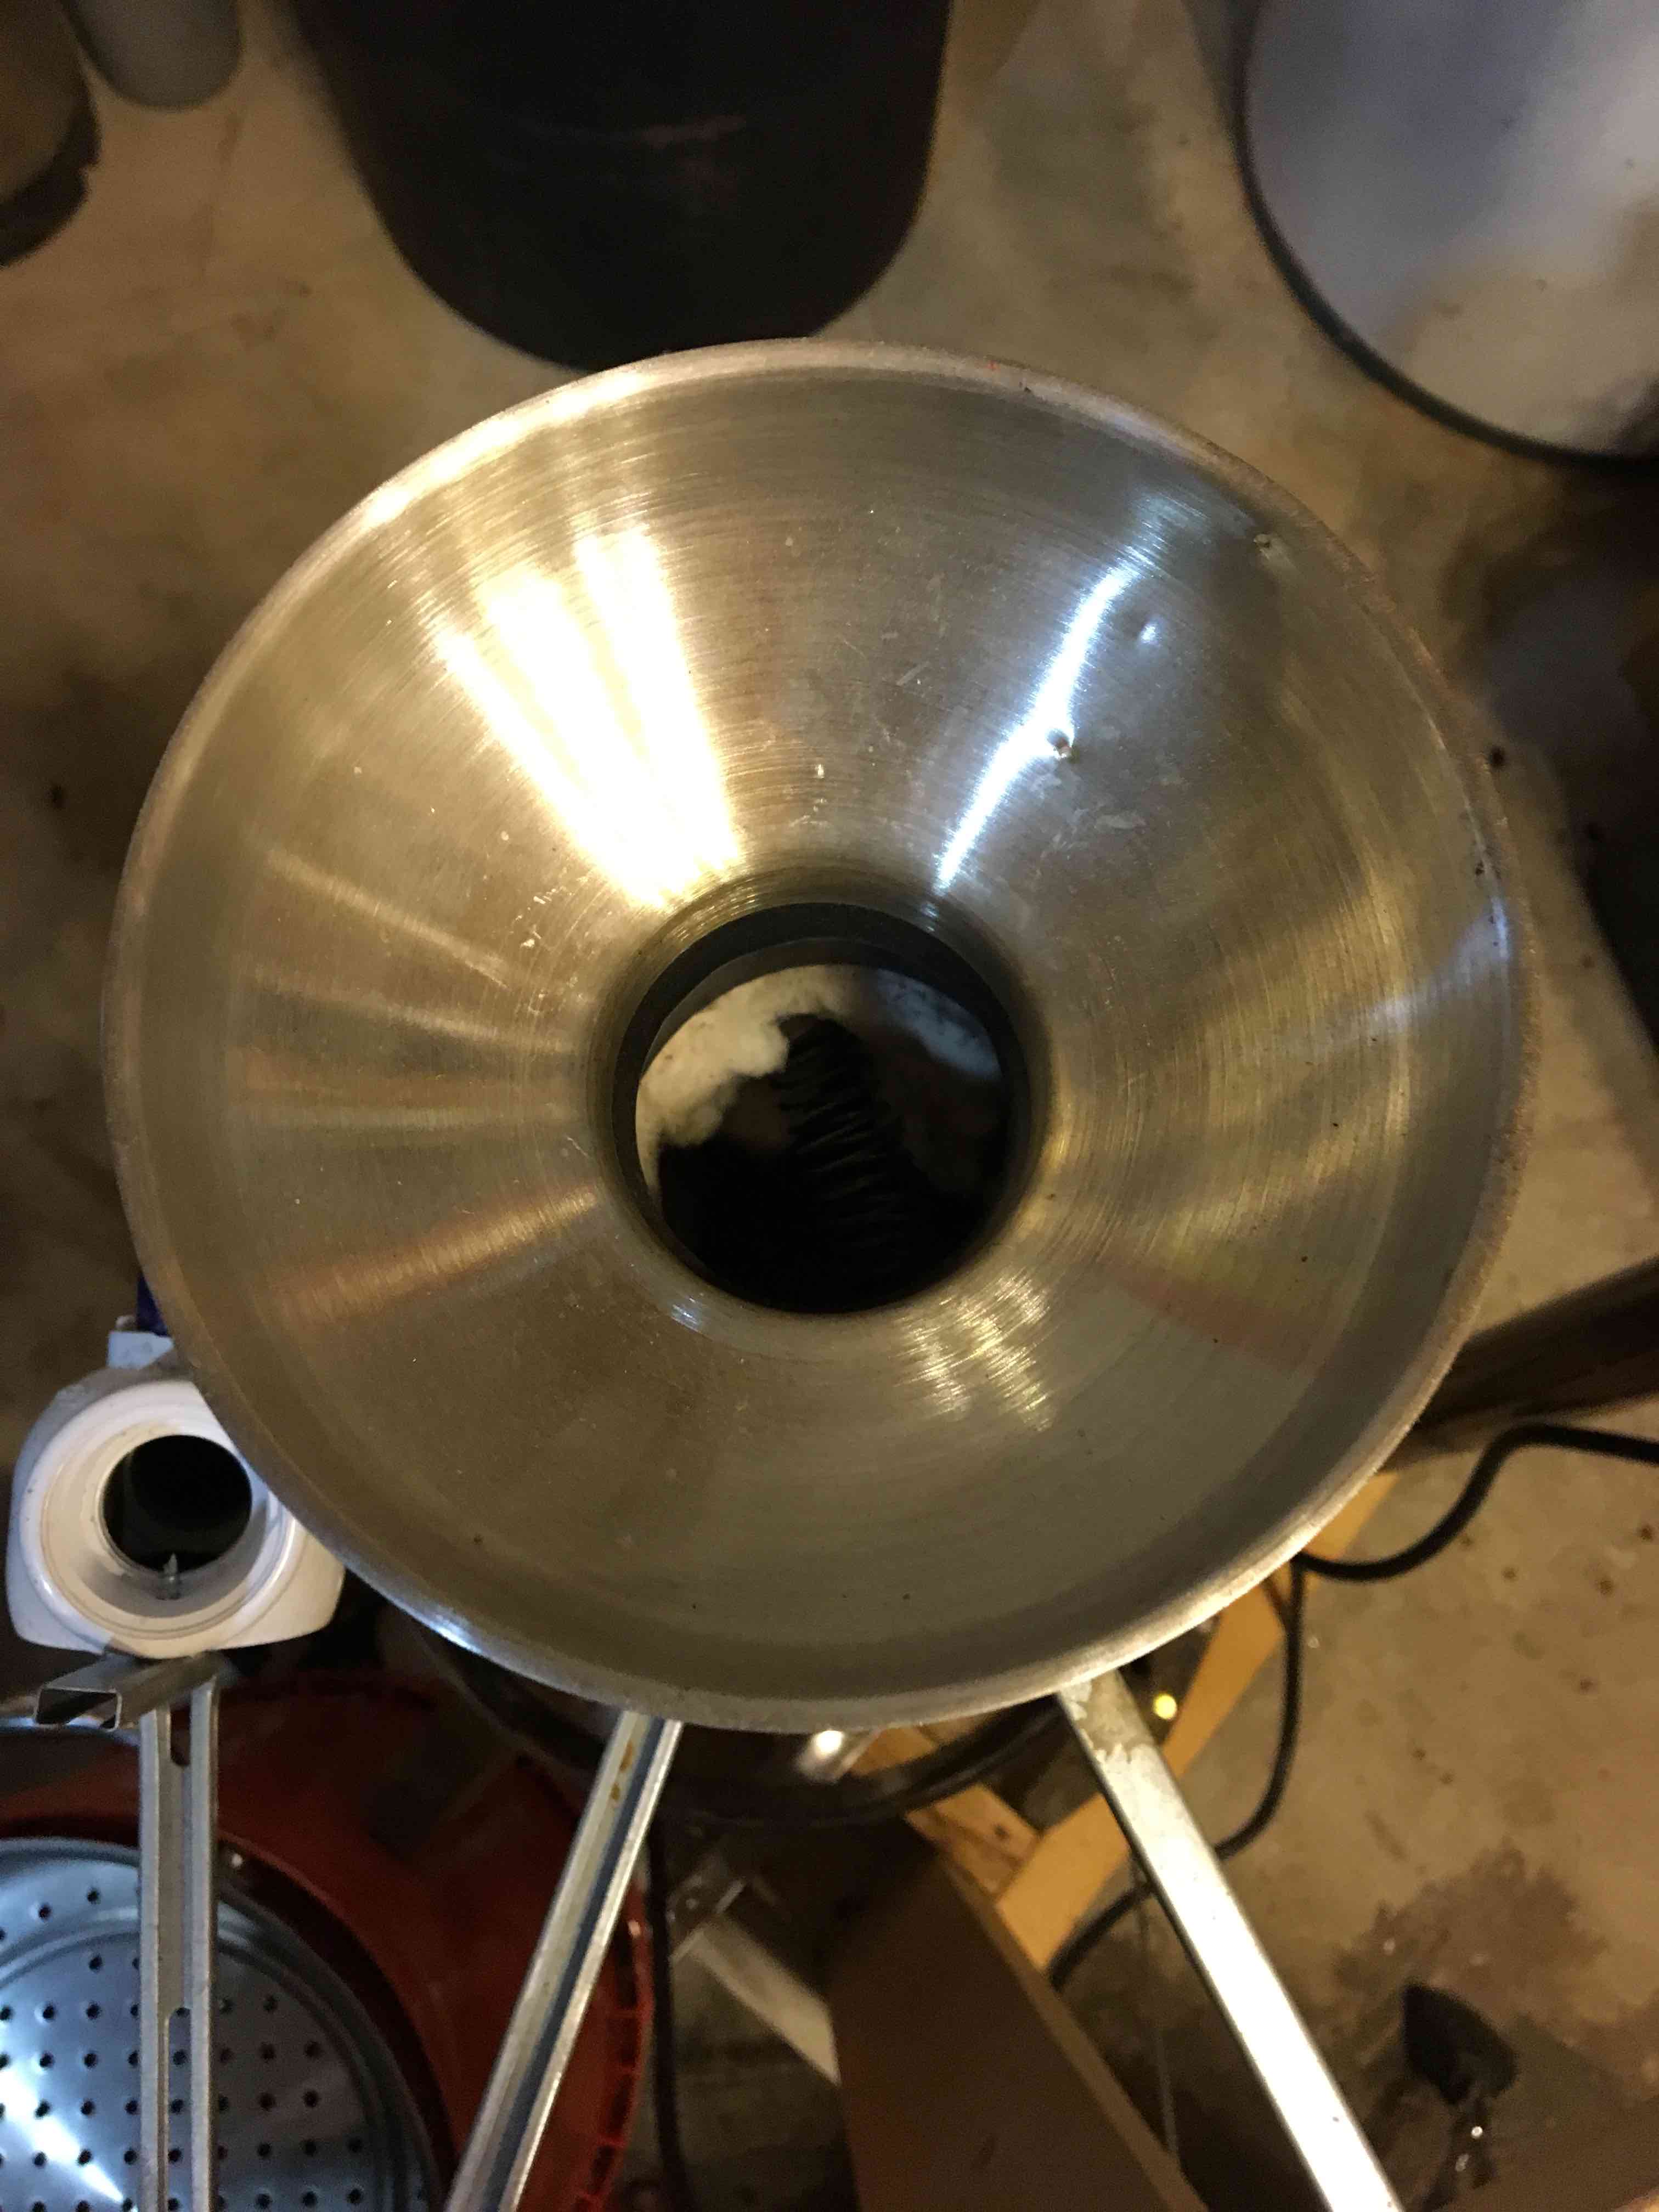
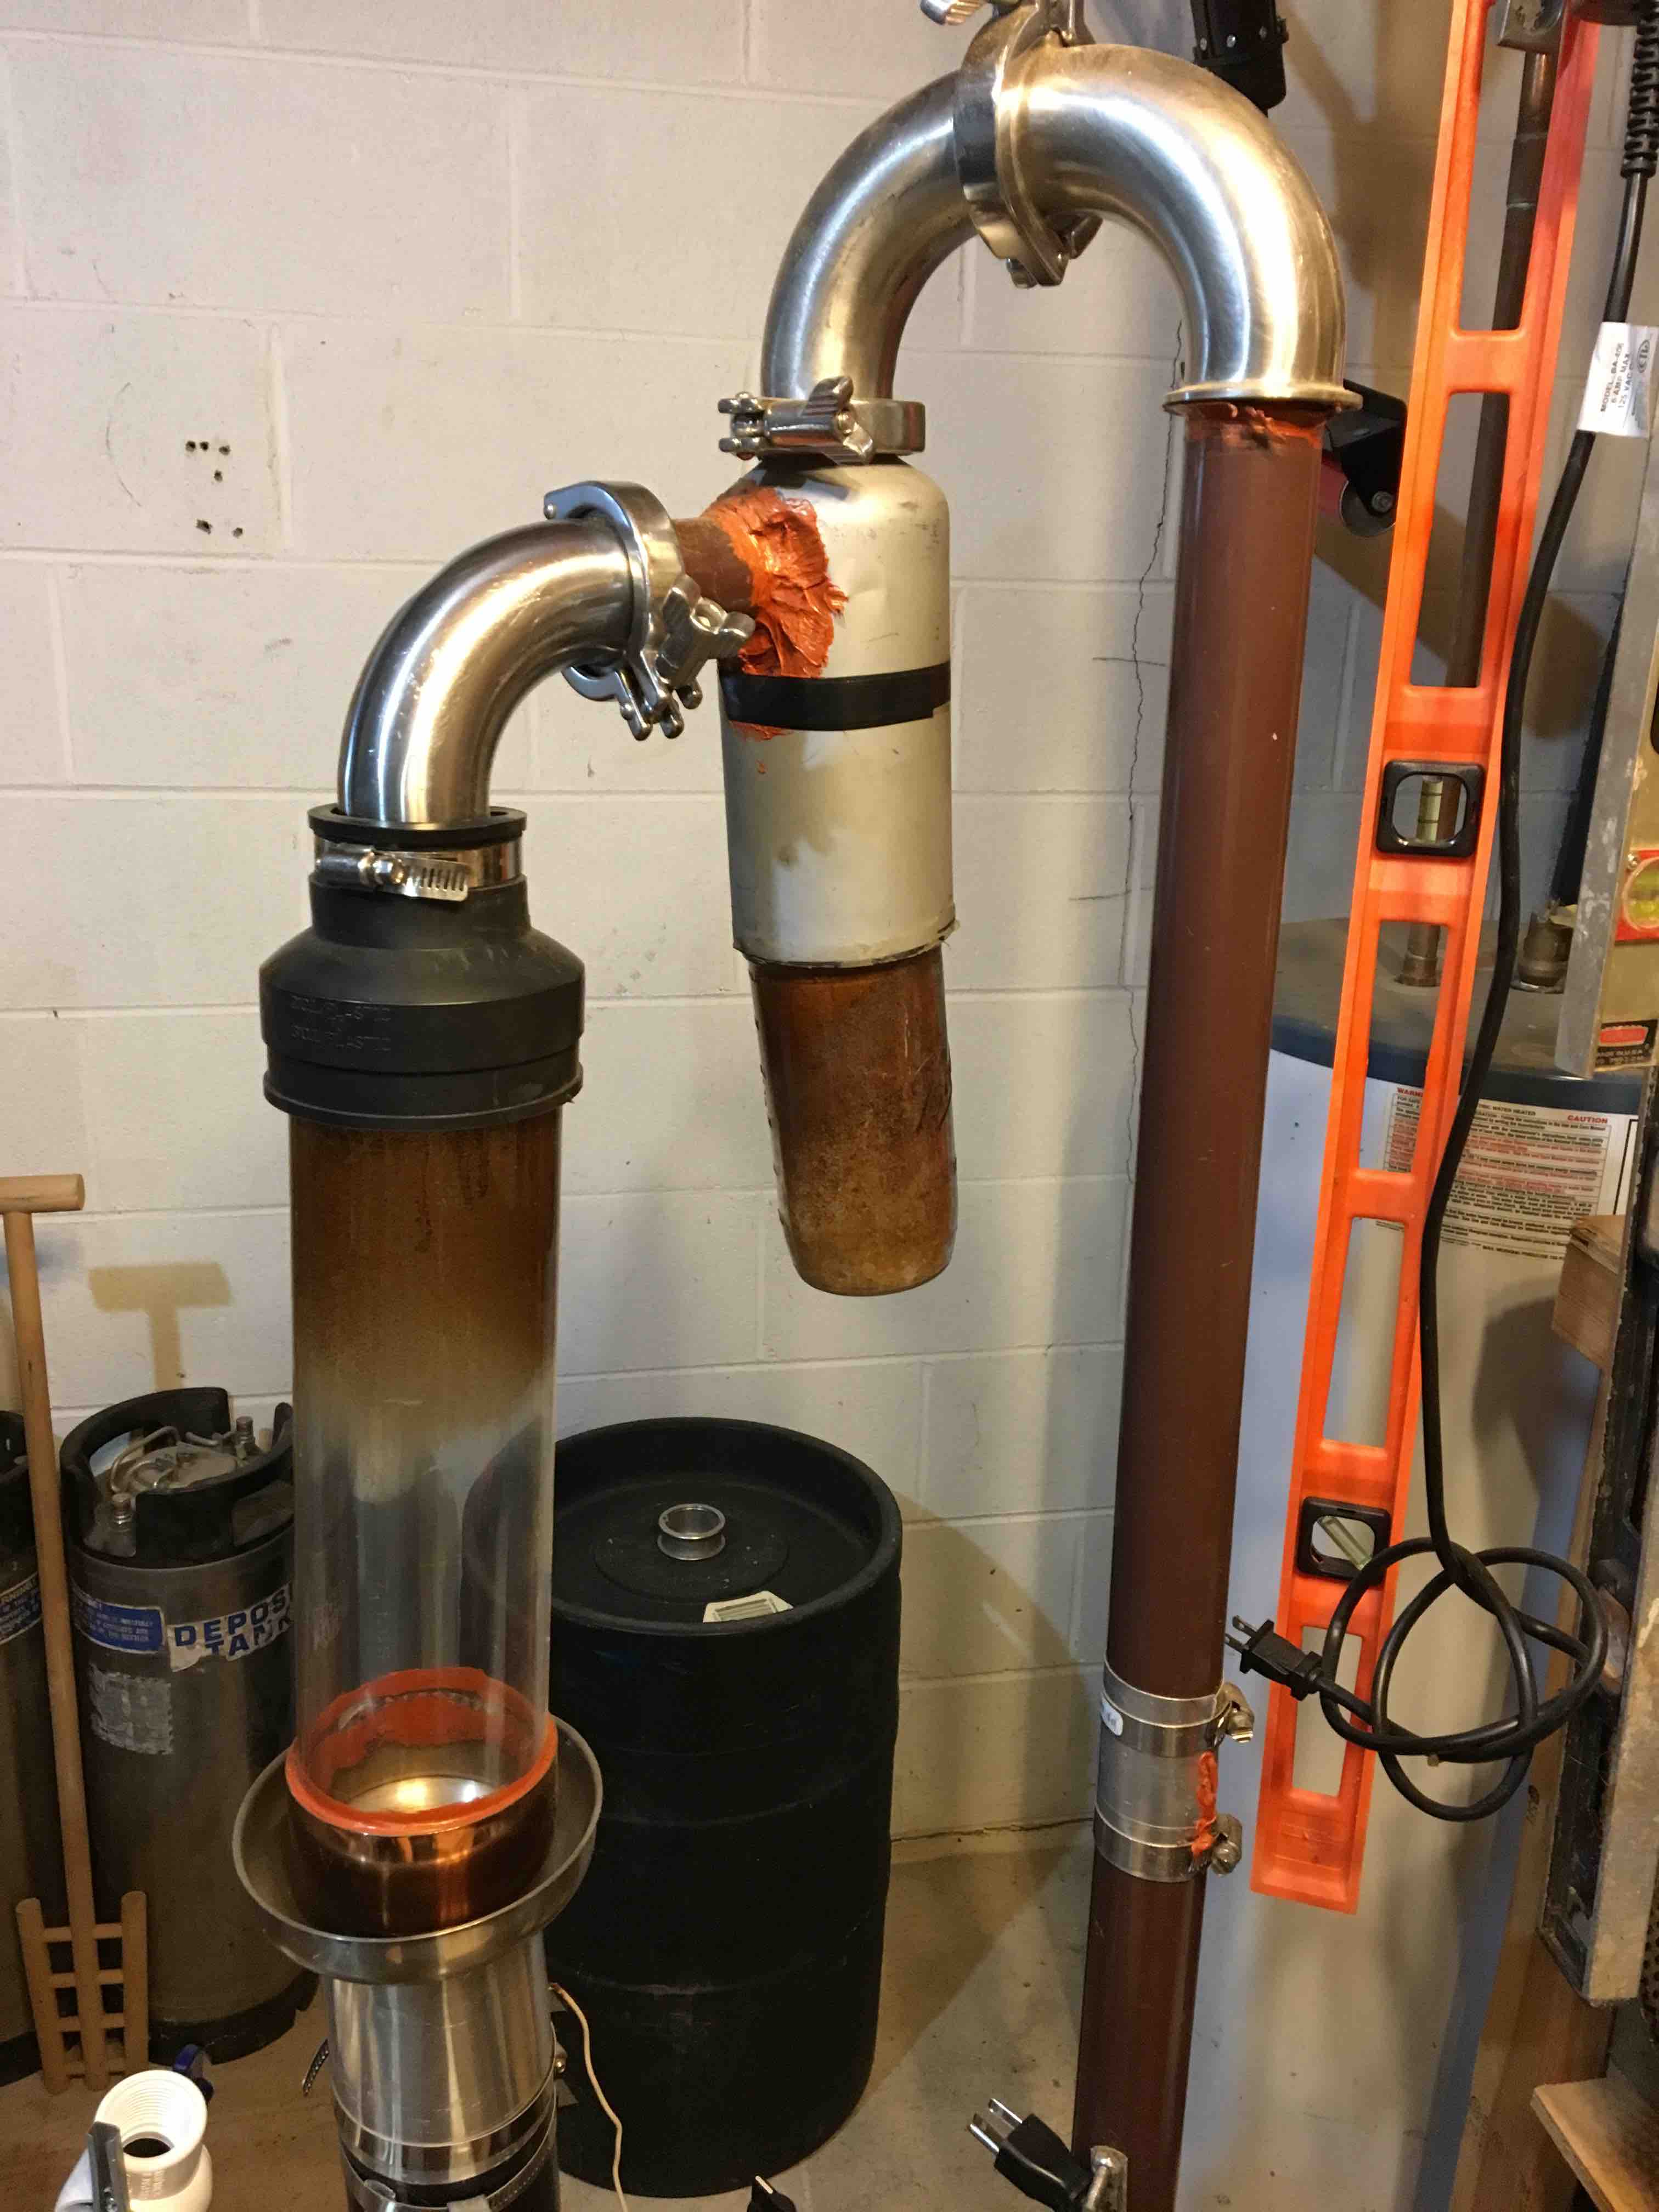
Here's pics of my roaster and roast chamber. I have no fabrication tools/skills so had to DIY the crap out of making everything fit together with no airflow leaks. My roasts are incredibly consistent on this thing and turn out great coffee. SO, please excuse the frankensteiny nature lol
CharcoalRoaster attached the following images:


|
|
|
|
| HoldTheOnions |
Posted on 05/27/2018 9:51 PM
|
|
1/2 Pounder  Posts: 205 Joined: October 26, 2014 |
Sorry for hijacking thread as you got it sorted, but fyi for anyone else reading this. This 4amp vac/blower is excellent for mid sized air roaster applications like this one. https://www.amazo...tinger+vac Can see it working here. https://www.youtu...ocltulzVu4 I forget exact numbers, but I remember using around 2 amps to push 250-300g of cold beans and would drop it down to around 1.25 amps by the end of the roast. Gave best results on a speed controller, but dimmer worked fine too. Sorry again, carry on :-) |
|
|
|
| garageroaster |
Posted on 05/28/2018 11:31 PM
|
|
Newbie Posts: 3 Joined: April 03, 2018 |
elkayem, my build was based off of OGH's design also but instead of a cocktail shaker I used a sink drain kit and a 7" drain elbow. By doing this I was able to utilize the nut and threads to secure the roast chamber. When my roast is over I vacuum off the chaff and simply unscrew the base to dump out the beans, it actually works pretty good. I'm still in the prototype phase but am going to be building a box to house and stabilize the unit once I get time. The drain kit was $17 at Ace Hardware. Cheers.
garageroaster attached the following image:

|
|
|
|
| renatoa |
Posted on 05/29/2018 4:52 AM
|
|
Administrator Posts: 3104 Joined: September 30, 2016 |
So bad that today sink drain are made of plastic, with only the top perforated cover made from stainless... :( Here is a challenge to find such metal drain sets. |
|
|
|
| Brewin_Bruin |
Posted on 05/29/2018 5:51 PM
|
|
Newbie Posts: 23 Joined: March 05, 2018 |
Quote elkayem wrote: elkayem wrote: "I don't have any firm evidence on why the original setup didn't work, but my suspicion is that the corrugated hose that came with the the air pump was slowing down some of the air flow. " Yes, you are quite correct, corrugated hose is well known for slowing down airflow. You can find a lot on this topic in discussions of dust collection issues for woodworking shops. One alternative for controlling/reducing airflow that IS cheap and simple came to mind. It's been mentioned by others in the fluidized bed forum: instead of controlling the motor speed you can introduce a variable leak via a Y or T connection between the blower and the heating coil, with a valve that allows you fine control. Since most of the current is going to the heater, you can sacrifice a little electrical efficiency for simplicity and lower equipment cost. Following the "KISS" principle is generally a good design perspective. It might whistle, depending on how things are configured. Edited by JackH on 05/30/2018 2:47 AM |
|
|
|
| elkayem |
Posted on 05/30/2018 10:37 AM
|
|
Newbie Posts: 43 Joined: March 09, 2018 |
CharcoalRoaster, thank you for the pictures! I'm trying to discern how you connect the funnel to the heat tube. It looks like some kind of a rubber tube enclosed in a metal tube with a clamp? Looks clever. Garageroaster, nice design! I was thinking of some kind of a threaded interface like I see in your photo, but couldn't figure out how to spin the RC with the thermocouple wires. I'll have to check out the Ace hardware kit you mentioned. Also, yours must be the only one with a roast chamber supported on the back of a turtle. |
|
|
|
| elkayem |
Posted on 05/30/2018 10:39 AM
|
|
Newbie Posts: 43 Joined: March 09, 2018 |
Quote Brewin_Bruin wrote: One alternative for controlling/reducing airflow that IS cheap and simple came to mind. It's been mentioned by others in the fluidized bed forum: instead of controlling the motor speed you can introduce a variable leak via a Y or T connection between the blower and the heating coil, with a valve that allows you fine control. Since most of the current is going to the heater, you can sacrifice a little electrical efficiency for simplicity and lower equipment cost. Following the "KISS" principle is generally a good design perspective. It might whistle, depending on how things are configured. This is a very good idea. I already have a PWM controller I am using with my smaller roaster which I intend to reuse, otherwise I would certainly implement it this way. I agree that this is simpler. |
|
|
|
| Brewin_Bruin |
Posted on 05/30/2018 12:59 PM
|
|
Newbie Posts: 23 Joined: March 05, 2018 |
elkayem wrote: " I already have a PWM controller I am using with my smaller roaster which I intend to reuse, otherwise I would certainly implement it this way." Be careful with PWM and AC motors, unless you do extra tricks like zero crossing, they don't play nicely together, but with DC motors, it's fine. |
|
|
|

Page 1 of 2: 12
| Jump to Forum: |
Powered by PHP-Fusion Copyright © 2024 PHP-Fusion Inc
Released as free software without warranties under GNU Affero GPL v3
Designed with ♥ by NetriXHosted by skpacman