
Login

Shoutbox
You must login to post a message.
renatoa
07/26/2024 3:49 PM
Bill grubbe and Jk, 
allenb
07/26/2024 5:15 AM
Spiderkw Welcome to HRO!

renatoa
07/24/2024 8:31 AM
ramiroflores and John123,

 ?
?
?renatoa
07/21/2024 1:18 AM
 , Luislobo
renatoa
07/19/2024 11:28 AM
Koepea,
Forum Threads
Newest Threads
Skywalker roaster modsBackground Roast Iss...
Hello from Arkansas
TC4ESP
Green coffee reviews
Hottest Threads
| Skywalker roaster... | [375] |
| TC4ESP | [115] |
| War on Farmers by... | [47] |
| Adventures in flu... | [26] |
| Hello! (soon) Roa... | [17] |
In Memory Of Ginny

Donations
Latest Donations
dmccallum - 10.00
JackH - 25.00
snwcmpr - 10.00
Anonymous - 2.00
Anonymous - 5.00
dmccallum - 10.00
JackH - 25.00
snwcmpr - 10.00
Anonymous - 2.00
Anonymous - 5.00
Users Online
Guests Online: 5
Members Online: 0
Total Members: 8,393
Newest Member: Bill grubbe
Members Online: 0
Total Members: 8,393
Newest Member: Bill grubbe
View Thread
Who is here? 1 guest(s)
Page 1 of 2: 12
|
 Both Manual and Digital contol?
|
|
| km99 |
Posted on 04/27/2022 1:04 PM
|
 Newbie  Posts: 26 Joined: November 29, 2012 |
I hope this is the correct way/place to ask this question, I apologize if not.... I am currently building my second fluidbed roaster. This is my first attempt at automation. It will have heating element control with Artisan/TC4+/SSR. I am definitely way over my head here! But very excited to learn. Here is my question: If my computer crashes or is lost, can I still control the heating element that the Artisan slider was controlling thru the SSR with say a potentiometer or something? I tried in vain to find the answers in previous threads. Sorry if this is clearly covered somewhere else. Thank you all for your passion and information on such a fun hobby! |
|
|
|
| renatoa |
Posted on 04/27/2022 2:34 PM
|
|
Administrator Posts: 3104 Joined: September 30, 2016 |
TC4 allows connecting two potentiometers, for heater and fan control in standalone mode. So you can take control, if the Artisan computer crashes. You can even override the Artisan value sent via a slider using the pot, they are designed to work together using a leapfrog logic, whatever of them is moved will change the value until moved again, or the other slider/pot is moved to a new position. Of course trying to do this using both Artisan and the pot will be very confusing  especially if no LCD provided for TC4. especially if no LCD provided for TC4.One more thing you should be aware... there are specific ways to crash/reboot a computer that will led to reboot of Arduino too ! Fortunately Arduino reboots much faster and you can resume quickly the roasting, assuming you remember the approximate control level values when crash happened. |
|
|
|
| km99 |
Posted on 04/27/2022 3:31 PM
|
|
Newbie Posts: 26 Joined: November 29, 2012 |
That is a great explanation that even I could understand! Thank you so much. |
|
|
|
| km99 |
Posted on 05/17/2022 9:13 AM
|
|
Newbie Posts: 26 Joined: November 29, 2012 |
I am a newbie with Arduino, but excited to learn. I ordered the Pre-flashed Arduino and TC4+ from Tindie and also downloaded the sketch from gerstgrasser. The Arduino is loaded with ARTISAN V3.10c. Everything has worked to this point with Artisan software. I have 2 thermocouples hooked up and I am using OT1 for controlling an SSR for the heat element. Also the LCD for Arduino has worked flawlessly. Last night I tried to add an analog Potentiometer and could not get any result of any kind. I wired the 2 outside pins on the pot, one to Ground on Arduino and one to 3v power (also tried the 5v power pin). The center pin on pot goes to A0 (also tried A1 to rule that out) and nothing happens when rotating the knob. I have tried it in standalone mode with Arduino powered by the power plug and also with the laptop powering Arduino and using Artisan. When I control the Heat with the slider in Artisan it works flawlessly, but absolutely nothing happens with the pot. Any advice you guys could send my way would be amazing. Thanks in advance! |
|
|
|
| renatoa |
Posted on 05/17/2022 10:19 AM
|
|
Administrator Posts: 3104 Joined: September 30, 2016 |
aArtisan lacks pots support. You should load aArtisan_PID for analogue control (pots) support. Don't forget to activate them in user.h, this section: https://github.co...user.h#L78 |
|
|
|
| km99 |
Posted on 05/17/2022 10:27 AM
|
|
Newbie Posts: 26 Joined: November 29, 2012 |
Oh I did not know that. Thank you so much. Is github where I download that sketch? *edit*...I found how to do it on github. Thank you for your patience with Arduino questions and also with using this forum, and for moving the post to the right place. You guys are amazing. Edited by km99 on 05/17/2022 10:48 AM |
|
|
|
| km99 |
Posted on 05/17/2022 5:36 PM
|
|
Newbie Posts: 26 Joined: November 29, 2012 |
Well....I switched from aArtisan to aArtisan_PID. According to the LCD the Heater Power is now adjustable from the analog pot on A0. Very excited about that. The issue now is that the leds do not come on when heat is being called for and the SSR is not receiving signal from OT1. Any thoughts on that? I am sure I missed a setting somewhere that needs to be changed.... |
|
|
|
| km99 |
Posted on 05/17/2022 9:37 PM
|
|
Newbie Posts: 26 Joined: November 29, 2012 |
Ok, I double-checked everything and I think I didn't save the user.h file one time? Anyway...everything works now! |
|
|
|
| renatoa |
Posted on 05/18/2022 6:19 AM
|
|
Administrator Posts: 3104 Joined: September 30, 2016 |
Is this your avatar ? https://www.reute...022-05-17/ |
|
|
|
| km99 |
Posted on 05/18/2022 1:03 PM
|
|
Newbie Posts: 26 Joined: November 29, 2012 |
Funny  ...or tragic depending upon your perspective and proximity! ...or tragic depending upon your perspective and proximity! |
|
|
|
| km99 |
Posted on 05/27/2022 8:56 AM
|
|
Newbie Posts: 26 Joined: November 29, 2012 |
Another question, when using my fluidbed with Artisan Scope and TC4+ I am using the pid controller in the Arduino. So, consequently, when the heat is being controlled my 'heat slider' does not go up and down. The question is: How do you turn off the heat at the end of the roast!!! When I hit the drop button, nothing happens with the heat. I have tried configuring the "drop" event to serial command and OT1;0 but that seems to have no effect. So right now I am manually shutting off my power to elements, but PID is still calling for heat. Any insight on that? |
|
|
|
| mg512 |
Posted on 05/27/2022 10:08 AM
|
 1/4 Pounder  Posts: 189 Joined: March 04, 2018 |
IIRC, you would configure the "drop" event to send something like "PID, off\n OT1,0" (not sure off the top of my head if it's just \n though). |
|
|
|
| renatoa |
Posted on 05/27/2022 10:09 AM
|
|
Administrator Posts: 3104 Joined: September 30, 2016 |
PID;STOP will do both: stop PID follow profile, and set OT1 level to zero. \\n is what you want Edited by renatoa on 05/27/2022 10:26 AM |
|
|
|
| km99 |
Posted on 05/27/2022 10:21 AM
|
|
Newbie Posts: 26 Joined: November 29, 2012 |
Do I still select 'serial command' from the dropdown menu and type PID;STOP in the command line next to it? or do I select p-i-d and type STOP in the command line? |
|
|
|
| renatoa |
Posted on 05/27/2022 10:24 AM
|
|
Administrator Posts: 3104 Joined: September 30, 2016 |
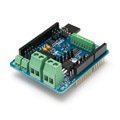
p-i-d is for Fuji controllers, expects 3 float numbers separated by semicolon, as kp;ki;kd, to be sent to the black box. ~~~
renatoa attached the following image:

Edited by renatoa on 05/27/2022 10:34 AM |
|
|
|
| km99 |
Posted on 05/27/2022 10:26 AM
|
|
Newbie Posts: 26 Joined: November 29, 2012 |
Perfect! You guys continue to be amazing. Thank you so much |
|
|
|
| renatoa |
Posted on 05/27/2022 10:38 AM
|
|
Administrator Posts: 3104 Joined: September 30, 2016 |
Also notice PID;OFF on FC event, will stop following profile, and keep power level unchanged, allowing you to drive the boat during the development troubled waters Not so easy for an algorithm to keep on track the roast during a flick followed by a crash, without derailing. |
|
|
|
| km99 |
Posted on 05/27/2022 10:58 AM
|
|
Newbie Posts: 26 Joined: November 29, 2012 |
Great advice and insight. Thank you. |
|
|
|
| km99 |
Posted on 06/11/2022 9:19 PM
|
|
Newbie Posts: 26 Joined: November 29, 2012 |
Is there a way to "calibrate" the thermocouple readings in Arduino? I had the symb ET/BT temperature adjusted by x*1.02 in Artisan, but it would not follow the profile on the line like it used to. I finally realized the temps on my Arduino screen were different than my Artisan temps, and it was following the profile based on Arduino temps. That being said, can you calibrate the thermocouple easily in Arduino code or with the user.h file instead of using Artisan to do so? |
|
|
|
| renatoa |
Posted on 06/12/2022 4:23 AM
|
|
Administrator Posts: 3104 Joined: September 30, 2016 |
You have a calibration in code, using an offset (for ambient, i.e. lowest temperature you intend to measure) and a gain (for end of scale, i.e. highest temperature) Check this code section starting here: https://github.co....ino#L1381 The calibration coefficients can be stored in eeprom, as you can see in the next lines of code, but this is not a very friendly job, is not part of the original TC4 code, you need a separated sketch. Lack of memory, yeah... For now just changing the default calibration gain and offset should suit your needs. You can find them in user.h, here: https://github.co...ser.h#L147 |
|
|
|
| progen |
Posted on 08/01/2022 12:39 AM
|
 1/4 Pounder Posts: 82 Joined: December 17, 2019 |
It's weird that I got a strange problem lately. During testing, everything worked fine and I could control the SSR manually via a pot and only used the light dimmer module's ZCD feature. All nice and good. But today, whenever I turned on the light dimmer module, IO2's light will start flashing and OT1 will be outputting a signal around 30% regarding of whether the pins to the pot are plugged in or not. The setup is also not responding to the pot. It's fine when I comment out the Analogue 1 line in user.h but the problem comes back when I comment in Analogue 1 again. |
|
|
|
| renatoa |
Posted on 08/01/2022 2:33 AM
|
|
Administrator Posts: 3104 Joined: September 30, 2016 |
Check your pot integrity. Is the cursor (middle pin) voltage changing according to rotation ? |
|
|
|
| progen |
Posted on 08/01/2022 4:47 AM
|
|
1/4 Pounder Posts: 82 Joined: December 17, 2019 |
Quote renatoa wrote: Check your pot integrity. Is the cursor (middle pin) voltage changing according to rotation ? The thing is I get this problem the very moment I activate Analogue 1 in user.h even if the pot is not connected. All 3 pins unplugged. It starts the moment I turn on the light dimmer module. |
|
|
|
| progen |
Posted on 08/01/2022 6:21 AM
|
|
1/4 Pounder Posts: 82 Joined: December 17, 2019 |
If I recall correctly, Devices in Artisan Scope should be Arduino 5/6 and 7/8. I don't know why mine because 3/4 and 5/6 but should Artisan settings influence the Arduino / TC4+ even when the software isn't running? Anyway, what I did was reset Devices, Extra Devices and added back Arduino 5/6 and Arduino 7/8 and now it works fine. Guess this is one of those little glitches that once you've encountered it before, you never worry if you see it again. |
|
|
|
| progen |
Posted on 08/01/2022 6:22 AM
|
|
1/4 Pounder Posts: 82 Joined: December 17, 2019 |
Damn, spoke too soon. Problem came back. At 3.3V, I can only go up to 68% on the heater but at 5V, I can go up to a full 100%. All working fine during testing but it's giving me problems when I'm using the 5V. When I go back down to 3.3V and reset everything, it's fine. |
|
|
|

Page 1 of 2: 12
| Jump to Forum: |
Powered by PHP-Fusion Copyright © 2024 PHP-Fusion Inc
Released as free software without warranties under GNU Affero GPL v3
Designed with ♥ by NetriXHosted by skpacman