
Login

Shoutbox
You must login to post a message.
renatoa
07/26/2024 3:49 PM
Bill grubbe and Jk, 
allenb
07/26/2024 5:15 AM
Spiderkw Welcome to HRO!

renatoa
07/24/2024 8:31 AM
ramiroflores and John123,

 ?
?
?renatoa
07/21/2024 1:18 AM
 , Luislobo
renatoa
07/19/2024 11:28 AM
Koepea,
Forum Threads
Newest Threads
Skywalker roaster modsBackground Roast Iss...
Hello from Arkansas
TC4ESP
Green coffee reviews
Hottest Threads
| Skywalker roaster... | [375] |
| TC4ESP | [115] |
| War on Farmers by... | [47] |
| Adventures in flu... | [26] |
| Hello! (soon) Roa... | [17] |
In Memory Of Ginny

Donations
Latest Donations
dmccallum - 10.00
JackH - 25.00
snwcmpr - 10.00
Anonymous - 2.00
Anonymous - 5.00
dmccallum - 10.00
JackH - 25.00
snwcmpr - 10.00
Anonymous - 2.00
Anonymous - 5.00
Users Online
Guests Online: 5
Members Online: 1
renatoa
Total Members: 8,394
Newest Member: Scottcob
Members Online: 1
renatoa
Total Members: 8,394
Newest Member: Scottcob
View Thread
Who is here? 1 guest(s)
 Skywalker, the ALM chinese one pound roaster
|
|
| kazozero |
Posted on 05/15/2024 7:32 AM
|
|
Newbie  Posts: 19 Joined: May 14, 2024 |
The wifi box i ordered from Chinese App - Taobao. Seller is Man coffee. He selling RMB388
kazozero attached the following image:

|
|
|
|
| renatoa |
Posted on 05/17/2024 8:11 AM
|
|
Administrator Posts: 3104 Joined: September 30, 2016 |
Quote renatoa wrote: I found multiple companies, related to Foshan, selling the same roaster... not sure which of them is really a manufacturer, if only one... https://surewin-c...index.html https://gzkitchen...ofile.html https://akmita.en...index.html https://itopkitch...ofile.html Akimita start using for the first time the name Skywalker for this roaster on Alibaba, and also showing images from the production line. https://www.aliba...64424.html |
|
|
|
| kazozero |
Posted on 05/17/2024 8:41 AM
|
|
Newbie Posts: 19 Joined: May 14, 2024 |
You right! Akimita company profile in Alibaba seem more promising. They have the detail and production line of skywalker roaster. |
|
|
|
| kazozero |
Posted on 05/17/2024 8:59 AM
|
|
Newbie Posts: 19 Joined: May 14, 2024 |
Attached is the app i use to go my roasting. This morning i just roast 300g The server should be in China and I’m from Singapore.
kazozero attached the following images:


|
|
|
|
| renatoa |
Posted on 05/17/2024 11:25 AM
|
|
Administrator Posts: 3104 Joined: September 30, 2016 |
Is this a profile roasting, or manual driven of power by you? Is the air plotting an option ? Seems missing... or, is the green line ? |
|
|
|
| kazozero |
Posted on 05/17/2024 7:54 PM
|
|
Newbie Posts: 19 Joined: May 14, 2024 |
Quote renatoa wrote: Is this a profile roasting, or manual driven of power by you? Is the air plotting an option ? Seems missing... or, is the green line ? I bought the wifi box from the China App. Yes using manual control in order to get the artisan graph. Is like the original control but was ported into an app. Green line you referring is air temperature. I didn’t mod extra sensor for it *sorry my bad, the green colour line indicates “airflow”. Where yellow are the air temperature Edited by kazozero on 05/18/2024 1:58 AM |
|
|
|
| renatoa |
Posted on 05/18/2024 1:42 AM
|
|
Administrator Posts: 3104 Joined: September 30, 2016 |
Surely temperature, and not % of fan ? Then where is fan % plotted ? Extra sensor for air ? Fitting where ? Is the roaster providing a new plug for this purpose ? On that screen I see the graph only, can you post a screen with roast controls and numeric displays ? |
|
|
|
| kazozero |
Posted on 05/18/2024 2:00 AM
|
|
Newbie Posts: 19 Joined: May 14, 2024 |
Quote renatoa wrote: Surely temperature, and not % of fan ? Then where is fan % plotted ? Extra sensor for air ? Fitting where ? Is the roaster providing a new plug for this purpose ? On that screen I see the graph only, can you post a screen with roast controls and numeric displays ? The graph below indicate total roast time 8.41, development period 1.51, development percent 21.4% *my next roast will attach with the control. |
|
|
|
| kazozero |
Posted on 05/18/2024 6:06 AM
|
|
Newbie Posts: 19 Joined: May 14, 2024 |
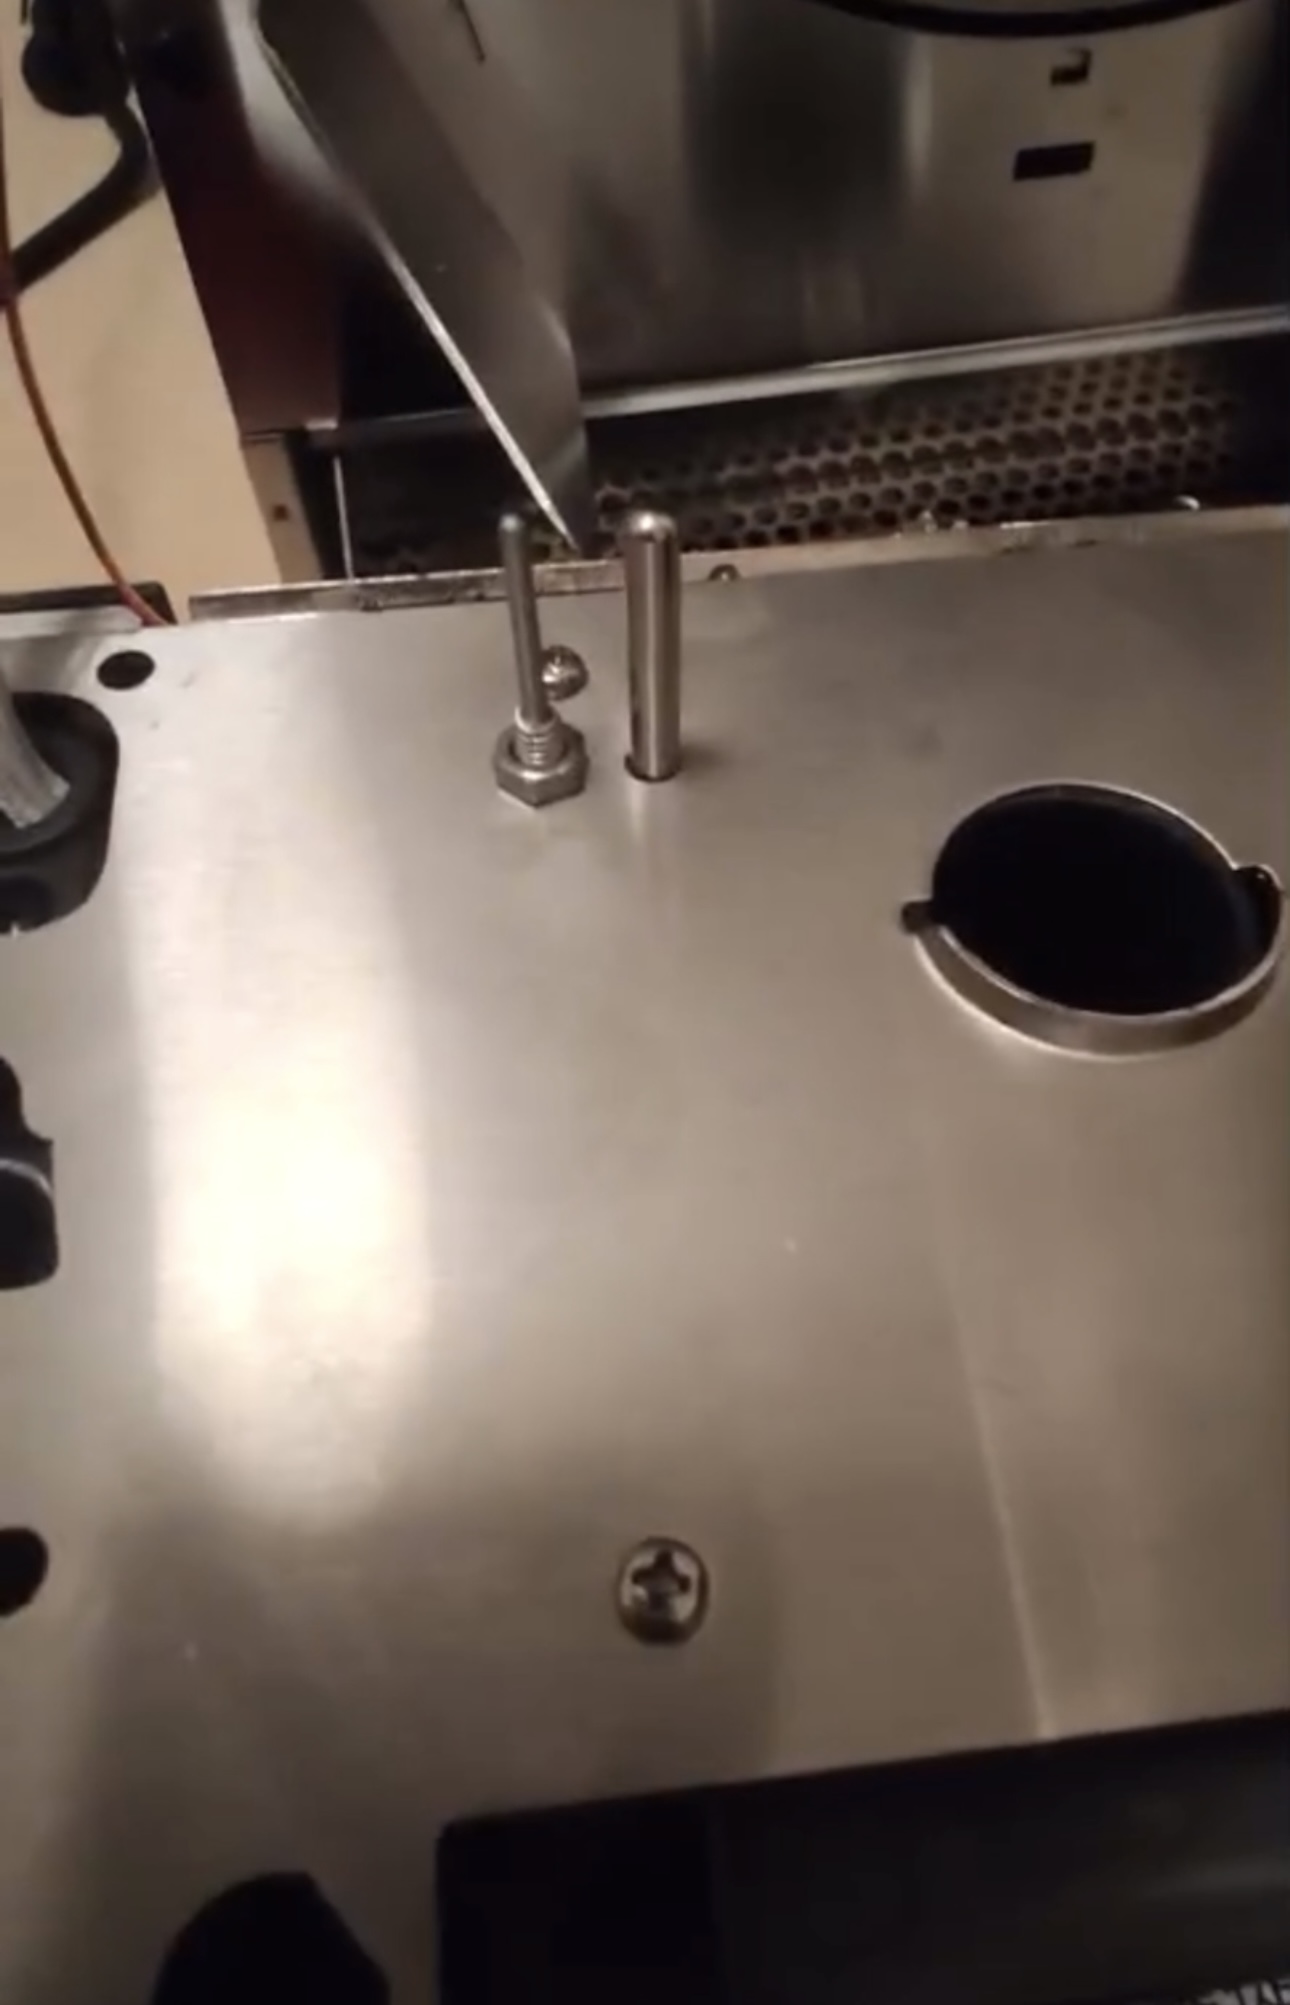
Quote renatoa wrote: Surely temperature, and not % of fan ? Then where is fan % plotted ? Extra sensor for air ? Fitting where ? Is the roaster providing a new plug for this purpose ? On that screen I see the graph only, can you post a screen with roast controls and numeric displays ? Actually we can still add 1 sensor in our roaster. I attached the picture at below. This sensor came with screw thread at base. After fitted we just use nut to tighten it.
kazozero attached the following images:

|
|
|
|
| renatoa |
Posted on 05/18/2024 6:16 AM
|
|
Administrator Posts: 3104 Joined: September 30, 2016 |
Sure, we can add a dozen... but... is this a manufacturer provided feature, or a DIY mod ? And the same question as before... where is connected, who read this new sensor? |
|
|
|
| kazozero |
Posted on 05/18/2024 6:26 AM
|
|
Newbie Posts: 19 Joined: May 14, 2024 |
Quote renatoa wrote: Sure, we can add a dozen... but... is this a manufacturer provided feature, or a DIY mod ? And the same question as before... where is connected, who read this new sensor? Our first version don’t seem linked to artisan or artisan like features. So i have to buy a wifi box that link to inner heat sensor (via original usb port). And the software provide reading and controlling the roaster |
|
|
|
| alin |
Posted on 05/19/2024 2:28 AM
|
|
Newbie Posts: 3 Joined: March 04, 2024 |
Sorry @kazozero, I don't understand your explanations. First question - Did you buy a modded coffee roaster with wifi control from your computer and artisan graphics display from the factory? Or you separately bought an alternate WiFi controller that you're now trying to connect to your original coffee roaster ? What does that alternative Wifi controller look like? We are very curious if it brings anything new compared to the dy variants developed here. Please show pictures of the whole system so we can figure out what it is all about. Thanks for the replies ! |
|
|
|
| renatoa |
Posted on 05/19/2024 3:14 AM
|
|
Administrator Posts: 3104 Joined: September 30, 2016 |
From what I seen so far, those are not screenshots of the true Artisan Roastlogger, recently renamed RoasterScope. First of all, Artisan is a PC/Linux/MacOS executable program. Is not an app, don't run on any smartphone, only on tablets/pads. So please no more use the word Artisan for whatever app you are showing, will confuse people. |
|
|
|
| kazozero |
Posted on 05/19/2024 4:26 AM
|
|
Newbie Posts: 19 Joined: May 14, 2024 |
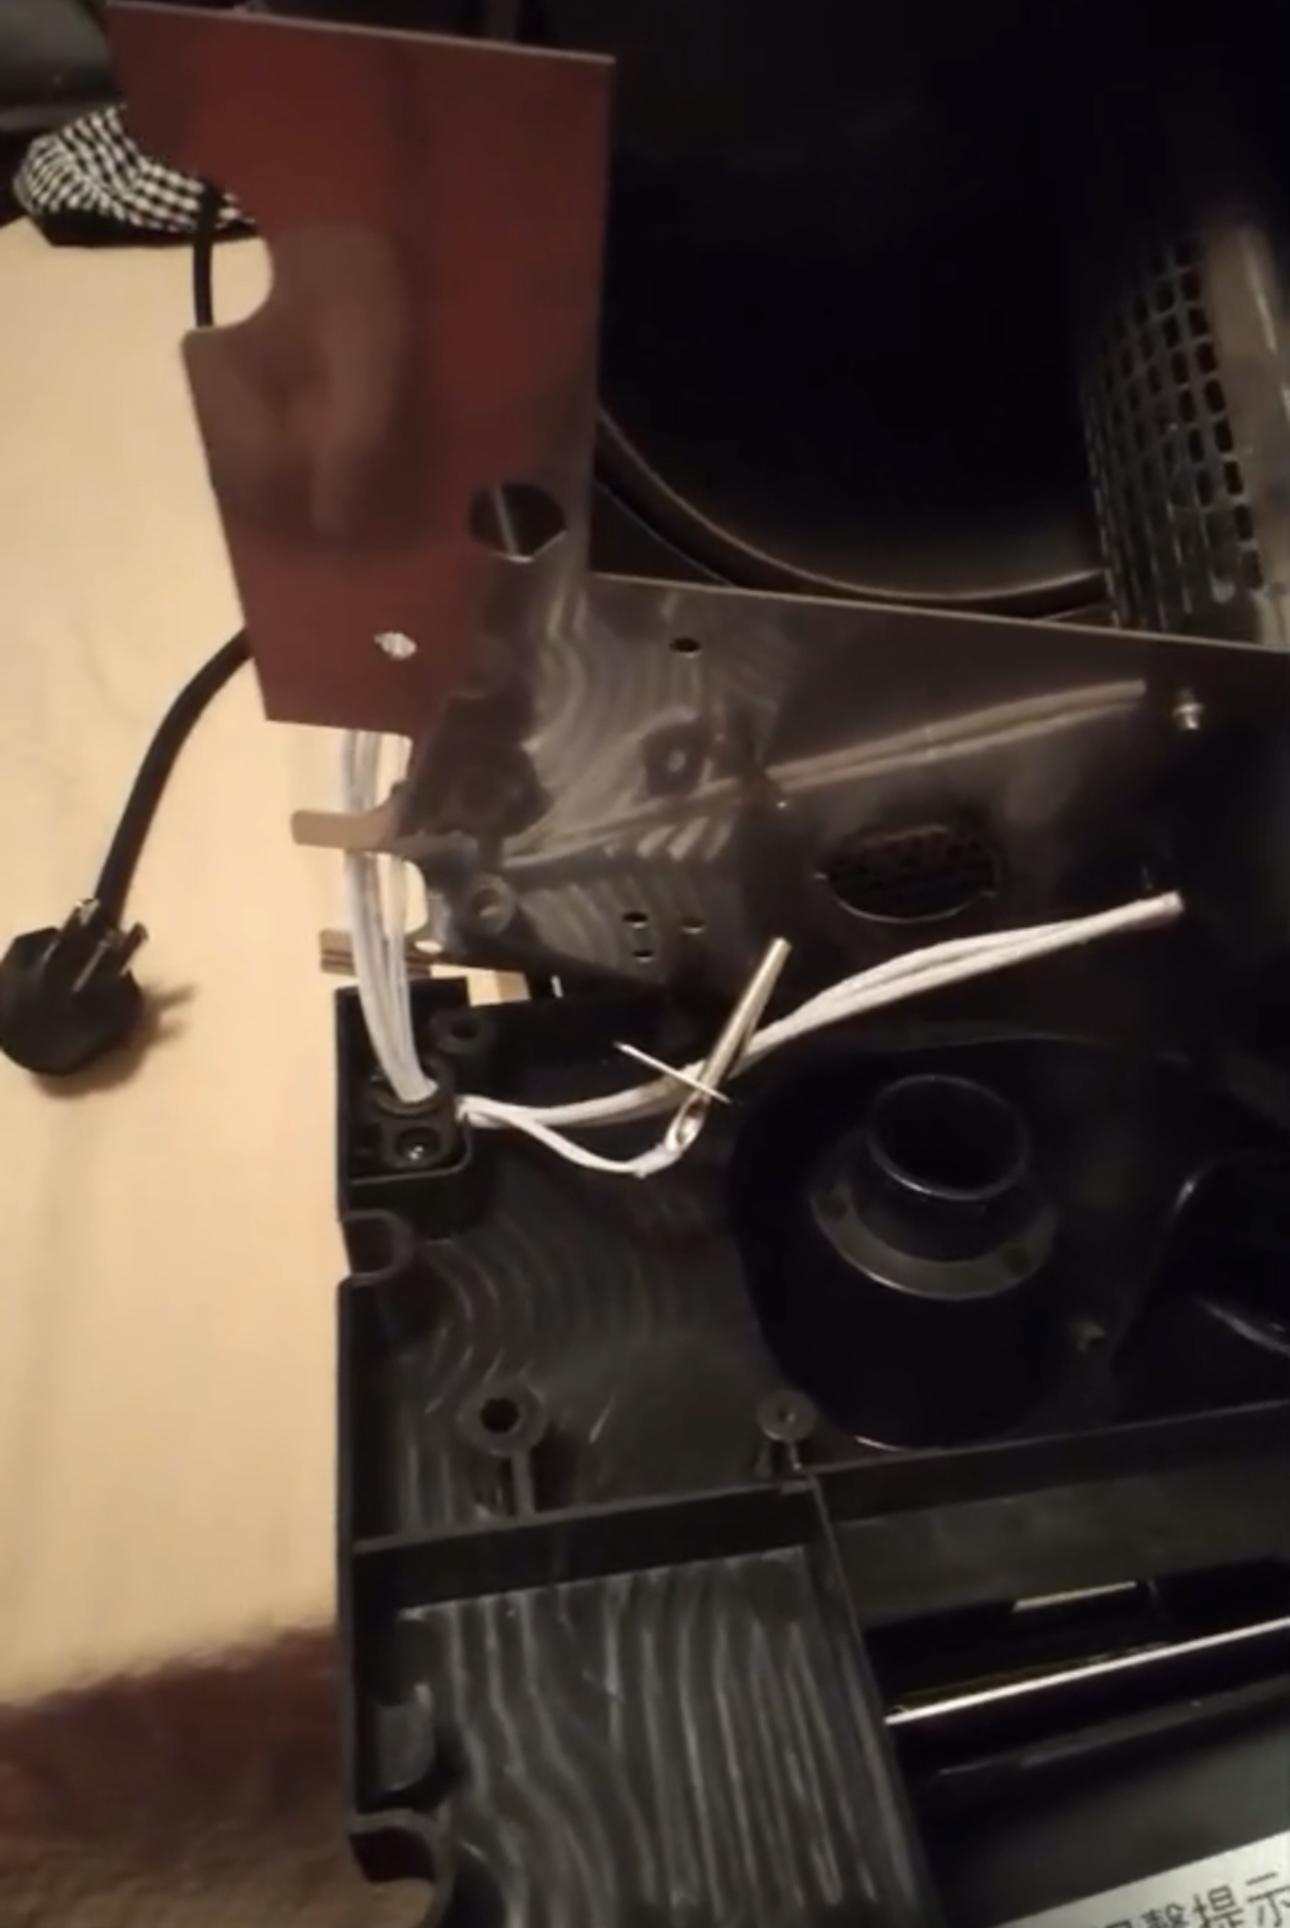
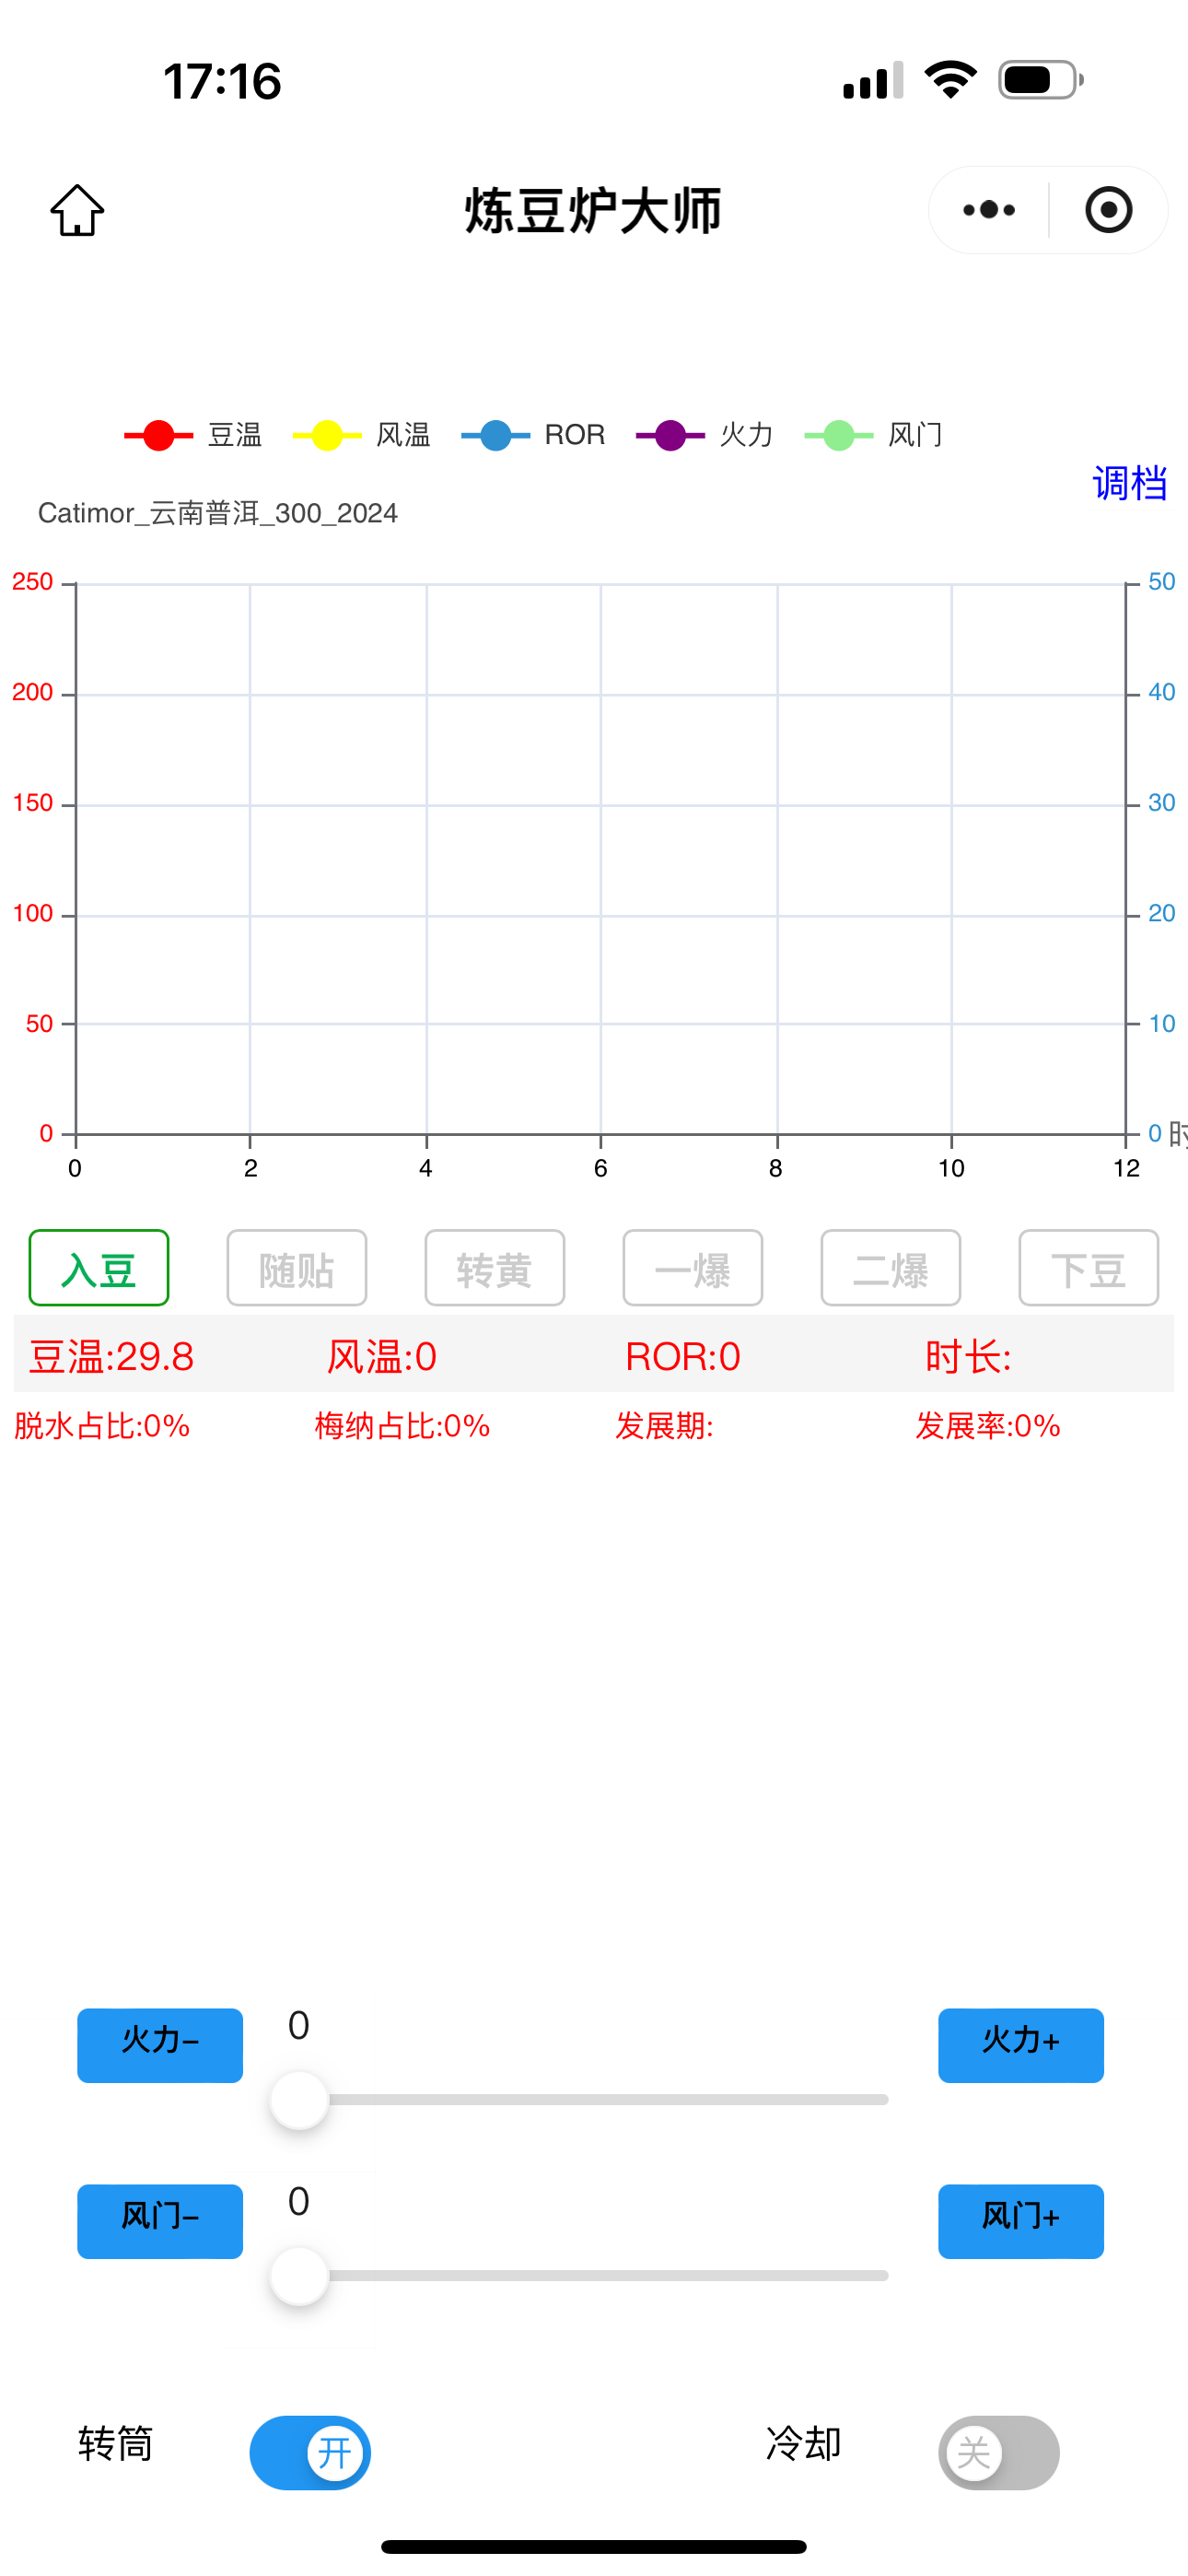
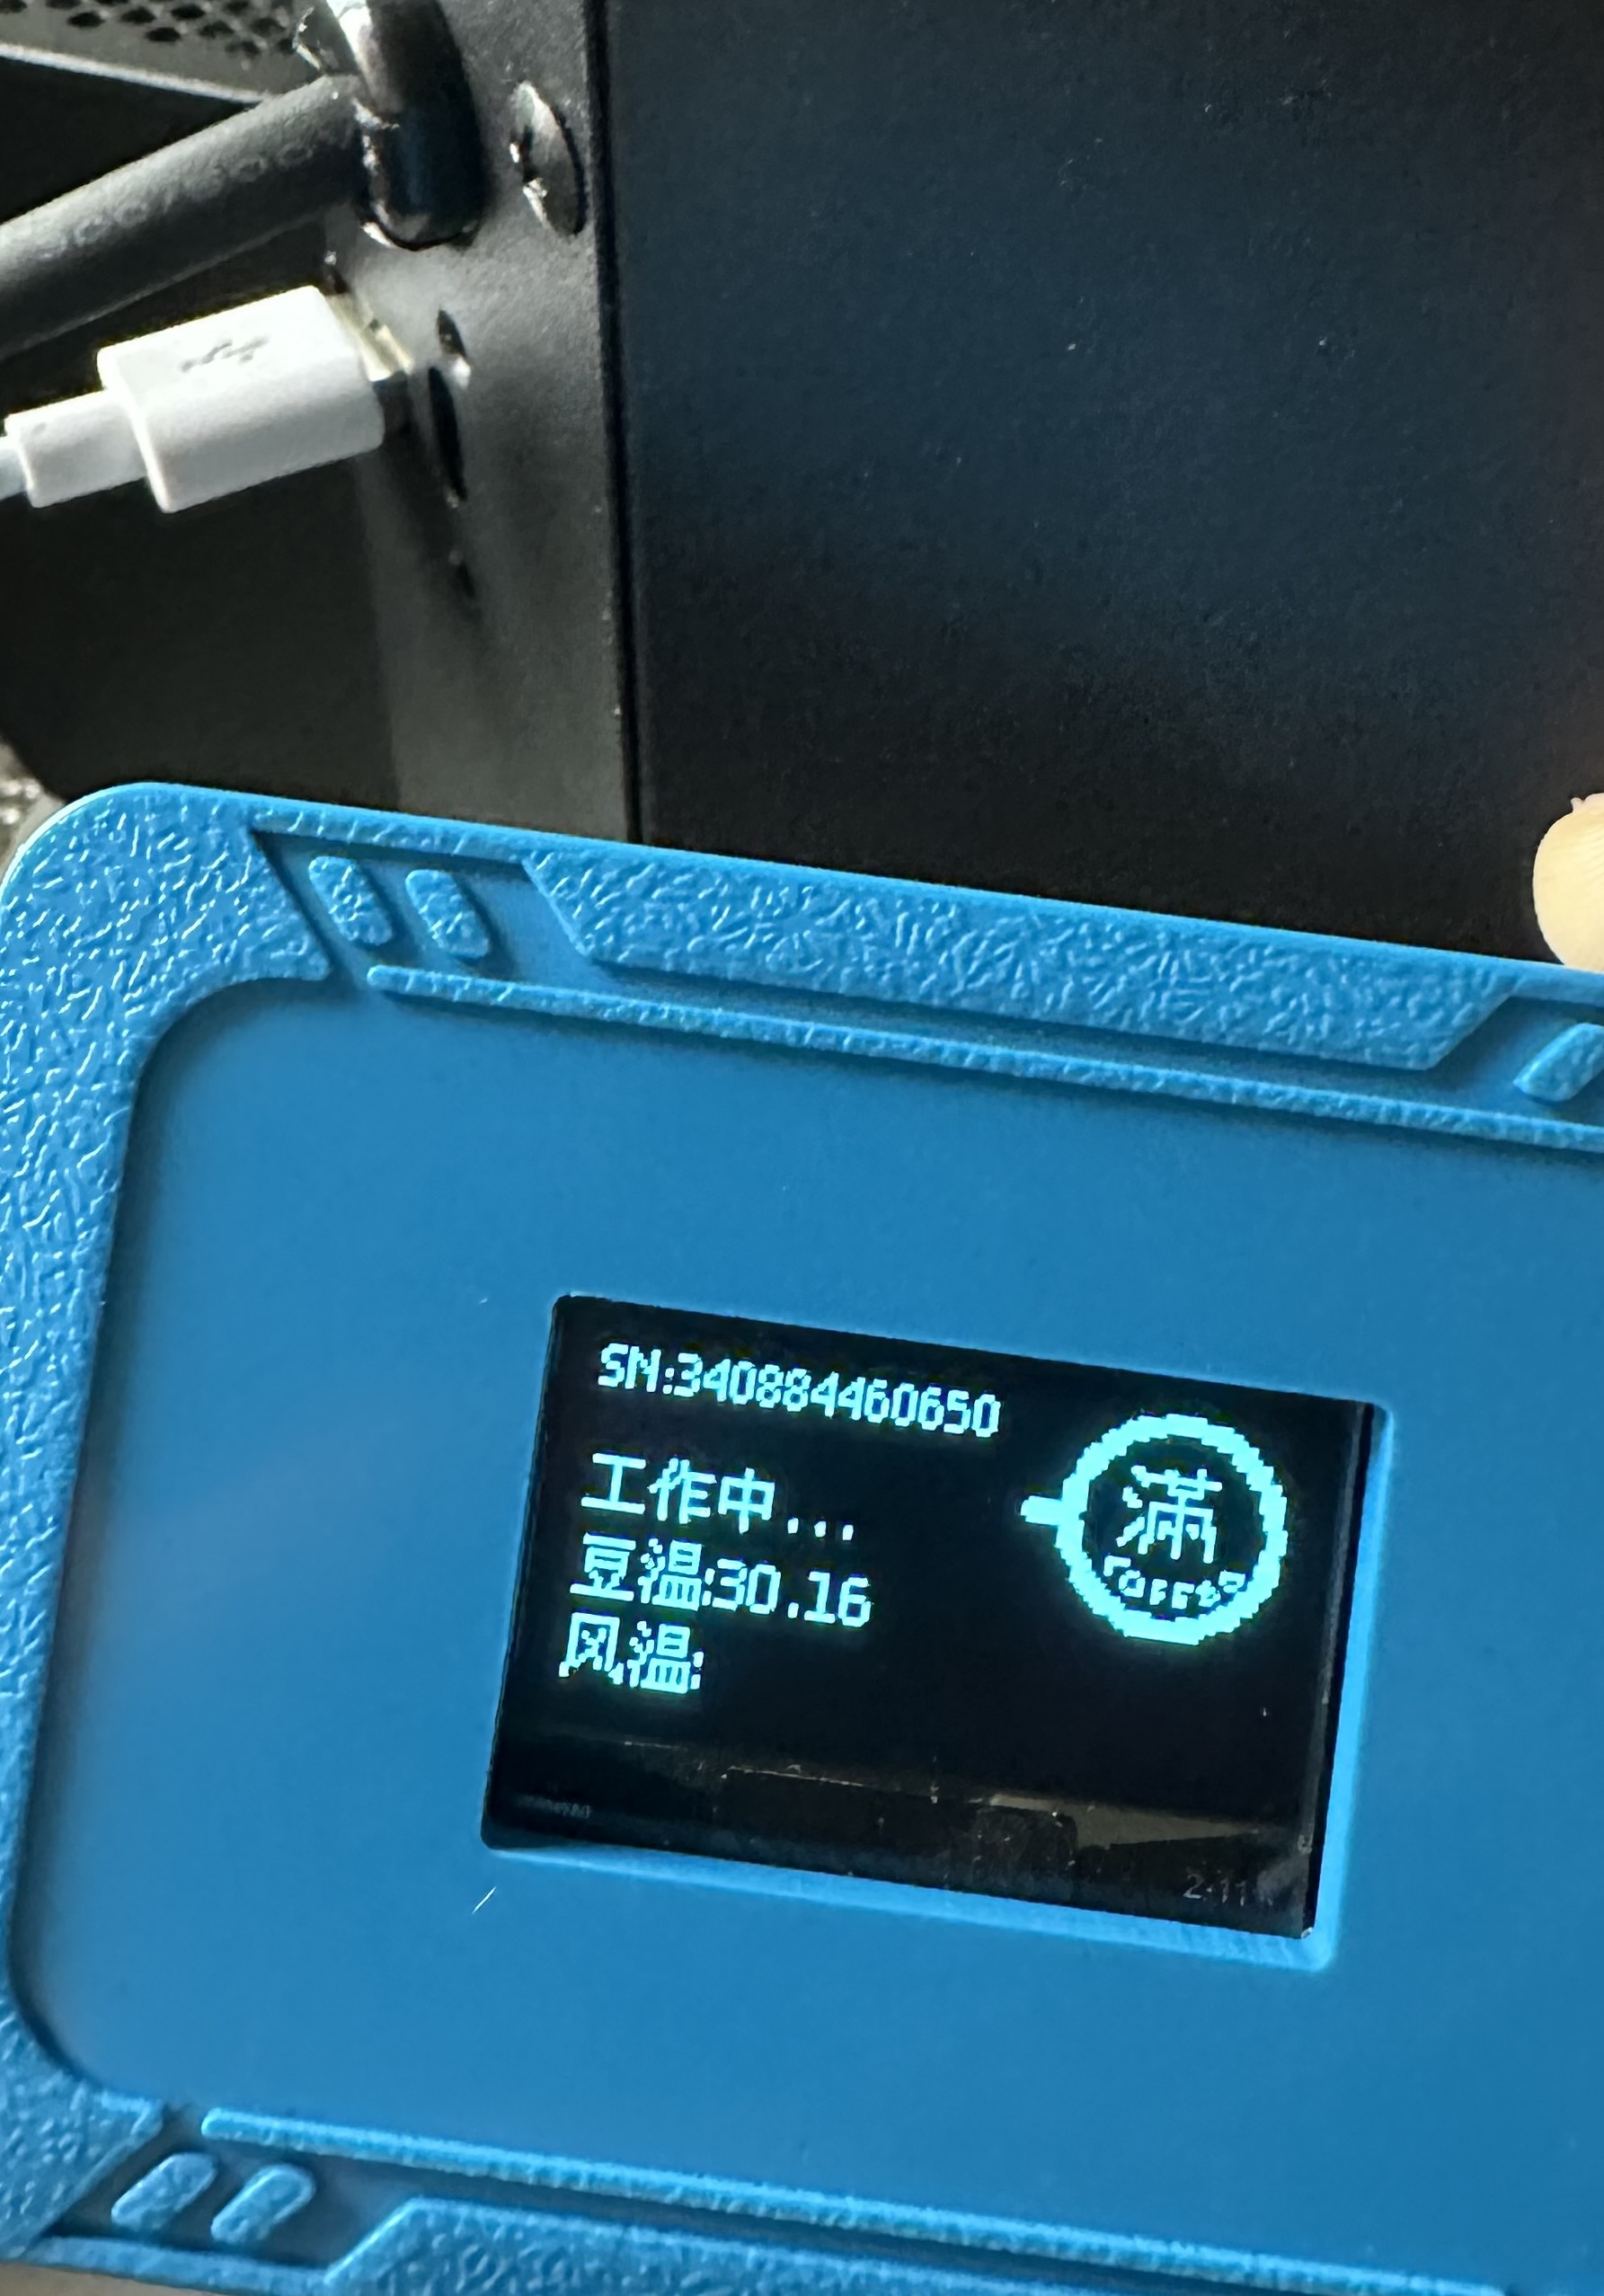
Attached is the box connected to skywalker roaster. The small screen show the barrel temperature. Another picture showing the graph before start roasting and below is the control button. Basically are: Heat control from 0 - 100, airflow control from 0-100 Barrel rolling - on/off, cooling - on/off
kazozero attached the following images:
|
|
|
|
| kazozero |
Posted on 05/19/2024 4:35 AM
|
|
Newbie Posts: 19 Joined: May 14, 2024 |
Quote renatoa wrote: From what I seen so far, those are not screenshots of the true Artisan Roastlogger, recently renamed RoasterScope. First of all, Artisan is a PC/Linux/MacOS executable program. Is not an app, don't run on any smartphone, only on tablets/pads. So please no more use the word Artisan for whatever app you are showing, will confuse people. Thanks for the education. As a roaster the program simply help us to read the temperature and control airflow to achieve the end result. I thought here are to shares the mod and experiences about Skywalker roaster. I’m sorry probably i went to the wrong chat |
|
|
|
| renatoa |
Posted on 05/19/2024 5:06 AM
|
|
Administrator Posts: 3104 Joined: September 30, 2016 |
Quote So it's the user responsibility to start stop the drum rolling ? Does the app allows stop the drum rotation in the middle of the roast ? You are at the right place here, all we want is the right understanding of what we see and what we get. |
|
|
|
| kazozero |
Posted on 05/19/2024 5:14 AM
|
|
Newbie Posts: 19 Joined: May 14, 2024 |
Quote renatoa wrote: Quote So it's the user responsibility to start stop the drum rolling ? Does the app allows stop the drum rotation in the middle of the roast ? You are at the right place here, all we want is the right understanding of what we see and what we get. Thanks. Yes, we need to stop the rolling manually. Which is really good for roaster. Especially we have to let the machine cool down to certain degree before stop the rolling. The app will auto start rolling when connected. The only problem is, we can’t set preheat temperature. Everything manually control. |
|
|
|
| alin |
Posted on 05/19/2024 11:06 AM
|
|
Newbie Posts: 3 Joined: March 04, 2024 |
Do you only use the app to control the coffee roaster? Or does it run parallel to the classic controller ? |
|
|
|
| kazozero |
Posted on 05/19/2024 9:30 PM
|
|
Newbie Posts: 19 Joined: May 14, 2024 |
Quote alin wrote: Do you only use the app to control the coffee roaster? Or does it run parallel to the classic controller ? Due to only 1 usb port. We can only use either original control or the wifi box. (Not sure multiple usb extension work or not. Maybe i will try some day) |
|
|
|
| renatoa |
Posted on 05/20/2024 1:24 AM
|
|
Administrator Posts: 3104 Joined: September 30, 2016 |
Would not work, that plug does not carry true USB signals, the connector was the choice due to its popularity and easiness of use. So don't try split wires using an USB hub, you risk damaging something at the roaster side. However, a bypass box can be done, using an Arduino board, running a modified version of Spy sketch. |
|
|
|
| kazozero |
Posted on 05/20/2024 1:39 AM
|
|
Newbie Posts: 19 Joined: May 14, 2024 |
Quote renatoa wrote: Would not work, that plug does not carry true USB signals, the connector was the choice due to its popularity and easiness of use. So don't try split wires using an USB hub, you risk damaging something at the roaster side. However, a bypass box can be done, using an Arduino board, running a modified version of Spy sketch. Ooh i see. Thanks for the advice. |
|
|
|
| billsey |
Posted on 05/30/2024 12:30 AM
|
|
Newbie Posts: 44 Joined: August 11, 2015 |
Likely the same type of thing is true for the USB-C port the exhaust fan connects to, it probably just pulling power for the fan and has no ability to control anything. |
|
|
|
| kazozero |
Posted on 06/01/2024 9:58 AM
|
|
Newbie Posts: 19 Joined: May 14, 2024 |
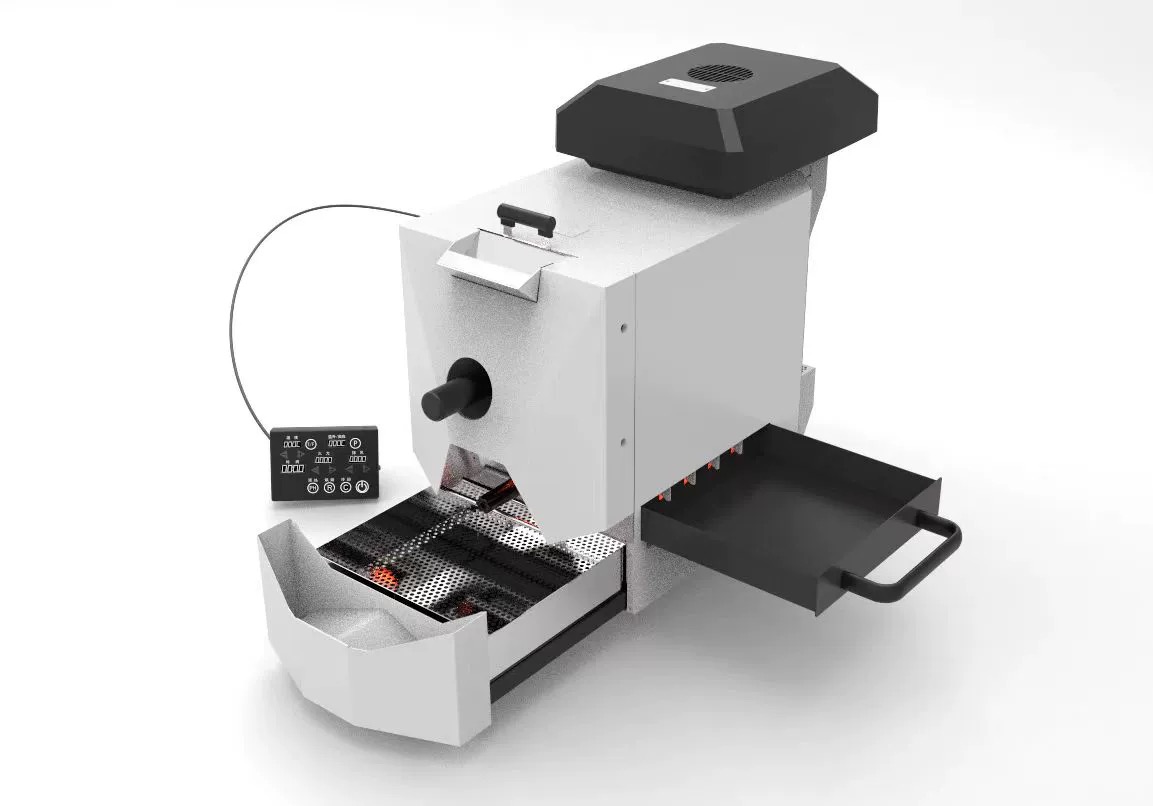
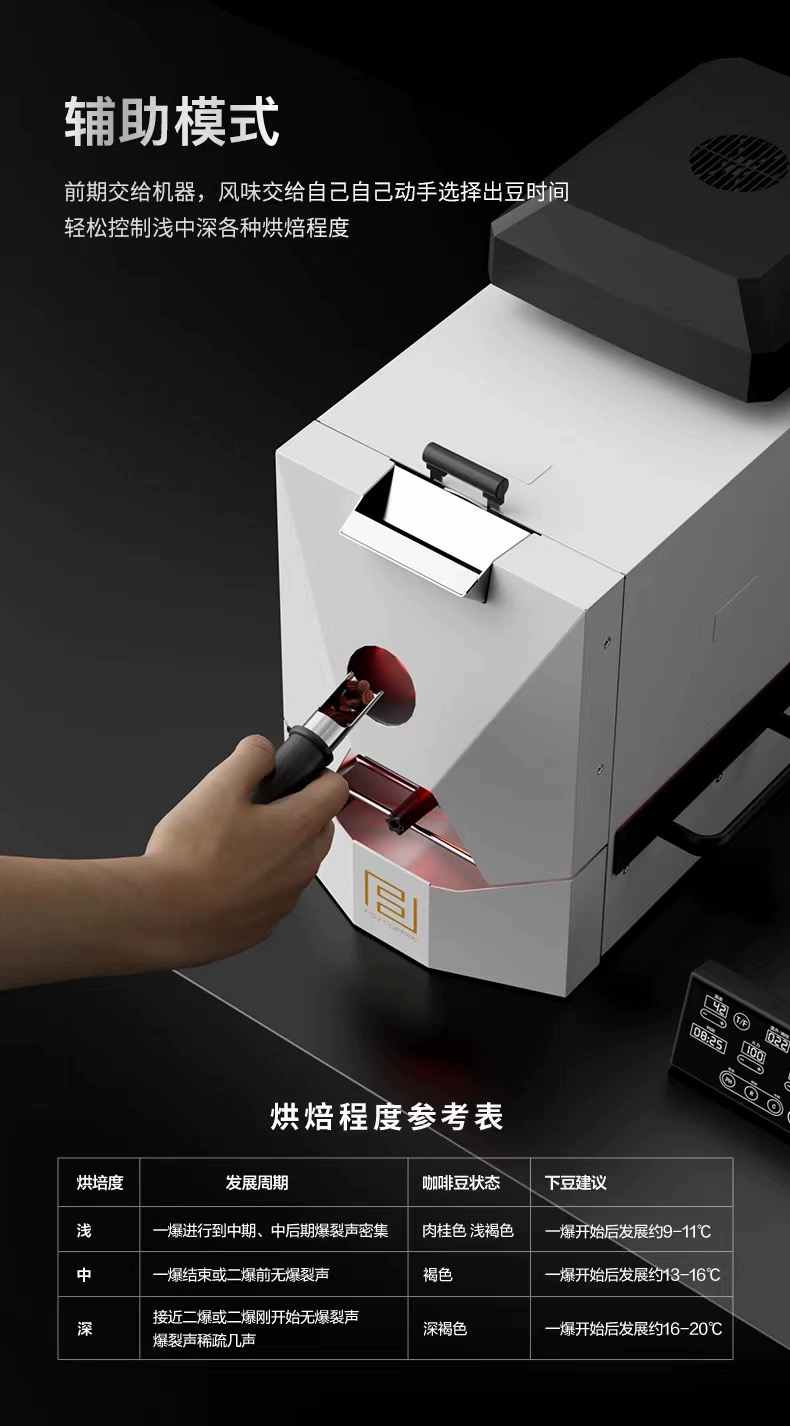
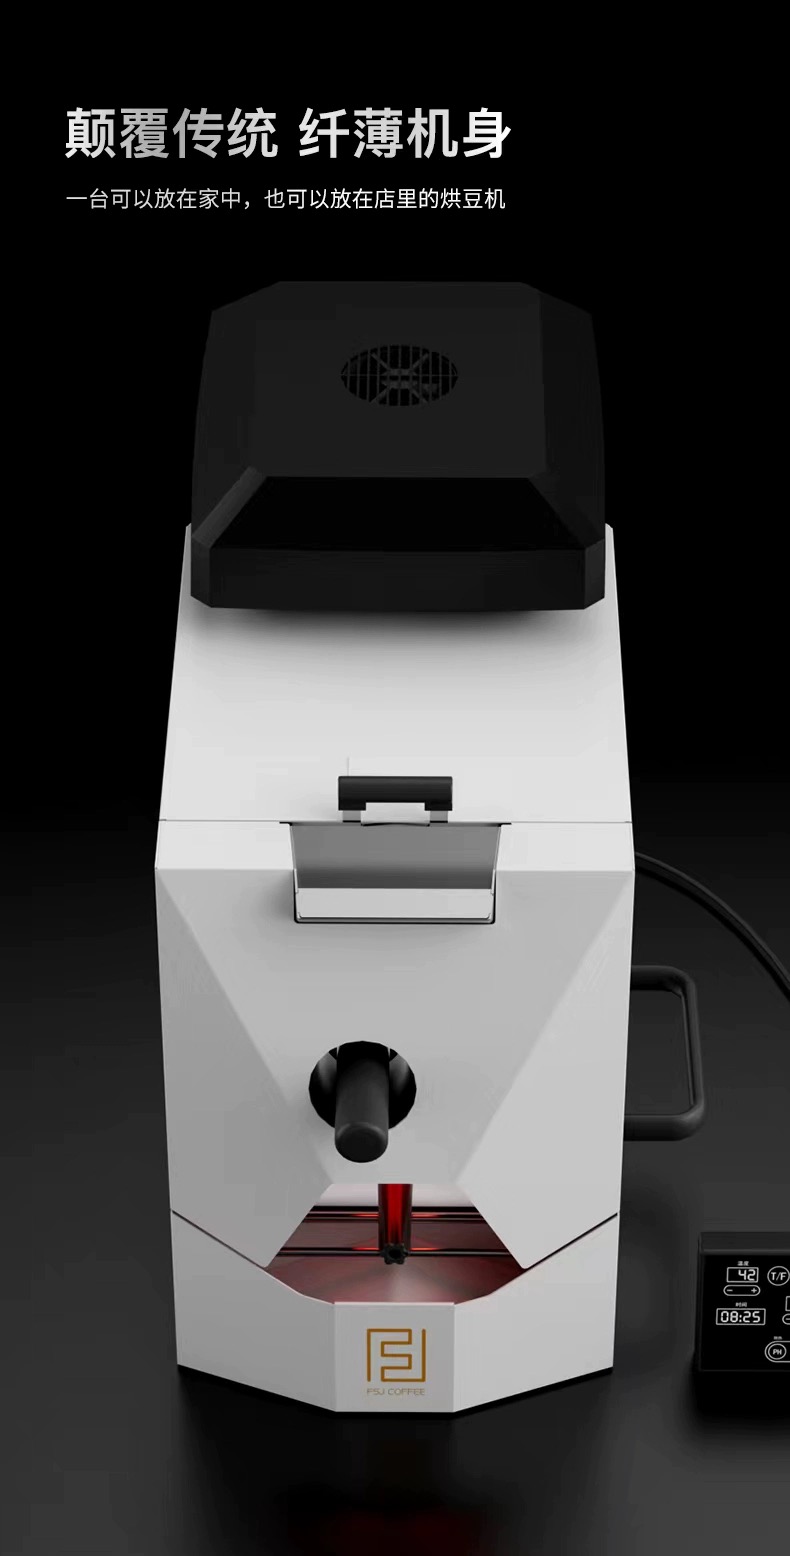
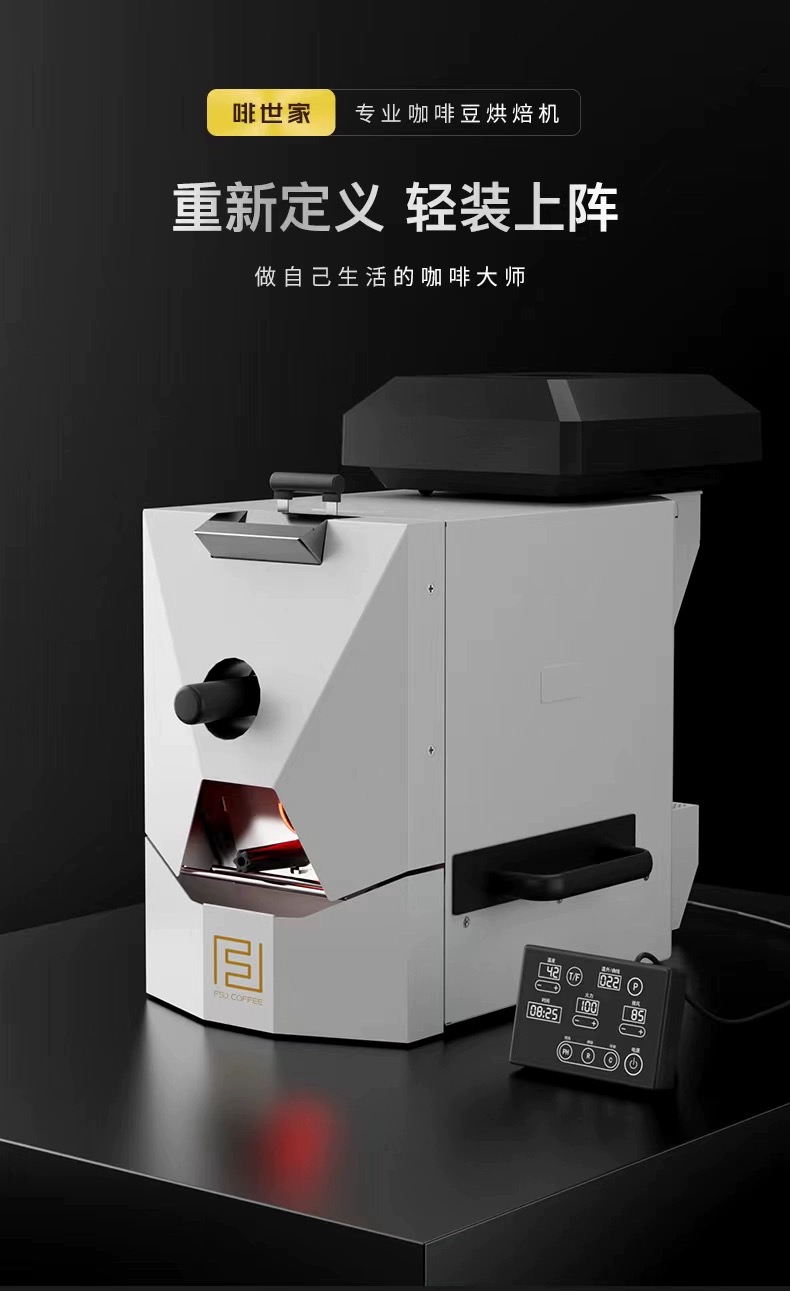
Shocked and surprised to see the white colour version
kazozero attached the following image:
|
|
|
|
| renatoa |
Posted on 06/01/2024 10:16 AM
|
|
Administrator Posts: 3104 Joined: September 30, 2016 |
Yours ? or elsewhere ? Image looks kinda CGI  ... ... |
|
|
|
| kazozero |
Posted on 06/01/2024 10:51 AM
|
|
Newbie Posts: 19 Joined: May 14, 2024 |
Quote Now mine. Happened saw it on sales
kazozero attached the following images:

|
|
|
|

| Jump to Forum: |
Powered by PHP-Fusion Copyright © 2024 PHP-Fusion Inc
Released as free software without warranties under GNU Affero GPL v3
Designed with ♥ by NetriXHosted by skpacman